
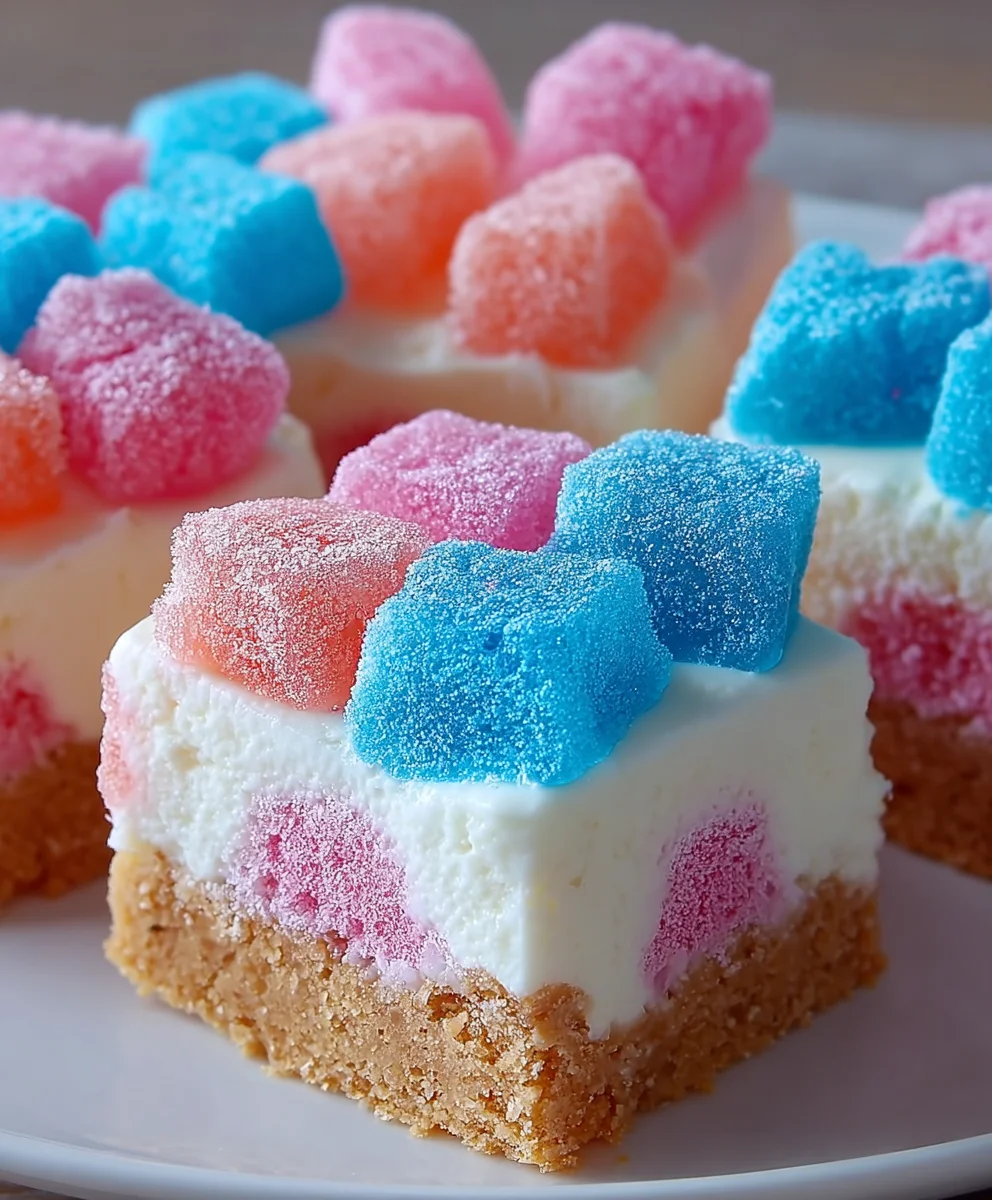
Gummy Cotton Candy Cheesecake Bites – imagine a dessert that captures the whimsical delight of a funfair, the irresistible chew of your favorite candies, and the timeless, creamy richness of cheesecake, all expertly combined into one perfect, portable treat. I am absolutely thrilled to share my latest creation, a recipe designed to not only tantalize your taste buds but also bring a vibrant splash of joy to any occasion.
A Modern Twist on Beloved Classics
While traditional cheesecake boasts centuries of history, these Gummy Cotton Candy Cheesecake Bites represent a delightful modern fusion, a testament to contemporary dessert innovation. It’s about taking beloved, nostalgic elements and reimagining them into something spectacular and new. I’ve always believed that food should be an adventure, and these bites are crafted to deliver a multi-sensory experience.
People adore this dish for countless reasons. The light, airy sweetness of cotton candy gently melts on your tongue, creating a delicate top note that perfectly complements the rich, tangy, and impossibly smooth cheesecake base. Then, a playful burst of chewy gummy candy introduces an exciting textural contrast, ensuring every bite remains wonderfully dynamic and intriguing. They are incredibly convenient, effortlessly portioned, and an absolute joy to serve, making them the ultimate crowd-pleaser for parties, family gatherings, or simply a special personal indulgence. Get ready to fall in love with these extraordinary Gummy Cotton Candy Cheesecake Bites!

Ingredients:
For the Graham Cracker Crust:
- 1 ½ cups (about 180g) fine graham cracker crumbs (from approximately 12-14 full graham cracker sheets)
- ¼ cup (50g) granulated sugar
- 6 tablespoons (85g) unsalted butter, melted
- Pinch of fine sea salt
For the Cotton Candy Cheesecake Filling:
- 24 ounces (680g) full-fat cream cheese, softened to room temperature (three 8-ounce blocks)
- 1 cup (200g) granulated sugar
- 3 large eggs, at room temperature
- ½ cup (120g) full-fat sour cream, at room temperature
- 1 teaspoon pure vanilla extract
- 1 ½ teaspoons cotton candy extract (or to taste, depending on brand strength)
- 2-3 drops pink or light blue gel food coloring (optional, for visual effect)
For the Gummy Topping & Cotton Candy Glaze Swirl:
- ½ cup (about 120g) assorted gummy candies (e.g., gummy bears, worms, rings), cut into smaller pieces if large
- 2 tablespoons water or light corn syrup
- 1 cup (120g) powdered sugar, sifted
- 2-3 tablespoons milk (any kind)
- ½ teaspoon cotton candy extract
- 1-2 drops pink or light blue gel food coloring (optional)
For Garnish (Optional but highly recommended for our “Gummy Cotton Candy Cheesecake Bites”):
- Freshly spun cotton candy (small wisps)
- Extra gummy candies
- Festive sprinkles
Getting Started: Equipment and Prep
Before we dive into creating these whimsical “Gummy Cotton Candy Cheesecake Bites,” let’s ensure we have all our tools ready and ingredients prepped. This makes the entire process smoother and more enjoyable. You’ll need a 12-cup standard muffin tin, paper or silicone cupcake liners, and a large mixing bowl with an electric mixer (stand mixer with paddle attachment or a hand mixer will work beautifully). Room temperature ingredients, especially the cream cheese, eggs, and sour cream, are absolutely paramount for achieving that perfectly smooth, lump-free cheesecake batter that we’re all after. Trust me, cold cream cheese will lead to a lumpy batter, no matter how much you try to beat it. I like to take these out of the fridge at least an hour, or even two, before I plan to start baking. Preheat your oven to 325°F (160°C) and line your muffin tin with the cupcake liners. This recipe makes 12 generous cheesecake bites, though you could stretch it to 18 smaller ones if you use mini muffin tins and adjust baking time.
Phase 1: Crafting the Perfect Crust for Our “Gummy Cotton Candy Cheesecake Bites”
The foundation of any good cheesecake is its crust, and for our “Gummy Cotton Candy Cheesecake Bites,” we want a sweet, buttery base that holds up well. This step is quick and simple, but essential for that delightful crunch.
- First things first, let’s get those graham cracker crumbs ready. If you’re starting with whole graham crackers, place them in a food processor and pulse until they form fine crumbs. Alternatively, you can place them in a large zip-top bag and crush them with a rolling pin – it’s a bit more of an arm workout but just as effective! We’re looking for a consistent, sand-like texture.
- In a medium-sized mixing bowl, combine the finely crushed graham cracker crumbs, the granulated sugar, and a pinch of fine sea salt. Give these dry ingredients a good stir with a fork to ensure everything is evenly distributed. The salt helps to balance the sweetness and really brings out the flavor of the graham crackers.
- Now, pour in the melted unsalted butter. Using a fork or a spatula, mix everything together until the crumbs are thoroughly moistened and resemble wet sand. Every crumb should be coated in butter; this is what helps the crust bind together when baked.
- Divide the mixture evenly among the 12 prepared cupcake liners in your muffin tin. I usually use about 1 ½ to 2 tablespoons per liner. Using the back of a spoon or a small, flat-bottomed glass, firmly press the crumb mixture into an even layer at the bottom of each liner. Compacting it well is important so your crust doesn’t crumble when you bite into your finished cheesecake.
- Bake the pressed crusts in your preheated oven for 5-7 minutes. This short bake time helps to set the crust, making it less likely to get soggy once the cheesecake filling is added. Once baked, remove the tin from the oven and set it aside to cool slightly while you prepare the filling. Keep the oven on, as we’ll be needing it again very soon for the main event!
Phase 2: Whipping Up the Dreamy Cotton Candy Cheesecake Filling
This is where the magic truly happens, where we infuse that whimsical cotton candy flavor into our rich, creamy cheesecake. Remember, room temperature ingredients are your best friend here!
- In the large bowl of your electric mixer, with the paddle attachment (or using a hand mixer), beat the softened cream cheese on medium speed for about 2-3 minutes until it’s incredibly smooth and creamy. Scrape down the sides and bottom of the bowl frequently to ensure no lumps remain. This initial step is critical for a silky-smooth cheesecake texture.
- Gradually add the granulated sugar to the cream cheese, continuing to beat on medium-low speed. Mix for another 2-3 minutes until the sugar is fully incorporated and the mixture is light and fluffy. Again, don’t forget to scrape down the bowl to catch any stray sugar crystals or cream cheese stuck to the sides.
- Next, incorporate the eggs, one at a time. Beat on low speed just until each egg is combined before adding the next. It’s very important not to overmix at this stage! Overmixing after adding the eggs can incorporate too much air into the batter, which can cause the cheesecake to puff up too much during baking and then crack as it cools. We want rich and dense, not airy.
- Once the eggs are just combined, add the room temperature sour cream, pure vanilla extract, and the star of the show, the cotton candy extract. If you’re using food coloring for that signature cotton candy look, add 2-3 drops of pink or light blue gel food coloring now. Mix on low speed just until everything is combined and the color is evenly distributed. Seriously, resist the urge to keep beating!
- Give the batter one final gentle scrape down with a rubber spatula to ensure everything is perfectly blended and there are no hidden pockets of unmixed ingredients. You should have a beautifully smooth, slightly thick, and wonderfully fragrant cotton candy-flavored cheesecake batter.
Phase 3: Baking Our “Gummy Cotton Candy Cheesecake Bites” to Perfection
Baking mini cheesecakes requires a bit of attention, but it’s generally less finicky than a full-sized cheesecake. We’re aiming for that perfectly set, creamy center without any cracks.
- Carefully spoon or pour the cotton candy cheesecake batter evenly over the pre-baked graham cracker crusts in each of your prepared muffin liners. Fill each liner about ¾ full. Try to make sure the amount in each is as consistent as possible for even baking.
- For best results and to prevent cracking, I highly recommend using a water bath. While not strictly essential for small bites, it provides a humid environment that helps the cheesecakes bake gently and evenly. Place your muffin tin inside a larger baking pan (like a roasting pan). Then, carefully pour hot water into the larger pan until it reaches about halfway up the sides of the muffin tin. Be extremely careful not to get any water into the cheesecake batter!
- Carefully transfer the entire setup (large pan with muffin tin and water) to your preheated 325°F (160°C) oven.
- Bake for 18-22 minutes, or until the edges of the cheesecakes are set and appear slightly firm, but the centers still have a slight jiggle when you gently shake the pan. This slight jiggle indicates that they are perfectly cooked through but still moist and creamy. Overbaking will lead to a dry cheesecake.
- Once baked, turn off the oven and prop the oven door open slightly with a wooden spoon. Leave the cheesecakes in the cooling oven for another 15-20 minutes. This slow cooling process helps prevent drastic temperature changes, which are a common cause of cracks in cheesecakes.
- After the oven cool-down, carefully remove the muffin tin from the water bath (if used) and then remove the cheesecakes from the muffin tin to a wire rack. Let them cool completely at room temperature for about 30-60 minutes.
- Once cooled to room temperature, transfer the “Gummy Cotton Candy Cheesecake Bites” to the refrigerator to chill for at least 4 hours, or preferably overnight. Chilling is absolutely crucial for the cheesecake to fully set and achieve its optimal texture and flavor. Don’t rush this step!
Phase 4: Creating the Magical Gummy Topping and Cotton Candy Glaze Swirl
This is where we add the playful “gummy” and vibrant “cotton candy” elements that truly define our “Gummy Cotton Candy Cheesecake Bites.” These layers add both texture and a burst of fun color!
- For the Gummy Topping: In a small microwave-safe bowl, combine the assorted gummy candies and 2 tablespoons of water or light corn syrup. Microwave on high in 15-second intervals, stirring well after each, until the gummies are fully melted and smooth. This usually takes about 45-60 seconds total, depending on your microwave. Be careful not to overheat them, as they can become stiff. If the mixture is too thick, you can add another tiny splash of water or corn syrup. Once melted and smooth, set aside to cool slightly, but don’t let it set completely. It needs to be pourable.
- For the Cotton Candy Glaze Swirl: In another small bowl, whisk together the sifted powdered sugar, 2 tablespoons of milk, the ½ teaspoon cotton candy extract, and 1-2 drops of pink or light blue gel food coloring until smooth. The consistency should be pourable but thick enough to hold its shape for a swirl. If it’s too thick, add more milk a tiny drop at a time; if it’s too thin, add a bit more sifted powdered sugar.
Phase 5: Assembling and Garnishing Your “Gummy Cotton Candy Cheesecake Bites”
Now for the grand finale – bringing all the components together to create these show-stopping “Gummy Cotton Candy Cheesecake Bites.”
- Once your chilled cheesecakes are firm and completely cold, gently peel away the paper or silicone liners. Place each cheesecake bite on your serving platter.
- Apply the Cotton Candy Glaze Swirl: Drizzle or spoon a small amount of the cotton candy glaze over the top of each chilled cheesecake bite. You can create a simple swirl pattern using a toothpick or the back of a spoon. This layer will provide another punch of cotton candy flavor and a lovely base for the gummy layer.
- Add the Gummy Topping: While the cotton candy glaze is still slightly wet (or has just begun to set), carefully spoon a thin layer of the melted gummy mixture over the glaze on each cheesecake. You can let it gently drip over the sides for a more whimsical look. Work relatively quickly here, as the melted gummy mixture will start to set as it cools.
- The Final Flourish (Garnish): This is where you can truly make these bites shine! While the gummy topping is still soft, quickly arrange a few extra gummy candies on top of each cheesecake bite. Then, just before serving, gently pull off small wisps of fresh cotton candy and delicately place them on top. The ethereal cotton candy adds an incredible visual appeal and a delightful, melt-in-your-mouth texture. A sprinkle of festive sprinkles can also add that extra touch of sparkle and fun!
- Serve immediately to enjoy the fresh cotton candy, or store your assembled “Gummy Cotton Candy Cheesecake Bites” in an airtight container in the refrigerator for up to 3-4 days. The cotton candy garnish is best added just before serving, as it can dissolve in the fridge due to moisture.
Chef’s Notes & Troubleshooting Tips for “Gummy Cotton Candy Cheesecake Bites”
Creating these delightful “Gummy Cotton Candy Cheesecake Bites” is a truly rewarding experience, but a few pro tips can make your journey even smoother and ensure a perfect outcome every time. I’ve learned these through trial and error, and I’m happy to share them with you!
-
Room Temperature is Non-Negotiable:
I’ve said it before, and I’ll say it again: ensure all your dairy ingredients (cream cheese, eggs, sour cream) are at true room temperature. This is the single most important factor for achieving a silky-smooth, lump-free cheesecake batter. If your cream cheese is even slightly cool, it won’t incorporate properly, leading to a lumpy texture that no amount of beating will fix. Plan ahead and take them out of the fridge at least 1-2 hours before you start.
-
Don’t Overmix the Batter:
Once the eggs are added, switch to a low speed and mix only until just combined. Overmixing introduces too much air, which causes the cheesecake to puff up dramatically in the oven and then inevitably fall and crack as it cools. We want density and creaminess, not a soufflé!
-
The Importance of the Water Bath:
While mini cheesecakes are more forgiving than a full-sized one, a water bath significantly reduces the risk of cracking and promotes an incredibly moist, even bake. The steam from the water bath keeps the surface of the cheesecake from drying out and provides a gentle, consistent heat. If you’re nervous about water splashing into the cheesecakes, you can wrap the bottom of your muffin tin tightly in aluminum foil before placing it in the water bath.
-
Cooling is Key:
Resist the urge to pull your cheesecakes out of the oven immediately. The gradual cooling process, first in the turned-off oven and then at room temperature, is crucial. Rapid temperature changes are a prime culprit for cheesecake cracks. Patience here truly pays off with beautiful, unblemished bites.
-
Chilling Time:
Do not skip the chilling period! At least 4 hours, or ideally overnight, in the refrigerator allows the cheesecake to fully set, firm up, and develop its optimal creamy texture and rich flavor. Trying to top or serve them too soon will result in a soft, messy cheesecake.
-
Working with Gummy Topping:
When melting your gummies, work in short bursts in the microwave and stir diligently. Overheating can make them sticky and difficult to work with. If your gummy mixture starts to set while you’re topping the cheesecakes, a quick 5-10 second reheat in the microwave will loosen it up again. You want it warm enough to be pourable, but not so hot that it melts the cheesecake.
-
Garnishing with Fresh Cotton Candy:
While absolutely stunning, fresh cotton candy is quite delicate. It will absorb moisture from the air and the refrigerator, causing it to dissolve. For the best presentation and texture, add the cotton candy garnish just before serving your “Gummy Cotton Candy Cheesecake Bites.” If you’re preparing these for an event, keep the cotton candy separate and top each bite right before guests arrive or as they’re being served.
-
Flavor Variations:
While cotton candy is our star, don’t be afraid to experiment! You could swap out the cotton candy extract for other fun flavors like bubblegum, strawberry, or even a hint of mint. For the gummy topping, you could use a single flavor of gummy for a more uniform taste, or stick with assorted for a rainbow of fruitiness.
-
Storage:
Store your finished “Gummy Cotton Candy Cheesecake Bites” (without the fresh cotton candy garnish) in an airtight container in the refrigerator for up to 3-4 days. They are a fantastic make-ahead dessert!
I hope these detailed instructions and tips help you create the most magnificent and fun “Gummy Cotton Candy Cheesecake Bites” imaginable! Enjoy the process, and most importantly, enjoy indulging in these whimsical treats!
Conclusion:
If you’ve followed along with me on this delightful culinary journey, I trust you’re already buzzing with excitement to get into your kitchen and whip up a batch of these truly unforgettable treats. This isn’t just another dessert recipe; it’s an invitation to experience pure, unadulterated joy in every single bite. We’ve created something that transcends the ordinary, a dessert that isn’t just eaten but celebrated. From the moment you first glimpse their vibrant colors and whimsical presentation to the very last delicious crumble, these bites are designed to captivate and charm. I genuinely believe this recipe is a must-try for anyone who loves to combine playful textures with classic, comforting flavors, creating an experience that’s both novel and deeply satisfying. It’s the kind of recipe that sparks conversation, ignites smiles, and makes you feel like a culinary magician, even if you’re a beginner baker. The unique combination of creamy, tangy cheesecake, the fluffy sweetness of cotton candy, and the delightful chew of gummies creates a symphony of sensations that will dance on your palate.
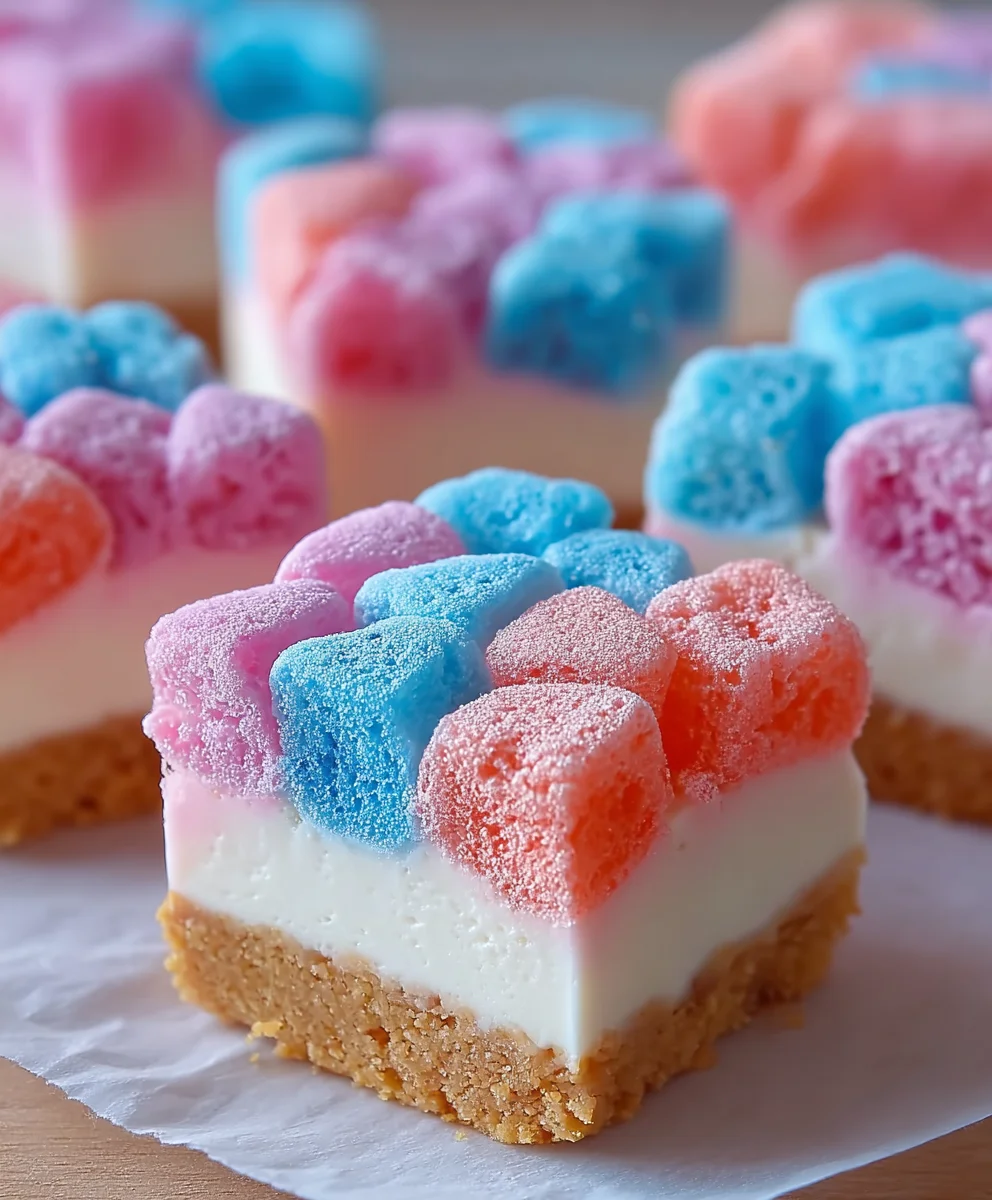
What truly makes these Gummy Cotton Candy Cheesecake Bites an absolute sensation and a recipe you simply must add to your repertoire is their unparalleled ability to deliver on every front: visual appeal, textural excitement, and an explosion of flavor. Imagine the look on your friends’ and family’s faces when they see these little masterpieces – they’re miniature works of edible art! The vibrant hues of the cotton candy, delicately swirled into the creamy cheesecake, topped with glistening, colorful gummy candies, make for a show-stopping presentation that effortlessly elevates any dessert table. But it’s not just about looks; the flavor profile is equally compelling. The rich, velvety cheesecake provides a perfect counterpoint to the ethereal sweetness of the cotton candy, which melts on the tongue, while the gummies introduce a fantastic, fruity chewiness that keeps every bite interesting. It’s a multi-sensory experience that promises to delight both young and old, making it an instant crowd-pleaser for any occasion.
When it comes to serving these extraordinary treats, the possibilities are as endless as your imagination. For a chic party platter, arrange them on a pristine white ceramic dish, perhaps garnished with a few fresh mint leaves or a sprinkle of edible glitter for an extra touch of sparkle. They’re perfectly sized for individual enjoyment, making them ideal for dessert buffets, baby showers, birthday parties, or even as a delightful surprise in a packed lunch. Imagine presenting them as unique, homemade gifts tied with a whimsical ribbon – they’re sure to be cherished and remembered long after the last bite. For a more relaxed setting, pair them with a robust cup of coffee, a delicate herbal tea, or even a glass of sparkling cider to complement their sweet, tangy notes. They also make an incredible finish to any meal, providing a light yet intensely satisfying conclusion.
But don’t stop there; feel empowered to personalize these bites and make them truly your own! While the core recipe for these Gummy Cotton Candy Cheesecake Bites is utterly perfect as is, it also serves as a fantastic canvas for your creative flair. Consider experimenting with different flavors of cotton candy – perhaps a bubblegum or grape cotton candy for a new twist, or even a chocolate cotton candy if you’re feeling adventurous. The gummy toppings can also be switched out; try sour gummies for an extra zing, or specific fruit-shaped gummies to match a party theme. You could also experiment with the crust, perhaps a chocolate cookie crust for a deeper flavor, or a gluten-free graham cracker for those with dietary restrictions. A drizzle of white chocolate or a scattering of colorful sprinkles before chilling would also add another layer of visual appeal and flavor. Let your creativity run wild! Don’t be afraid to put your unique stamp on this recipe; that’s where some of the most memorable culinary discoveries happen.
So now that you have all the tools and inspiration you need, I wholeheartedly encourage you to step into your kitchen and give this incredible recipe a try. Trust me, the sheer joy of creating and then savoring these whimsical treats is an experience you won’t want to miss. They truly are something special, offering a delightful escape from the everyday and proving that dessert can be both comforting and excitingly innovative. Once you’ve made them, I would absolutely love to hear about your experience. Did you try any variations? What did your family and friends think? Did they bring a smile to everyone’s face? Please share your stories, your triumphs, and even your creative adaptations. Your feedback and adventures inspire me, and I’m always thrilled to see how you bring these recipes to life in your own home. Happy baking, my friends, and get ready to indulge in some pure, unadulterated dessert bliss!
Gummy Cotton Candy Cheesecake Bites
Imagine a dessert that captures the whimsical delight of a funfair, the irresistible chew of your favorite candies, and the timeless, creamy richness of cheesecake, all expertly combined into one perfect, portable treat. These bites offer a modern twist on beloved classics, delivering a multi-sensory experience with light, airy cotton candy sweetness, rich and tangy cheesecake, and a playful burst of chewy gummy candy.
Ingredients
-
1 ½ cups (180g) graham cracker crumbs
-
¼ cup (50g) granulated sugar
-
6 tablespoons (85g) butter, melted
-
Pinch sea salt
-
24 ounces (680g) cream cheese, softened
-
1 cup (200g) granulated sugar
-
3 large eggs, room temperature
-
½ cup (120g) sour cream, room temperature
-
1 teaspoon vanilla extract
-
1 ½ teaspoons cotton candy extract
-
2-3 drops pink or light blue gel food coloring (optional)
-
½ cup (120g) gummy candies, cut into smaller pieces if large
-
2 tablespoons water or light corn syrup
-
1 cup (120g) powdered sugar, sifted
-
2-3 tablespoons milk
-
½ teaspoon cotton candy extract
-
1-2 drops pink or light blue gel food coloring (optional)
-
Fresh cotton candy (for garnish, optional)
-
Extra gummy candies (for garnish, optional)
-
Festive sprinkles (for garnish, optional)
Instructions
-
Step 1
Preheat oven to 325°F (160°C). Line a 12-cup standard muffin tin with paper or silicone cupcake liners. Ensure cream cheese, eggs, and sour cream are at room temperature. -
Step 2
Finely crush graham crackers. In a medium bowl, combine crumbs, ¼ cup granulated sugar, and salt. Pour in melted butter; mix until crumbs are thoroughly moistened. Divide evenly among 12 liners and firmly press into an even layer using the back of a spoon. Bake for 5-7 minutes. Remove from oven and cool slightly; keep oven on. -
Step 3
In an electric mixer, beat softened cream cheese on medium speed for 2-3 minutes until smooth. Gradually add 1 cup granulated sugar; beat 2-3 minutes until light and fluffy, scraping bowl as needed. Add eggs one at a time on low speed, mixing just until combined; do not overmix. Stir in sour cream, vanilla extract, cotton candy extract, and food coloring (if using) on low speed until combined. Scrape bowl. -
Step 4
Spoon or pour cheesecake batter evenly over pre-baked crusts, filling each liner about ¾ full. For best results, place muffin tin inside a larger baking pan and pour hot water into the larger pan until it reaches halfway up the muffin tin (water bath). Carefully transfer to preheated oven. Bake for 18-22 minutes, until edges are set but centers still have a slight jiggle. Turn off oven, prop door open, and leave cheesecakes in cooling oven for 15-20 minutes. Remove from water bath (if used) and muffin tin; cool completely at room temperature (30-60 minutes). Refrigerate for at least 4 hours, or preferably overnight, until fully set. -
Step 5
For Gummy Topping: In a small microwave-safe bowl, combine gummy candies and 2 tablespoons water or light corn syrup. Microwave on high in 15-second intervals, stirring, until gummies are fully melted and smooth (~45-60 seconds total). Set aside to cool slightly but remain pourable. For Cotton Candy Glaze: In another small bowl, whisk powdered sugar, 2-3 tablespoons milk, ½ teaspoon cotton candy extract, and food coloring (if using) until smooth and pourable. -
Step 6
Once chilled cheesecakes are firm, gently peel away liners and place on a serving platter. Drizzle cotton candy glaze over the top of each cheesecake bite; swirl with a toothpick. While glaze is still slightly wet, carefully spoon a thin layer of melted gummy mixture over the glaze. Quickly arrange extra gummy candies on top. Just before serving, delicately place small wisps of fresh cotton candy and festive sprinkles (optional) on top. Serve immediately or store assembled bites (without fresh cotton candy garnish) in an airtight container in the refrigerator for up to 3-4 days.
Important Information
Nutrition Facts (Per Serving)
It is important to consider this information as approximate and not to use it as definitive health advice.
Allergy Information
Please check ingredients for potential allergens and consult a health professional if in doubt.

Leave a Comment