
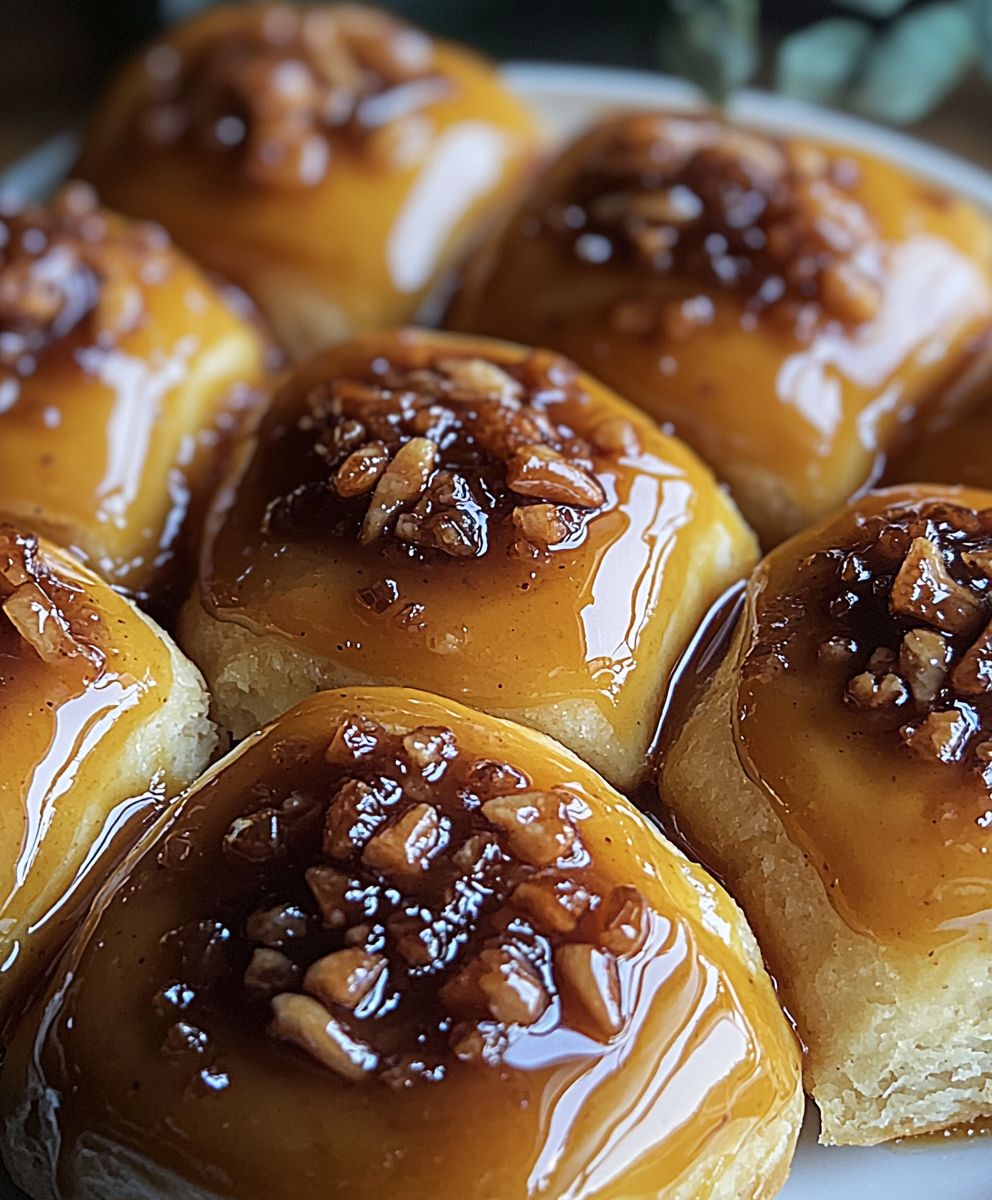
Hawaiian Rolls Sticky Buns: Prepare to experience a delightful twist on a classic comfort food! Imagine biting into a warm, gooey, caramel-drenched bun, but with a surprisingly soft and subtly sweet base. That’s exactly what you get with this recipe, and trust me, it’s an absolute game-changer.
Sticky buns, in their traditional form, have a rich history, tracing back to German immigrants who brought their baking traditions to America. Over time, regional variations emerged, each adding its unique touch to this beloved treat. But what happens when you infuse this classic with the tropical sweetness of Hawaiian rolls? Pure magic!
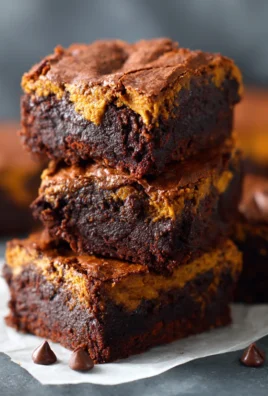
What makes these Hawaiian Rolls Sticky Buns so irresistible? It’s the perfect combination of textures and flavors. The Hawaiian rolls provide an incredibly soft and fluffy base, contrasting beautifully with the crunchy pecans and the rich, buttery caramel sauce. The subtle sweetness of the rolls complements the caramel without being overpowering. Plus, this recipe is surprisingly easy to make, making it perfect for a weekend brunch or a special occasion. Everyone loves the comforting warmth and the satisfyingly sweet indulgence of a sticky bun, and this version takes it to a whole new level of deliciousness. Get ready to impress your friends and family with this unique and unforgettable treat!

Ingredients:
- 2 (12-count) packages Hawaiian sweet rolls
- 1 cup (2 sticks) unsalted butter
- 1 cup packed light brown sugar
- 1/2 cup heavy cream
- 1/4 cup honey
- 1 teaspoon vanilla extract
- 1/2 teaspoon sea salt
- 1 cup chopped pecans or walnuts (optional)
Preparing the Caramel Sauce:
This is where the magic happens! The caramel sauce is what makes these sticky buns so incredibly addictive. Don’t be tempted to rush this step; low and slow is the key to a rich, deeply flavored caramel.
- Melt the Butter: In a large, heavy-bottomed saucepan (this is important to prevent scorching!), melt the butter over medium-low heat. Make sure the butter is completely melted before moving on to the next step. We want a nice, even base for our caramel.
- Add Brown Sugar: Once the butter is melted, add the packed light brown sugar. Stir constantly with a wooden spoon or heat-resistant spatula until the sugar is completely dissolved and the mixture is smooth. This usually takes about 3-5 minutes. Be patient and keep stirring! You don’t want any grainy bits of sugar left.
- Incorporate Heavy Cream: Slowly pour in the heavy cream, stirring constantly. The mixture will bubble up a bit, so be careful. Continue stirring until the cream is fully incorporated and the sauce is smooth and glossy. This will help create a luscious, creamy texture.
- Add Honey and Vanilla: Stir in the honey and vanilla extract. The honey adds a lovely depth of flavor, and the vanilla enhances the overall sweetness. Continue stirring for another minute or two, allowing the flavors to meld together.
- Season with Salt: Finally, add the sea salt. The salt might seem counterintuitive in a sweet dish, but it actually balances the sweetness and enhances the other flavors. Stir well to incorporate.
- Simmer the Sauce: Reduce the heat to low and let the caramel sauce simmer for about 5-7 minutes, stirring occasionally. This allows the sauce to thicken slightly and the flavors to deepen. Keep a close eye on it to prevent it from burning. The sauce should be thick enough to coat the back of a spoon.
Preparing the Baking Dish:
This step is crucial for ensuring that your sticky buns release easily from the pan and have that beautiful, caramelized bottom. We’re essentially creating a non-stick layer of caramel goodness!
- Grease the Baking Dish: Generously grease a 9×13 inch baking dish with butter. Make sure to get into all the corners and crevices. This will prevent the sticky buns from sticking and make them easier to remove after baking.
- Pour Caramel Sauce: Pour about half of the prepared caramel sauce into the greased baking dish, spreading it evenly across the bottom. This layer of caramel will create that irresistible sticky base for the buns.
- Add Nuts (Optional): If you’re using nuts, sprinkle the chopped pecans or walnuts evenly over the caramel sauce in the baking dish. The nuts will add a delightful crunch and nutty flavor to the sticky buns.
Assembling the Sticky Buns:
Now comes the fun part arranging the Hawaiian rolls in the baking dish! This is where you get to be a little creative and make sure each roll is nestled snugly in the caramel sauce.
- Arrange the Rolls: Place the Hawaiian sweet rolls in a single layer on top of the caramel sauce in the baking dish. You can arrange them in rows or in a more random pattern, but make sure they are close together so they bake evenly.
- Pour Remaining Caramel Sauce: Pour the remaining caramel sauce evenly over the tops of the rolls, making sure to coat each one thoroughly. This will ensure that the buns are sticky and delicious all the way through.
Baking the Sticky Buns:
The oven is where the magic truly happens! The heat transforms the doughy rolls and the luscious caramel sauce into a golden-brown, gooey masterpiece. Keep a close eye on them to prevent burning.
- Preheat Oven: Preheat your oven to 350°F (175°C). Make sure your oven is properly preheated before placing the sticky buns inside.
- Bake: Bake for 20-25 minutes, or until the rolls are golden brown and the caramel sauce is bubbly. The tops of the rolls should be nicely browned, and the caramel sauce should be bubbling around the edges.
Inverting and Serving:
This is the moment of truth! Inverting the sticky buns is what reveals that beautiful, caramelized bottom and makes them truly irresistible. Be careful, as the caramel will be very hot!
- Let Cool Slightly: Let the sticky buns cool in the baking dish for about 5-10 minutes after removing them from the oven. This allows the caramel to set slightly, making it easier to invert.
- Invert: Place a large serving platter or baking sheet over the top of the baking dish. Carefully and quickly invert the baking dish onto the platter. The sticky buns should release easily from the pan. If any rolls stick, gently loosen them with a spatula.
- Serve: Serve the sticky buns warm. They are best enjoyed fresh out of the oven, when the caramel is still gooey and the rolls are soft and fluffy.
Tips for Success:
- Use a Heavy-Bottomed Saucepan: This will prevent the caramel sauce from scorching.
- Don’t Overcook the Caramel: Overcooked caramel can become hard and brittle.
- Let the Sticky Buns Cool Slightly Before Inverting: This will help the caramel set and prevent the buns from falling apart.
- Serve Warm: Sticky buns are best enjoyed warm, when the caramel is gooey and the rolls are soft.
- Add Variations: Feel free to add other ingredients to your sticky buns, such as raisins, dried cranberries, or chocolate chips.
Enjoy!
These Hawaiian roll sticky buns are a guaranteed crowd-pleaser. They’re perfect for breakfast, brunch, or dessert. Enjoy!
Conclusion:
And there you have it! These Hawaiian Rolls Sticky Buns are truly a game-changer. I know, I know, I might be a little biased, but trust me on this one. The combination of the sweet, fluffy Hawaiian rolls with the rich, gooey caramel and crunchy pecans is simply irresistible. It’s the kind of treat that disappears in minutes, leaving everyone wanting more. But why is this recipe a must-try? It’s all about the simplicity and the incredible flavor payoff. Forget spending hours kneading dough and waiting for it to rise. This recipe uses readily available Hawaiian rolls, cutting down on prep time significantly. This means you can whip up a batch of these delectable sticky buns even on a busy weekday morning or for a last-minute brunch gathering. The ease of preparation doesn’t compromise on taste, though. The buttery, caramel-infused pecans perfectly complement the soft, slightly sweet rolls, creating a symphony of flavors and textures that will tantalize your taste buds. Beyond the ease and the flavor, these Hawaiian Rolls Sticky Buns are incredibly versatile. Serve them warm with a scoop of vanilla ice cream for an extra decadent dessert. Or, enjoy them alongside a cup of coffee or tea for a cozy breakfast treat. They’re also perfect for potlucks, bake sales, or any occasion where you want to impress your friends and family with a homemade treat that tastes like it came from a fancy bakery. Looking for variations? Get creative! Try adding a sprinkle of shredded coconut to the caramel sauce for an extra tropical twist. Or, swap out the pecans for walnuts or almonds for a different nutty flavor. For a chocolatey indulgence, drizzle melted chocolate over the finished buns. You could even add a pinch of sea salt to the caramel for a salted caramel version that’s both sweet and savory. The possibilities are endless!Serving Suggestions:
* Warm with vanilla ice cream * Alongside coffee or tea * As a brunch centerpiece * Perfect for potlucks and bake salesVariations:
* Add shredded coconut to the caramel * Substitute walnuts or almonds for pecans * Drizzle with melted chocolate * Add a pinch of sea salt for salted caramel I truly believe that everyone should experience the joy of these Hawaiian Rolls Sticky Buns. They’re easy to make, incredibly delicious, and guaranteed to bring a smile to your face. So, what are you waiting for? Gather your ingredients, preheat your oven, and get ready to bake up a batch of these irresistible treats. I’m so excited for you to try this recipe! And more importantly, I’d love to hear about your experience. Did you make any variations? What did your family and friends think? Share your photos and stories in the comments below. Let’s spread the sticky bun love! Don’t forget to rate the recipe once you’ve tried it. Happy baking, and enjoy every single bite of these amazing Hawaiian Rolls Sticky Buns! I know you’ll love them as much as I do. PrintHawaiian Rolls Sticky Buns: The Ultimate Sweet & Savory Recipe
Easy and irresistible sticky buns made with Hawaiian sweet rolls, a rich homemade caramel sauce, and optional pecans or walnuts. Perfect for breakfast, brunch, or dessert!
- Prep Time: 15 minutes
- Cook Time: 30 minutes
- Total Time: 45 minutes
- Yield: 24 sticky buns 1x
Ingredients
- 2 (12-count) packages Hawaiian sweet rolls
- 1 cup (2 sticks) unsalted butter
- 1 cup packed light brown sugar
- 1/2 cup heavy cream
- 1/4 cup honey
- 1 teaspoon vanilla extract
- 1/2 teaspoon sea salt
- 1 cup chopped pecans or walnuts (optional)
Instructions
- In a large, heavy-bottomed saucepan, melt the butter over medium-low heat.
- Add the packed light brown sugar. Stir constantly with a wooden spoon or heat-resistant spatula until the sugar is completely dissolved and the mixture is smooth (3-5 minutes).
- Slowly pour in the heavy cream, stirring constantly until fully incorporated and the sauce is smooth and glossy.
- Stir in the honey and vanilla extract. Continue stirring for another minute or two.
- Add the sea salt. Stir well to incorporate.
- Reduce the heat to low and let the caramel sauce simmer for about 5-7 minutes, stirring occasionally. The sauce should thicken slightly and coat the back of a spoon.
- Generously grease a 9×13 inch baking dish with butter.
- Pour about half of the prepared caramel sauce into the greased baking dish, spreading it evenly across the bottom.
- If using nuts, sprinkle the chopped pecans or walnuts evenly over the caramel sauce in the baking dish.
- Place the Hawaiian sweet rolls in a single layer on top of the caramel sauce in the baking dish. Arrange them close together.
- Pour the remaining caramel sauce evenly over the tops of the rolls, making sure to coat each one thoroughly.
- Preheat oven to 350°F (175°C).
- Bake for 20-25 minutes, or until the rolls are golden brown and the caramel sauce is bubbly.
- Let the sticky buns cool in the baking dish for about 5-10 minutes after removing them from the oven.
- Place a large serving platter or baking sheet over the top of the baking dish. Carefully and quickly invert the baking dish onto the platter.
- If any rolls stick, gently loosen them with a spatula.
- Serve the sticky buns warm.
Notes
- Use a heavy-bottomed saucepan to prevent the caramel sauce from scorching.
- Don’t overcook the caramel; it can become hard and brittle.
- Let the sticky buns cool slightly before inverting to help the caramel set and prevent the buns from falling apart.
- Sticky buns are best enjoyed warm.
- Feel free to add other ingredients to your sticky buns, such as raisins, dried cranberries, or chocolate chips.
Leave a Comment