
Custard Pie holds a truly special place in the hearts of dessert enthusiasts worldwide, and I am certainly no exception. There’s an undeniable charm in its humble yet utterly satisfying presence, making it a perennial favorite for gatherings, holidays, or simply a comforting treat on a quiet afternoon. Have you ever experienced that moment when a single bite transports you back to cherished childhood memories, evoking a sense of warmth and nostalgia? That’s the pure magic of a perfectly made custard pie.
Historically, the concept of custards and pies dates back centuries, evolving through various cultures to become the beloved dessert we know today. This particular pie, with its smooth, rich, and delicately sweet filling nestled in a golden, flaky crust, embodies a timeless elegance that transcends culinary trends. It’s more than just a dessert; it’s a slice of tradition, a testament to the beauty of simple, quality ingredients coming together in harmonious balance.
Why the Enduring Love for Custard Pie?
People adore this classic for countless reasons. Its creamy, melt-in-your-mouth texture, often infused with a delicate hint of vanilla or a whisper of nutmeg, provides a soothing contrast to the crisp, buttery crust. It’s a remarkably versatile dish, perfect whether served warm from the oven or perfectly chilled, making it suitable for any occasion. My recipe aims to celebrate this enduring legacy, ensuring that every spoonful of this traditional Custard Pie delivers pure, unadulterated comfort and joy directly to your table.

Ingredients:
-
For the Flaky Pie Crust:
- 2 ½ cups (300g) all-purpose flour: I always use unbleached, good quality flour for the best texture.
- 1 teaspoon granulated sugar: Just a touch to enhance flavor and aid browning.
- 1 teaspoon salt: Essential for balancing the sweetness and enriching the taste of the crust.
- 1 cup (226g) unsalted butter: Crucially, this needs to be very cold and cut into ½-inch cubes. The colder, the flakier your crust will be. Some folks even pop it in the freezer for 15-20 minutes before using!
- ½ cup (120ml) ice water: Again, temperature is key here. I often add a few ice cubes to a measuring cup and then fill it with water, removing the cubes before pouring. You might need a little less or a little more, so have extra on hand.
-
For the Silky Custard Filling:
- 4 large eggs: These are the backbone of our creamy custard, providing richness and structure.
- 2 large egg yolks: Adding extra yolks makes for an even richer, more luxurious, and less “eggy” tasting custard with a beautiful golden hue.
- ¾ cup (150g) granulated sugar: The perfect amount for a sweet but not overly cloying custard, allowing the delicate vanilla and dairy flavors to shine.
- ½ teaspoon salt: Just like in the crust, salt is vital here to brighten all the other flavors. Don’t skip it!
- 2 cups (480ml) whole milk: Full-fat milk is essential for that traditional, luscious texture. Skim or low-fat milk simply won’t yield the same richness.
- 1 cup (240ml) heavy cream: This is where a lot of the decadent creaminess comes from. It contributes significantly to the smooth mouthfeel of our Custard Pie.
- 2 teaspoons pure vanilla extract: I always recommend using a good quality pure vanilla extract. It makes a world of difference in the final aroma and taste of your Custard Pie.
- A pinch of fresh nutmeg: Freshly grated nutmeg is non-negotiable for me in a classic Custard Pie. It adds a warm, spicy note that complements the sweet custard beautifully.
Prepare the Perfect Pie Crust
- Combine Dry Ingredients: In a large mixing bowl, whisk together the 2 ½ cups all-purpose flour, 1 teaspoon granulated sugar, and 1 teaspoon salt. Make sure these are well combined to ensure even flavor throughout your crust. This simple step lays the foundation for a truly delicious Custard Pie.
- Incorporate Cold Butter: Add the very cold, ½-inch cubed unsalted butter to the dry ingredients. Now, using a pastry blender, your fingertips, or a food processor, cut the butter into the flour mixture. If using your hands, work quickly to prevent the butter from warming too much. You’re looking for a mixture that resembles coarse meal, with some larger pea-sized pieces of butter still visible. These pockets of butter are what create that incredible flakiness we all love in a good pie crust. This step is crucial for the texture of your Custard Pie.
- Add Ice Water Gradually: Drizzle in the ½ cup of ice water, one tablespoon at a time, mixing gently after each addition. I usually start with about 4 tablespoons and then add more sparingly. The goal is to bring the dough together just enough so that it forms a ball, but isn’t sticky or overly wet. You might not need all of the water, or you might need a tiny bit more – humidity in your kitchen can play a role here! Stop adding water as soon as the dough holds together. Overmixing or overworking the dough at this stage will develop the gluten too much, resulting in a tough crust, which is the last thing we want for our delicate Custard Pie.
- Form and Chill the Dough: Gently gather the dough into a disc shape, taking care not to knead it. Wrap the disc tightly in plastic wrap and refrigerate for at least 1 hour, or preferably 2 hours. Chilling allows the gluten to relax, making the dough easier to roll, and it also firms up the butter, which contributes to flakiness. This resting period is non-negotiable for a superior pie crust, ensuring your Custard Pie has the perfect foundation.
- Roll Out the Dough: On a lightly floured surface, roll out the chilled dough into a 12-inch circle, about ⅛-inch thick. Work from the center outwards, rotating the dough frequently to prevent sticking and to maintain a circular shape. If the dough starts to become too warm or sticky, pop it back into the fridge for 10-15 minutes. Precision here ensures an even crust for your Custard Pie.
- Transfer to Pie Plate: Carefully transfer the rolled dough to a 9-inch pie plate. You can do this by gently rolling it around your rolling pin and then unrolling it over the plate, or by folding it into quarters and unfolding it in the plate. Gently press the dough into the bottom and up the sides of the pie plate, being careful not to stretch it, as stretching can cause it to shrink during baking.
- Trim and Crimp Edges: Trim the edges of the dough, leaving about a ½-inch overhang. Fold this overhang under itself, creating a neat, thick edge. Then, crimp the edges decoratively using your fingers or a fork. This not only looks pretty but also helps to contain the Custard Pie filling.
- Second Chill: Place the pie crust-lined plate back into the refrigerator for at least 30 minutes. This second chill is critical. It helps to prevent the crust from shrinking too much during blind baking and ensures that the butter remains cold, contributing to a flaky texture.
- Preheat Oven and Blind Bake: While the crust is chilling, preheat your oven to 400°F (200°C). After chilling, remove the pie plate from the fridge. Line the chilled pie crust with parchment paper or aluminum foil, making sure it covers the edges to prevent burning. Fill the liner with pie weights, dried beans, or rice. These weights help to keep the crust from puffing up and shrinking.
- Blind Baking the Crust: Bake for 15-20 minutes, or until the edges are just set and lightly golden. Carefully remove the pie weights and parchment/foil. Prick the bottom of the crust all over with a fork to prevent bubbles. Return the crust to the oven for another 5-10 minutes, or until the bottom is lightly golden brown and appears dry. This step, known as blind baking, is essential to prevent a soggy bottom once we add our Custard Pie filling. A fully baked, golden crust is key to a truly magnificent Custard Pie. Remove from the oven and let cool completely on a wire rack while you prepare the filling. Reduce oven temperature to 325°F (160°C) for the custard.
Craft the Creamy Custard Filling
- Warm the Dairy: In a medium saucepan, combine the 2 cups whole milk and 1 cup heavy cream. Heat over medium-low heat, stirring occasionally, just until bubbles begin to form around the edges of the pan and steam rises from the surface. Do not boil the mixture. Boiling can scorch the milk and affect the delicate flavor of your Custard Pie. Once warmed, remove the saucepan from the heat.
- Whisk Eggs and Sugar: In a large bowl, whisk together the 4 large eggs, 2 large egg yolks, ¾ cup granulated sugar, and ½ teaspoon salt until the mixture is pale yellow and slightly frothy. This usually takes about 2-3 minutes of vigorous whisking. The sugar should be mostly dissolved, and the mixture should be smooth. This careful blending ensures a uniform texture for our Custard Pie.
-
Temper the Eggs: This is a very important step to prevent scrambling the eggs when combining them with the hot dairy. While continuously whisking the egg mixture, slowly drizzle about half of the warm milk and cream mixture into the eggs. Continue whisking constantly until well combined. This process slowly raises the temperature of the eggs.
My Tip for Tempering:
Pour the warm dairy in a thin, steady stream while whisking. The goal is to gradually acclimate the eggs to the heat, creating a smooth transition rather than an abrupt cook. Patience here will pay off with a silky smooth Custard Pie.
- Combine All Ingredients: Once the eggs are tempered, slowly pour the tempered egg mixture back into the saucepan with the remaining warm milk and cream. Whisk gently until everything is fully incorporated.
- Add Vanilla and Nutmeg: Stir in the 2 teaspoons pure vanilla extract. For the nutmeg, I always grate a fresh pinch directly into the mixture. The aroma alone is intoxicating! If you don’t have fresh, a tiny pinch of pre-ground will do, but fresh is truly superior for enhancing the classic Custard Pie flavor.
- Strain the Custard: For the silkiest Custard Pie texture imaginable, strain the custard mixture through a fine-mesh sieve into a clean bowl or a large liquid measuring cup. This step removes any bits of cooked egg or chalazae (the white stringy bits from the egg) and ensures a perfectly smooth custard. Don’t skip this; it’s a small effort for a huge payoff in texture.
Baking Your Custard Pie to Golden Perfection
- Prepare for Baking: Place your cooled, blind-baked pie crust on a baking sheet. The baking sheet provides stability and makes it easier to transfer the Custard Pie in and out of the oven, especially once it’s filled.
-
Pour the Filling: Carefully pour the strained custard mixture into the cooled, blind-baked pie crust. Fill it almost to the very top, leaving just a tiny bit of space for expansion.
Careful Handling:
If your pie crust has a high crimped edge, you might be able to fill it quite generously. Just be mindful not to overfill, as a spill in the oven is no fun to clean up.
- Bake the Custard Pie: Transfer the baking sheet with the Custard Pie to your preheated 325°F (160°C) oven. Bake for 45-60 minutes. The exact baking time can vary depending on your oven and the depth of your pie plate.
-
Check for Doneness: How do you know when your Custard Pie is perfectly done? The edges of the custard should be set, but the center (about 2-3 inches in diameter) should still have a slight, gentle jiggle when you gently shake the pie plate. It should not be sloshy or liquid. A knife inserted about an inch from the edge should come out clean, but the very center might still look slightly moist. The surface of the Custard Pie should also be a beautiful, light golden brown. Overbaking will result in a tough, rubbery custard or even cracks on the surface. It’s better to slightly underbake than overbake, as the custard will continue to set as it cools.
Troubleshooting Cracks:
If your Custard Pie starts to crack, it’s usually a sign of overbaking or too high an oven temperature. Next time, try reducing the temperature slightly and/or reducing the baking time.
- Cooling Initial Stage: Once the Custard Pie reaches the perfect jiggle, carefully remove it from the oven. It’s crucial to resist the urge to cut into it immediately. Place the baking sheet with the pie on a wire rack to cool completely.
Cooling and Serving Your Delicious Custard Pie
- Cool Completely at Room Temperature: Allow the Custard Pie to cool at room temperature on a wire rack for at least 2-3 hours. During this time, the residual heat will continue to set the custard, and the flavors will meld beautifully. You’ll notice the center will firm up considerably as it cools. This slow, gradual cooling is important for the final texture.
-
Chill in the Refrigerator: Once the Custard Pie is no longer warm to the touch (it should feel cool or at least ambient), transfer it to the refrigerator. Chill it for at least 4 hours, or preferably overnight. Chilling is absolutely essential for the custard to fully set, making it easy to slice and ensuring that classic, firm yet creamy texture. Trying to slice a warm or insufficiently chilled Custard Pie will likely result in a messy, unset slice.
Importance of Chilling:
This extended chilling time is crucial not just for setting, but for enhancing the flavor profile. As the pie chills, the vanilla and nutmeg notes deepen, and the overall creamy richness becomes even more pronounced.
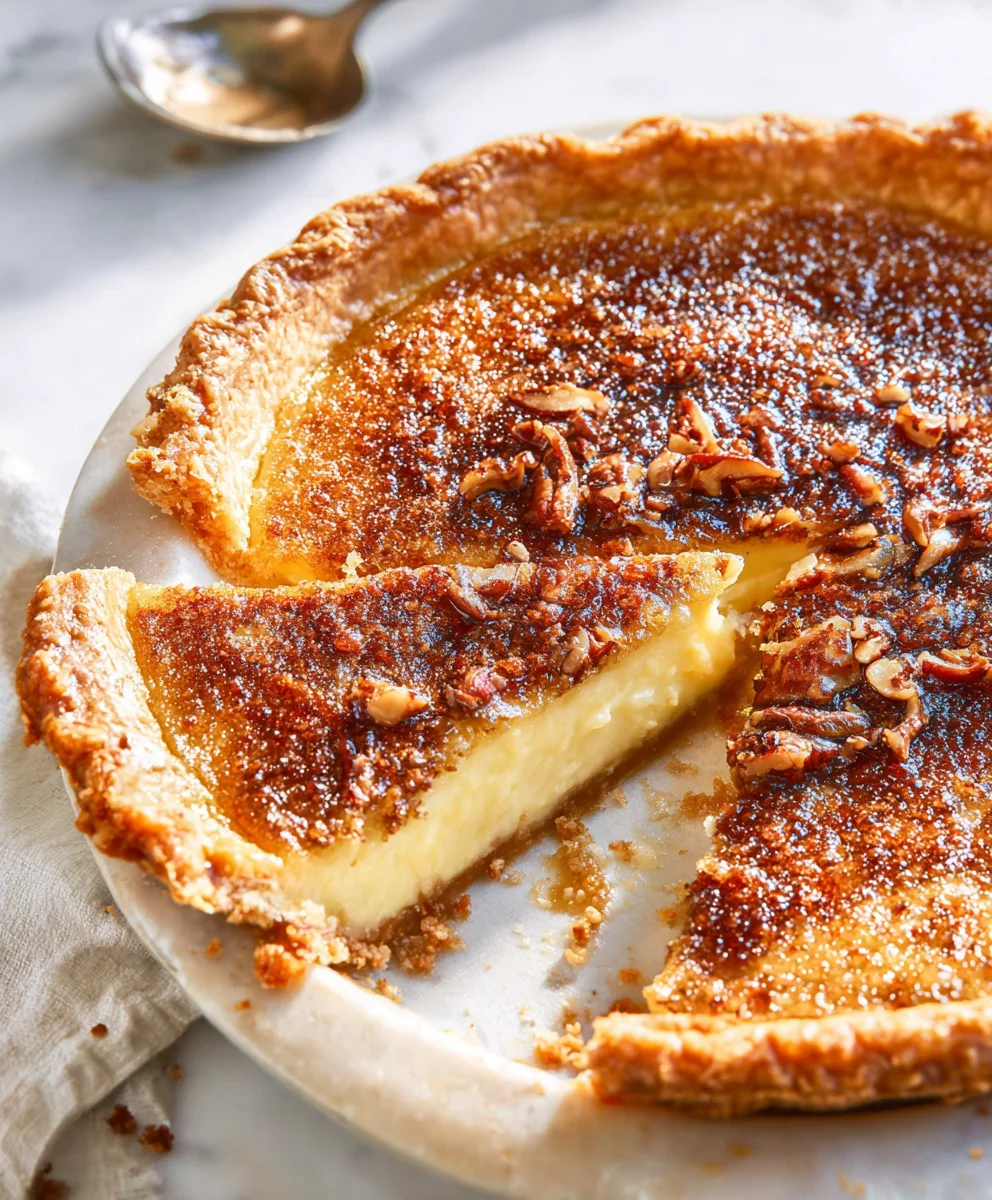
- Garnish (Optional): Before serving, if desired, you can lightly dust the top of your Custard Pie with a little extra freshly grated nutmeg or a sprinkle of cinnamon for an extra aromatic touch and visual appeal. A dollop of lightly sweetened whipped cream is also a delightful accompaniment.
- Slicing and Serving: Once thoroughly chilled, your homemade Custard Pie is ready to be enjoyed! Use a sharp knife that has been run under hot water and wiped clean for each slice. This will give you cleaner, more elegant slices. Cut the pie into wedges and use a pie server to gently lift each slice onto a plate.
-
Storage: Store any leftover Custard Pie in the refrigerator, covered loosely with plastic wrap or aluminum foil, for up to 3-4 days. While it’s best enjoyed within the first day or two, it will still be delicious for several days after.
Final Thoughts on Your Custard Pie:
Making a classic Custard Pie is a rewarding experience. From the flaky homemade crust to the silky, aromatic filling, every bite is a taste of comforting nostalgia. I hope you enjoy every moment of baking and savoring this timeless dessert! It truly is a testament to simple ingredients coming together to create something extraordinary.
Conclusion:
So there you have it, my friends – a recipe that I truly believe will become a staple in your culinary repertoire. This isn’t just another dessert; it’s an experience, a journey back to simpler times, a reminder of the pure joy that well-made food can bring. The Custard Pie recipe I’ve shared with you today is more than just ingredients and steps; it’s an invitation to create something truly magical in your own kitchen. What makes this particular Custard Pie a non-negotiable addition to your baking list? It’s its unparalleled balance of creamy texture and rich, yet delicate, flavor. Each bite is a silken dream, a perfect harmony of sweet and subtle notes that simply melt in your mouth. Forget overly complicated confections; this pie embodies elegance in its simplicity. It’s the kind of dessert that gathers loved ones around the table, sparking conversations and creating cherished memories. It’s robust enough to satisfy a serious sweet tooth but light enough not to overwhelm, making it the perfect ending to any meal, from a casual weeknight dinner to a festive holiday gathering. I promise you, the aroma filling your home as this bakes is a reward in itself, a testament to the comforting goodness you’re about to enjoy.
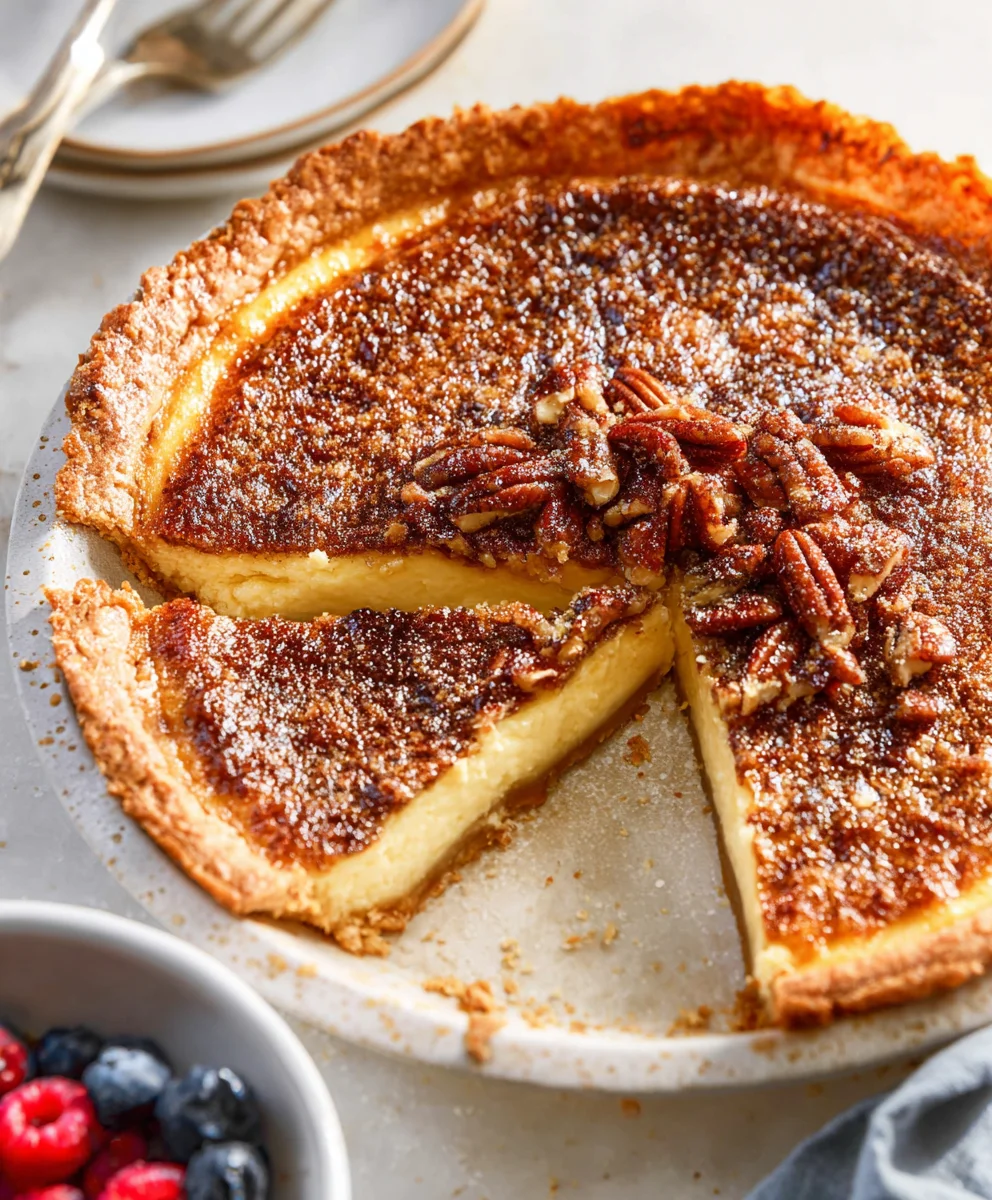
But the journey with your homemade Custard Pie doesn’t end when it cools. Oh no, that’s just the beginning of its versatility! While it’s absolutely divine enjoyed on its own, perhaps with a simple dusting of freshly grated nutmeg – which, by the way, is a classic and highly recommended pairing that elevates the flavor profile beautifully – there are so many ways to customize and serve this delightful creation. For a truly decadent experience, I love to serve a slice with a generous dollop of freshly whipped cream, perhaps infused with a hint of vanilla or a touch of bourbon for an adult twist. Imagine the creamy, light texture of the whipped cream contrasting with the smooth richness of the pie – it’s pure bliss. Seasonal fresh berries, such as ripe raspberries, blueberries, or sliced strawberries, also make an exquisite accompaniment, adding a burst of fresh fruitiness and a lovely color contrast. These simple additions can transform your already perfect Custard Pie into an even more spectacular dessert.
Elevate Your Custard Pie Experience: Creative Twists
Beyond serving suggestions, let’s talk about variations. While the traditional recipe is perfection, don’t be afraid to experiment! You could infuse the custard with a delicate lemon zest for a bright, citrusy note, or add a pinch of cardamom for an exotic warmth. For chocolate lovers, a sprinkle of high-quality dark chocolate shavings over the top before baking, or even folding in some mini chocolate chips into the custard, can transform it into a truly indulgent treat. Thinking about the crust? While a classic flaky pastry crust is traditional, consider a graham cracker crust for a different texture and a hint of honey, or even a gingersnap crust for a spicy kick that pairs wonderfully with the creamy custard. And why stop at a full-sized pie? This recipe adapts beautifully to individual ramekins for elegant single-serving desserts, or even mini pie tins, perfect for parties or lunchboxes. Imagine creating a selection of miniature Custard Pies, each with a slightly different topping or flavor twist – a truly impressive spread! The possibilities are truly endless, limited only by your imagination and what delights your palate.
Now, I’ve poured my heart into sharing this recipe with you because I genuinely believe it has the power to bring joy and comfort to your home. So, my dear readers, I implore you: don’t just read about this incredible Custard Pie; make it! Set aside an afternoon, gather your ingredients, and immerse yourself in the delightful process of creating something truly special. The satisfaction of pulling a golden, perfectly set pie from your oven is an unmatched feeling, and the look of delight on the faces of those you share it with will be your ultimate reward. Once you’ve baked your masterpiece, I would absolutely love to hear about your experience. Did you stick to the classic? Did you venture into one of the variations? What was your favorite part of the process, and more importantly, what did your taste testers think? Please, share your stories, your triumphs, and even your questions in the comments below. Snap a picture of your beautiful pie and share it with us – let’s build a community of enthusiastic bakers who appreciate the simple elegance of a perfect Custard Pie. Your feedback not only brightens my day but also helps other aspiring bakers. Happy baking, and I can’t wait to see what you create!
Heavenly Custard Pie: Simple, Sweet & Creamy
Custard Pie holds a truly special place in the hearts of dessert enthusiasts. There’s an undeniable charm in its humble yet utterly satisfying presence, making it a perennial favorite for gatherings, holidays, or simply a comforting treat. This recipe ensures every spoonful delivers pure, unadulterated comfort and joy.
Ingredients
-
1 1/2 cups (190g) all-purpose flour
-
3/4 cup rolled oats
-
8 tablespoons unsalted butter, softened
-
1/3 cup light brown sugar
-
1 large egg yolk
-
1 teaspoon vanilla extract
-
1/4 teaspoon salt
-
1 tablespoon water
-
4 large eggs
-
1 large egg yolk
-
1 1/4 cups heavy cream
-
1 1/4 cups whole milk
-
3/4 cup granulated sugar
-
2 teaspoons vanilla extract
-
1/4 teaspoon ground nutmeg
-
1/4 teaspoon ground cinnamon
-
1/4 teaspoon fine sea salt
Instructions
-
Step 1
In a bowl, cream together the softened butter and light brown sugar. Beat in 1 large egg yolk and 1 teaspoon vanilla extract. Add the all-purpose flour, rolled oats, 1/4 teaspoon salt, and 1 tablespoon water; mix until a cohesive, crumbly dough forms. -
Step 2
Press the prepared dough evenly into a 9-inch pie plate, covering the bottom and sides. Chill the crust in the refrigerator for at least 30 minutes to firm up. -
Step 3
Preheat your oven to 400°F (200°C). Line the chilled pie crust with parchment paper or aluminum foil, and fill with pie weights, dried beans, or rice. Bake for 15-20 minutes until the edges are lightly set. Carefully remove the weights and liner, then prick the bottom of the crust with a fork. Return to the oven for another 5-10 minutes, or until the crust is lightly golden brown and appears dry. Let the blind-baked crust cool completely on a wire rack. Reduce oven temperature to 325°F (160°C) for the custard. -
Step 4
In a medium saucepan, combine the whole milk and heavy cream. Heat over medium-low heat, stirring occasionally, just until bubbles begin to form around the edges and steam rises (do not boil). In a large bowl, whisk together the 4 large eggs, 1 large egg yolk, 3/4 cup granulated sugar, and 1/4 teaspoon fine sea salt until the mixture is pale yellow and slightly frothy. -
Step 5
To temper the eggs, slowly drizzle about half of the warm milk and cream mixture into the egg mixture while continuously whisking. Pour the tempered egg mixture back into the saucepan with the remaining warm dairy. Whisk gently until everything is fully incorporated. Stir in 2 teaspoons vanilla extract, 1/4 teaspoon ground nutmeg, and 1/4 teaspoon ground cinnamon. -
Step 6
For the silkiest texture, strain the entire custard mixture through a fine-mesh sieve into a clean bowl or a large liquid measuring cup. This step removes any small bits of cooked egg or impurities. -
Step 7
Place the cooled, blind-baked pie crust on a baking sheet for stability. Carefully pour the strained custard mixture into the crust, filling it almost to the very top. Transfer the baking sheet with the pie to your preheated 325°F (160°C) oven. Bake for 45-60 minutes. -
Step 8
The pie is perfectly done when the edges of the custard are set, but the center (about 2-3 inches in diameter) still has a slight, gentle jiggle when you gently shake the pie plate. A knife inserted about an inch from the edge should come out clean. Remove from oven and cool completely at room temperature on a wire rack for at least 2-3 hours. -
Step 9
Once the pie is no longer warm to the touch, transfer it to the refrigerator and chill for at least 4 hours, or preferably overnight, for the custard to fully set. Before serving, you may garnish with extra freshly grated nutmeg or a dollop of sweetened whipped cream. Slice with a sharp, warm knife and serve. Store any leftover pie in the refrigerator, covered loosely, for up to 3-4 days.
Important Information
Nutrition Facts (Per Serving)
It is important to consider this information as approximate and not to use it as definitive health advice.
Allergy Information
Please check ingredients for potential allergens and consult a health professional if in doubt.


Leave a Comment