
Honey Garlic Chicken Instant Pot: Craving a weeknight dinner that’s both incredibly flavorful and unbelievably easy? Imagine sinking your teeth into tender, juicy chicken, glazed with a sweet and savory honey garlic sauce that’s so good, you’ll want to lick the plate clean. This isn’t just a dream; it’s the reality of cooking Honey Garlic Chicken Instant Pot style!
While the exact origins of honey garlic chicken are a bit murky, the combination of honey and garlic has been a staple in Asian cuisine for centuries, prized for its balance of sweet and savory notes. This particular adaptation, leveraging the speed and convenience of the Instant Pot, brings that classic flavor profile to your table in a fraction of the time.
What makes this dish so universally loved? It’s the perfect trifecta of taste, texture, and convenience. The chicken is incredibly tender, practically falling apart at the touch of a fork. The honey garlic sauce is a symphony of flavors the sweetness of honey perfectly complementing the pungent garlic and savory soy sauce. And, thanks to the Instant Pot, you can have this restaurant-quality meal on the table in under 30 minutes. Forget takeout; this is your new go-to for a quick, delicious, and satisfying dinner!

Ingredients:
- Chicken: 2 lbs boneless, skinless chicken thighs, cut into 1-inch pieces
- Honey: ½ cup
- Soy Sauce: ¼ cup low sodium soy sauce
- Garlic: 6 cloves, minced
- Ginger: 1 tablespoon fresh ginger, minced
- Rice Vinegar: 2 tablespoons
- Sesame Oil: 1 tablespoon
- Cornstarch: 2 tablespoons
- Water: 2 tablespoons
- Red Pepper Flakes: ¼ teaspoon (or more, to taste)
- Green Onions: 2-3, thinly sliced, for garnish
- Sesame Seeds: 1 tablespoon, for garnish
- Cooked Rice: For serving
- Optional: Steamed broccoli or other vegetables, for serving
- Chicken Broth: 1 cup
Preparing the Honey Garlic Sauce:
Before we even touch the chicken, let’s get that amazing honey garlic sauce ready. This is the heart and soul of the dish, and having it prepped will make the whole cooking process smoother.
- Combine the wet ingredients: In a medium bowl, whisk together the honey, soy sauce, rice vinegar, and sesame oil. Make sure the honey is well incorporated for a smooth sauce.
- Add the aromatics: Add the minced garlic and ginger to the bowl. Give it a good stir to distribute the flavors evenly. The aroma at this point should already be making your mouth water!
- Spice it up (optional): If you like a little heat, add the red pepper flakes to the sauce. Start with ¼ teaspoon and adjust to your preference. Remember, you can always add more later, but you can’t take it out!
- Set aside: Once the sauce is thoroughly mixed, set it aside. We’ll use it later to coat the chicken.
Preparing the Chicken:
Now, let’s get the chicken ready for its honey garlic bath. Cutting the chicken into bite-sized pieces ensures it cooks quickly and evenly in the Instant Pot, and it also helps the sauce cling to every piece.
- Cut the chicken: If you haven’t already, cut the chicken thighs into 1-inch pieces. Try to keep the pieces relatively uniform in size so they cook at the same rate.
- Pat the chicken dry: Use paper towels to pat the chicken pieces dry. This helps them brown slightly when they’re sautéed in the Instant Pot.
Cooking in the Instant Pot:
This is where the magic happens! The Instant Pot makes this dish incredibly easy and quick. The pressure cooking infuses the chicken with flavor and makes it incredibly tender.
- Sauté the chicken: Turn on your Instant Pot and select the “Sauté” function. Add a tablespoon of oil (vegetable or olive oil works well) to the pot. Once the oil is hot, add the chicken pieces in a single layer (you may need to do this in batches to avoid overcrowding). Sauté the chicken for about 3-4 minutes per side, until lightly browned. Don’t worry about cooking it all the way through at this point; we just want to get some color on it.
- Deglaze the pot: Pour the chicken broth into the Instant Pot. Use a wooden spoon or spatula to scrape up any browned bits from the bottom of the pot. This is called deglazing, and it adds a ton of flavor to the dish while also preventing the “Burn” warning.
- Add the sauce: Pour the honey garlic sauce over the chicken in the Instant Pot. Stir to coat the chicken evenly with the sauce.
- Pressure cook: Secure the lid on the Instant Pot and make sure the valve is set to “Sealing.” Select the “Manual” or “Pressure Cook” function and set the cooking time to 8 minutes.
- Natural Pressure Release: Once the cooking time is up, let the Instant Pot release pressure naturally for 10 minutes. This means you don’t touch the valve; just let the pressure dissipate on its own. After 10 minutes, carefully release any remaining pressure manually by moving the valve to the “Venting” position. Be careful of the steam!
Thickening the Sauce:
After pressure cooking, the sauce might be a little thin. We’ll thicken it up with a simple cornstarch slurry to create that perfect, glossy glaze.
- Prepare the cornstarch slurry: In a small bowl, whisk together the cornstarch and water until smooth. Make sure there are no lumps.
- Thicken the sauce: Turn the Instant Pot back to the “Sauté” function. Pour the cornstarch slurry into the pot and stir continuously until the sauce thickens to your desired consistency. This usually takes just a few minutes. Be careful not to overcook it, or the sauce might become too thick.
Serving:
Now for the best part enjoying your delicious Honey Garlic Chicken! This dish is fantastic served over rice with a side of steamed vegetables.
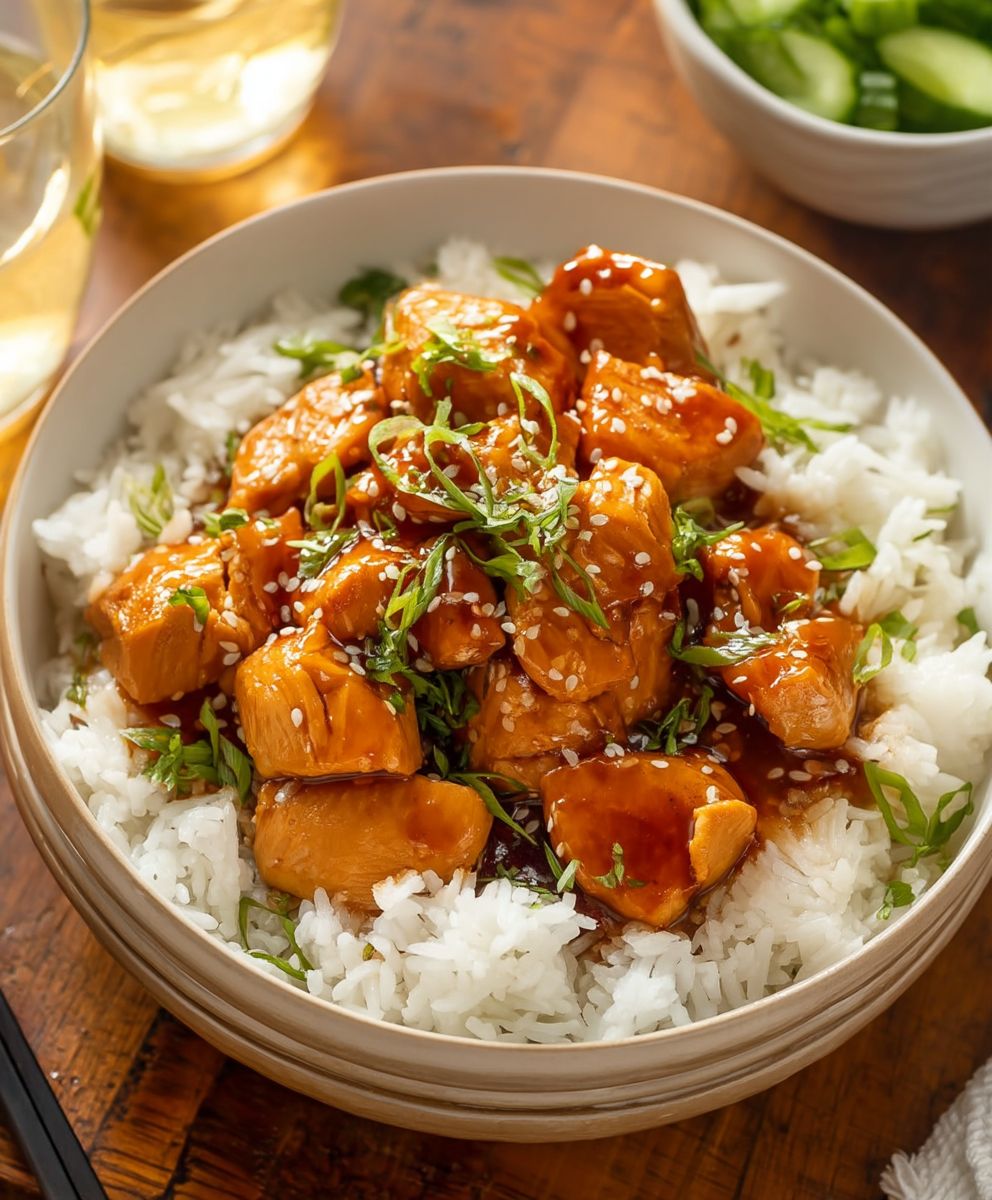
- Serve over rice: Spoon the cooked rice into bowls and top with the Honey Garlic Chicken.
- Garnish: Sprinkle the green onions and sesame seeds over the chicken for added flavor and visual appeal.
- Add vegetables (optional): Serve with steamed broccoli, green beans, or any other vegetables you like.
- Enjoy! Dig in and savor the sweet, savory, and slightly spicy flavors of this easy and delicious Instant Pot meal.
Tips and Variations:
Here are a few extra tips and ideas to customize this recipe to your liking:
- Chicken Breast: You can substitute chicken breasts for chicken thighs, but be aware that they may be slightly drier. Reduce the cooking time to 6 minutes if using chicken breasts.
- Vegetables in the Instant Pot: For a one-pot meal, you can add vegetables like broccoli florets or chopped carrots to the Instant Pot during the last minute of cooking. Just be careful not to overcook them.
- Spicy Level: Adjust the amount of red pepper flakes to control the spiciness. You can also add a dash of sriracha for extra heat.
- Sweetness: If you prefer a less sweet sauce, reduce the amount of honey slightly.
- Garlic Lovers: If you’re a garlic fanatic, feel free to add even more minced garlic to the sauce.
- Ginger Boost: Similarly, you can increase the amount of ginger for a more pronounced ginger flavor.
- Storage: Leftovers can be stored in an airtight container in the refrigerator for up to 3-4 days. Reheat in the microwave or on the stovetop.
- Freezing: This dish freezes well. Allow it to cool completely before transferring it to a freezer-safe container. It can be frozen for up to 2-3 months. Thaw overnight in the refrigerator before reheating.
- Serving Suggestions: This Honey Garlic Chicken is also great served in lettuce wraps, over noodles, or even as a topping for pizza!
Troubleshooting:
Here are some common issues you might encounter and how to fix them:
- “Burn” Warning: If you get a “Burn” warning on your Instant Pot, it means that food is sticking to the bottom of the pot. Immediately turn off the Instant Pot and release the pressure manually. Remove the chicken and sauce, and scrape the bottom of the pot thoroughly. Add a little more chicken broth and try again, making sure to deglaze the pot well after sautéing the chicken.
- Sauce Too Thin: If the sauce is still too thin after adding the cornstarch slurry, continue to simmer it on the “Sauté” function until it reaches your desired consistency. You can also add a little more cornstarch slurry if needed.
- Chicken Overcooked: If the chicken is dry or overcooked, it may be because you cooked it for too long. Reduce the cooking time slightly next time. Also, make sure you’re using chicken thighs, as they tend to be more forgiving than chicken breasts.
- Sauce Too Thick: If the sauce becomes too thick, add a little water or chicken broth to thin it out. Stir well to combine.
Enjoy your Honey Garlic Chicken!
Conclusion:
So, there you have it! This Honey Garlic Chicken Instant Pot recipe is truly a game-changer. I know, I know, I might be biased, but trust me on this one. The combination of sweet honey, savory garlic, and perfectly cooked chicken is simply irresistible. It’s the kind of meal that makes you want to lick your plate clean (and maybe even sneak a second helping!).
But beyond the incredible flavor, what really makes this recipe a must-try is its simplicity. We’re talking minimal prep time, easy cleanup, and a hands-off cooking process thanks to the magic of the Instant Pot. Whether you’re a seasoned chef or a complete beginner in the kitchen, you can absolutely nail this dish. It’s perfect for busy weeknights when you need a quick and satisfying meal, or for impressing guests without spending hours slaving away in the kitchen.
Serving Suggestions and Variations
Now, let’s talk about how to take this Honey Garlic Chicken Instant Pot recipe to the next level. The possibilities are endless! For a classic pairing, serve it over fluffy white rice or quinoa to soak up all that delicious sauce. Steamed broccoli, green beans, or asparagus make excellent side dishes. If you’re feeling adventurous, try adding a sprinkle of sesame seeds and some chopped green onions for a pop of color and flavor.
Want to switch things up a bit? No problem! Here are a few variations to consider:
- Spicy Kick: Add a pinch of red pepper flakes or a dash of sriracha to the sauce for a little heat.
- Ginger Zing: Grate some fresh ginger into the sauce for a warm and aromatic flavor.
- Pineapple Paradise: Add chunks of pineapple to the Instant Pot for a tropical twist.
- Vegetable Medley: Toss in some chopped bell peppers, onions, and carrots for a more complete meal.
Don’t be afraid to experiment and get creative! The beauty of this recipe is that it’s incredibly versatile and can be easily adapted to your own taste preferences. I’ve even tried it with boneless, skinless chicken thighs instead of breasts, and it turned out amazing! The thighs are a bit more forgiving and stay incredibly moist and tender in the Instant Pot.
I’m so confident that you’re going to love this Honey Garlic Chicken Instant Pot recipe. It’s a guaranteed crowd-pleaser that’s both delicious and easy to make. So, what are you waiting for? Grab your Instant Pot, gather your ingredients, and get cooking!
And most importantly, I want to hear about your experience! Did you try the recipe? Did you make any modifications? What did you think? Share your photos, comments, and feedback in the comments section below. I’m always excited to see how you make this recipe your own. Happy cooking!
I truly believe this recipe will become a staple in your kitchen, just as it has in mine. Enjoy!
Honey Garlic Chicken Instant Pot: Quick, Easy & Delicious Recipe
Tender Honey Garlic Chicken made easy in the Instant Pot! Juicy chicken thighs coated in a sweet and savory honey garlic sauce, perfect over rice with vegetables.
Ingredients
- 2 lbs boneless, skinless chicken thighs, cut into 1-inch pieces
- ½ cup honey
- ¼ cup low sodium soy sauce
- 6 cloves garlic, minced
- 1 tablespoon fresh ginger, minced
- 2 tablespoons rice vinegar
- 1 tablespoon sesame oil
- 2 tablespoons cornstarch
- 2 tablespoons water
- ¼ teaspoon red pepper flakes (or more, to taste)
- 2-3 green onions, thinly sliced, for garnish
- 1 tablespoon sesame seeds, for garnish
- Cooked rice, for serving
- 1 cup chicken broth
- Optional: Steamed broccoli or other vegetables, for serving
Instructions
- Prepare the Honey Garlic Sauce: In a medium bowl, whisk together the honey, soy sauce, rice vinegar, and sesame oil. Add the minced garlic, ginger, and red pepper flakes (if using). Stir well and set aside.
- Prepare the Chicken: Cut the chicken thighs into 1-inch pieces. Pat the chicken pieces dry with paper towels.
- Sauté the Chicken: Turn on your Instant Pot and select the “Sauté” function. Add a tablespoon of oil to the pot. Once the oil is hot, add the chicken pieces in a single layer (you may need to do this in batches to avoid overcrowding). Sauté the chicken for about 3-4 minutes per side, until lightly browned.
- Deglaze the Pot: Pour the chicken broth into the Instant Pot. Use a wooden spoon or spatula to scrape up any browned bits from the bottom of the pot.
- Add the Sauce: Pour the honey garlic sauce over the chicken in the Instant Pot. Stir to coat the chicken evenly with the sauce.
- Pressure Cook: Secure the lid on the Instant Pot and make sure the valve is set to “Sealing.” Select the “Manual” or “Pressure Cook” function and set the cooking time to 8 minutes.
- Natural Pressure Release: Once the cooking time is up, let the Instant Pot release pressure naturally for 10 minutes. After 10 minutes, carefully release any remaining pressure manually by moving the valve to the “Venting” position.
- Thicken the Sauce: In a small bowl, whisk together the cornstarch and water until smooth. Turn the Instant Pot back to the “Sauté” function. Pour the cornstarch slurry into the pot and stir continuously until the sauce thickens to your desired consistency.
- Serve: Spoon the cooked rice into bowls and top with the Honey Garlic Chicken. Sprinkle the green onions and sesame seeds over the chicken for garnish. Serve with steamed broccoli or other vegetables, if desired.
Notes
- For chicken breast, reduce cooking time to 6 minutes.
- Adjust red pepper flakes for desired spiciness.
- Leftovers can be stored in the refrigerator for 3-4 days or frozen for 2-3 months.
- If you get a “Burn” warning, deglaze the pot thoroughly and add more broth.
- If the sauce is too thin, simmer longer with the cornstarch slurry.
- If the sauce is too thick, add water or chicken broth.


Leave a Comment