
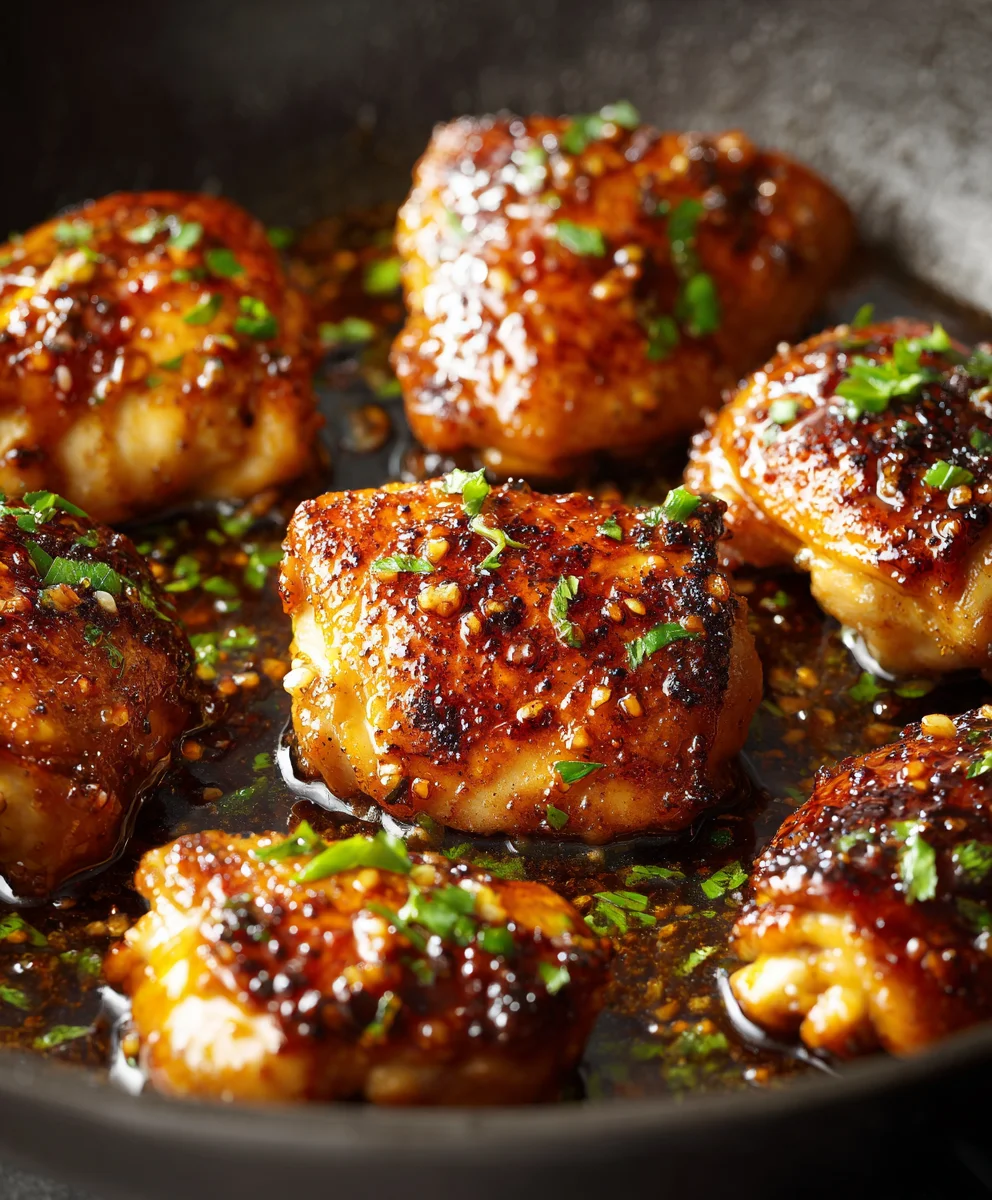
Honey Garlic Chicken, that quintessential weeknight hero, is truly a dish that captures hearts and palates alike. There’s a magical alchemy that happens when succulent chicken meets a luscious, sticky glaze of golden honey and pungent garlic. The result? An irresistible symphony of sweet and savory notes, perfectly balanced, with just a hint of tang that leaves you craving more. It’s a universally beloved meal, cherished for its incredible flavor, delightful aroma, and remarkable versatility.
Why This Dish Becomes an Instant Favorite
Whether you’re a seasoned chef or just starting your culinary journey, the simplicity of preparing this dish makes it an absolute triumph. Imagine perfectly tender chicken, coated in a glistening, caramelized sauce that clings to every piece – pure comfort on a plate! While its direct historical lineage isn’t tied to ancient traditions, the combination of honey and garlic has been celebrated across numerous cultures for its potent flavors and perceived benefits for centuries. This modern interpretation beautifully marries those timeless ingredients, evolving into a cherished staple in homes across the globe. I am genuinely thrilled to share my tried-and-true recipe for the ultimate Honey Garlic Chicken, promising a dish that’s both incredibly easy to make and guaranteed to be a crowd-pleaser. Get ready to transform your dinner routine with this phenomenal meal!

Ingredients:
- For the Chicken:
- 2 pounds boneless, skinless chicken thighs or breasts, your preference. I often go for thighs because they stay incredibly juicy!
- 1 tablespoon olive oil or your preferred cooking oil, for searing.
- 1 teaspoon salt
- 1/2 teaspoon black pepper
- 1/2 teaspoon garlic powder
- 1/4 teaspoon onion powder
- A pinch of paprika (optional, but adds a lovely color)
- For the Honey Garlic Sauce:
- 1/2 cup low-sodium soy sauce. Using low-sodium allows us to control the saltiness better.
- 1/2 cup honey. The star of our Honey Garlic Chicken!
- 2 tablespoons rice vinegar. This adds a crucial touch of tang to balance the sweetness.
- 1 tablespoon freshly grated ginger. Fresh ginger truly makes a difference here, don’t substitute with powdered if you can help it.
- 8-10 cloves garlic, minced. Yes, that’s a lot of garlic, and it’s essential for that robust Honey Garlic flavor!
- 1 teaspoon toasted sesame oil. This adds a wonderful, nutty aroma to the sauce.
- 1 tablespoon cornstarch. Our secret weapon for a beautifully thick and glossy sauce.
- 2 tablespoons cold water, for mixing with the cornstarch.
- For Garnish:
- 2 tablespoons chopped fresh green onions (scallions).
- 1 teaspoon toasted sesame seeds.
Preparation of the Chicken
- Prepare the Chicken: My first step for any fantastic chicken dish is always proper preparation. Take your 2 pounds of boneless, skinless chicken thighs or breasts and pat them thoroughly dry with paper towels. This step is incredibly important! Removing excess moisture ensures that when we sear the chicken, it gets a beautiful golden-brown crust instead of just steaming in its own juices. Trust me, for perfect Honey Garlic Chicken, a dry surface is key for that initial sizzle and sear.
- Cut into Uniform Pieces: Next, I like to cut the chicken into roughly 1-inch to 1.5-inch bite-sized pieces. Aim for consistency in size here. Why? Because uniform pieces cook evenly. No one wants some pieces that are perfectly tender while others are still a little undercooked or, worse, overcooked and dry. Evenly sized chicken ensures every piece of your Honey Garlic Chicken is cooked to perfection.
- Season the Chicken: Now for the flavor foundation! In a medium bowl, combine your cut chicken pieces with 1 teaspoon salt, 1/2 teaspoon black pepper, 1/2 teaspoon garlic powder, and 1/4 teaspoon onion powder. If you’re using paprika, add a pinch of that too. Toss everything together really well, making sure every single piece of chicken is coated evenly with the seasoning. I like to use my hands for this, ensuring the spices cling to every nook and cranny. This initial seasoning is crucial; it builds a delicious base layer of flavor before our amazing Honey Garlic sauce even enters the picture. Think of it as giving the chicken a head start on deliciousness.
Crafting the Irresistible Honey Garlic Sauce
- Mince the Aromatics: While the chicken is waiting patiently, let’s get started on the star of the show: the Honey Garlic sauce! Peel and finely mince your 8-10 cloves of garlic. Yes, it’s a generous amount, but this is Honey Garlic Chicken, after all, and you want that potent, aromatic garlic flavor to shine through. Then, peel and finely grate your 1 tablespoon of fresh ginger. Using a microplane makes this super easy and ensures you get all that wonderful, pungent ginger essence.
- Combine the Liquid Sauce Ingredients: In a medium bowl or a liquid measuring cup, combine 1/2 cup low-sodium soy sauce, 1/2 cup honey, 2 tablespoons rice vinegar, your minced garlic, your grated ginger, and 1 teaspoon toasted sesame oil. Give everything a good whisk until the honey is fully dissolved and all the ingredients are well incorporated. Take a moment to appreciate that fragrant mixture – it’s already starting to smell incredible! This is the core flavor profile for our fantastic Honey Garlic Chicken.
- Prepare the Cornstarch Slurry: For that beautifully thick and glossy finish, we’ll need a cornstarch slurry. In a small separate bowl, whisk together 1 tablespoon of cornstarch with 2 tablespoons of cold water until there are absolutely no lumps remaining. It should be a smooth, milky liquid. This slurry is what will thicken our sauce to that perfect, clingy consistency that coats every piece of chicken. Do not skip this step, and make sure the water is cold to prevent lumps.
Cooking the Chicken to Golden Perfection
- Heat the Pan: Place a large skillet or a heavy-bottomed pan (cast iron works wonderfully here!) over medium-high heat. Let it get nice and hot for about 2-3 minutes. You want a good amount of heat to achieve a proper sear. Add 1 tablespoon of olive oil (or your preferred cooking oil) to the hot pan, tilting it to coat the bottom evenly. You should see the oil shimmer, indicating it’s ready.
- Sear the Chicken: Carefully add your seasoned chicken pieces to the hot pan in a single layer. Do not overcrowd the pan! This is a crucial tip for getting a good sear. If you put too much chicken in at once, the temperature of the pan will drop, and the chicken will steam instead of sear, preventing that lovely golden-brown crust we’re after. If necessary, cook the chicken in two or even three batches.
- Cook Until Golden Brown and Cooked Through: Let the chicken sear undisturbed for about 3-4 minutes on one side until it develops a beautiful golden-brown crust. Then, flip the pieces and continue to cook for another 3-5 minutes, or until the chicken is cooked through and no longer pink in the center. The internal temperature should reach 165°F (74°C). This searing step adds so much depth of flavor and a pleasing texture to our Honey Garlic Chicken. Once cooked, remove the chicken from the pan and set it aside on a plate. You can loosely tent it with foil to keep it warm while we prepare the sauce.
Bringing It All Together: The Honey Garlic Glaze
- Deglaze and Add Aromatics: Lower the heat to medium. There might be some delicious browned bits (fond) stuck to the bottom of the pan from cooking the chicken – these are pure flavor! Add the combined liquid sauce mixture (soy sauce, honey, vinegar, garlic, ginger, sesame oil) to the pan. Use a wooden spoon or spatula to scrape up all those flavorful bits from the bottom of the pan. This step is called deglazing, and it adds immense depth to our Honey Garlic sauce. Bring the sauce to a gentle simmer.
- Thicken the Sauce: Once the sauce is simmering, give your cornstarch slurry a quick whisk again to ensure it’s well mixed. Slowly pour the cornstarch slurry into the simmering sauce in a thin stream, whisking continuously as you pour. Keep whisking for about 1-2 minutes. You’ll notice the sauce begin to thicken and become beautifully glossy right before your eyes. This is the magic happening, transforming our liquid mixture into the rich, clingy glaze that will coat our Honey Garlic Chicken perfectly.
- Adjust Seasoning (Optional): Taste the sauce. This is your chance to adjust it to your liking. Does it need a tiny bit more salt? A dash more vinegar for tang? A little extra honey for sweetness? I find it’s usually perfect as is, but our palates are all unique!
- Combine Chicken with Sauce: Now for the grand finale! Return all the cooked chicken pieces to the skillet with the thickened Honey Garlic sauce. Toss the chicken gently until every single piece is thoroughly coated in that gorgeous, sticky, sweet, and savory glaze. Let it simmer together for just another minute or two, allowing the flavors to meld and the sauce to truly cling to the chicken. This is where the dish truly becomes the Honey Garlic Chicken you’ve been dreaming of!
Serving Suggestions and Final Touches
- Garnish and Serve: Once the chicken is beautifully coated, remove the skillet from the heat. Transfer your incredible Honey Garlic Chicken to a serving platter. For that extra pop of freshness and a touch of visual appeal, generously sprinkle with your chopped green onions and toasted sesame seeds. The green onions add a mild oniony bite and bright color, while the sesame seeds provide a lovely nutty crunch.
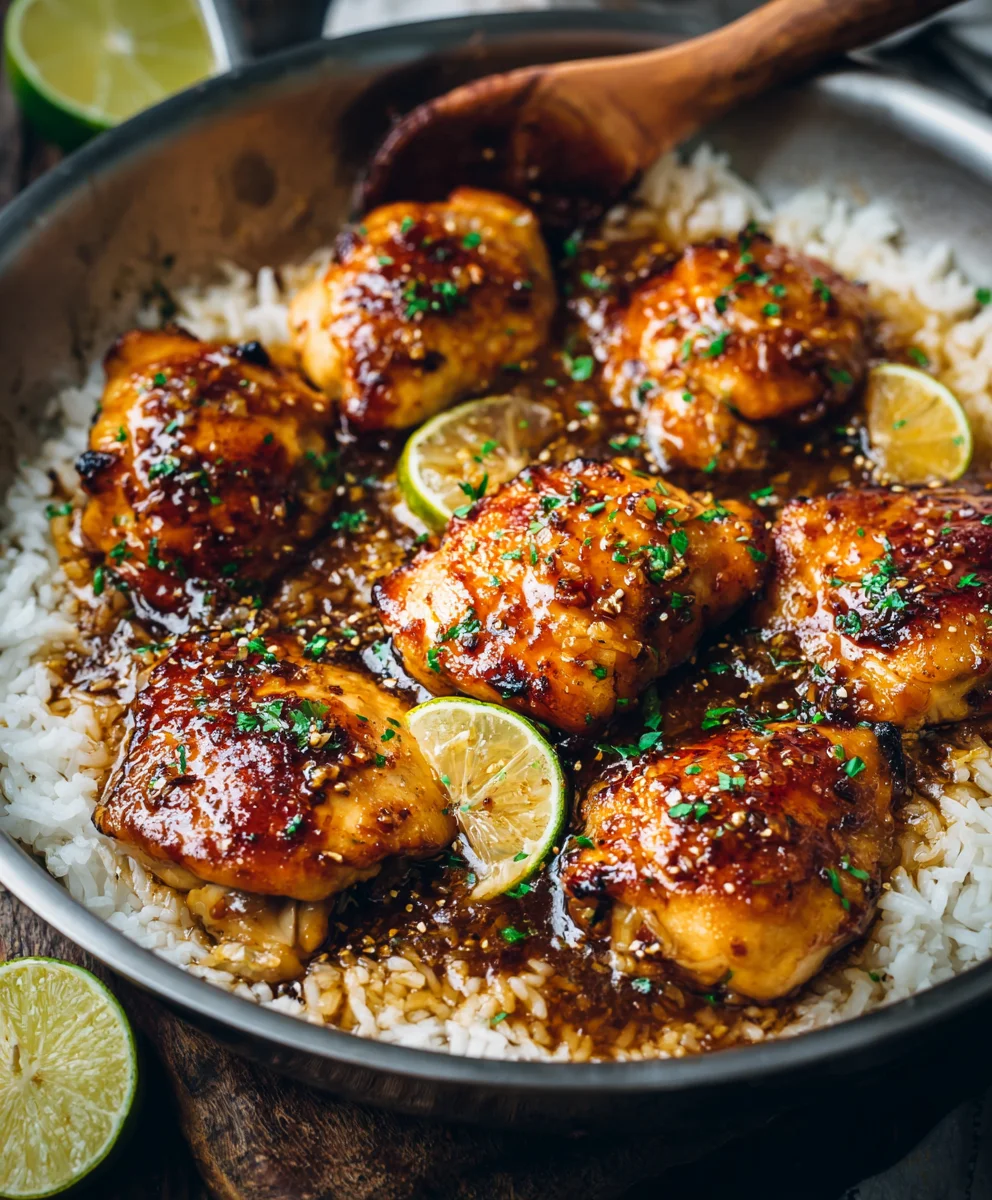
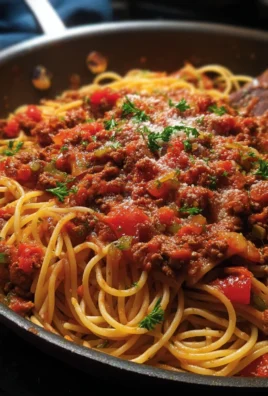
- Pairing Perfection: This Honey Garlic Chicken is incredibly versatile and pairs wonderfully with so many side dishes. I love serving it over fluffy white rice or brown rice, which soaks up every drop of that glorious sauce. Steamed broccoli, roasted asparagus, or a simple green salad also make fantastic accompaniments, adding a fresh, healthy balance to the richness of the dish. For a different twist, you could even toss it with some noodles.
- Leftovers and Storage: If by some miracle you have any leftovers (which rarely happens in my house!), store them in an airtight container in the refrigerator for up to 3-4 days. It reheats beautifully in the microwave or on the stovetop with a little splash of water or broth to loosen the sauce.
- Spice It Up (Optional Variation): If you enjoy a little heat, consider adding a pinch of red pepper flakes along with the garlic and ginger when you’re simmering the sauce. This adds a subtle kick that complements the sweet and savory notes of the Honey Garlic Chicken wonderfully.
- Add Veggies (Optional Variation): For a more complete one-pan meal, you can stir-fry some quick-cooking vegetables like sliced bell peppers, snap peas, or broccoli florets in the pan after you’ve cooked the chicken and before you add the sauce. Cook them until tender-crisp, then remove them and add them back in with the chicken at the end when tossing everything with the sauce. This turns it into a fantastic stir-fry style Honey Garlic Chicken!
Conclusion:
Well, my friends, we’ve come to the end of our culinary journey for today, but truly, it’s just the beginning of your delicious adventure! If you’ve followed along, you already know why I’m so passionate about this particular dish. It’s not just a meal; it’s an experience. This recipe isn’t merely about putting food on the table; it’s about bringing joy, comfort, and undeniable flavor into your home with minimal fuss. I truly believe that once you taste the succulent, tender chicken enveloped in that glistening, perfectly balanced sauce – a beautiful harmony of sweet, savory, and just a hint of tang – you’ll understand exactly what I mean. It’s the kind of dish that disappears quickly from plates, leaving everyone feeling satisfied and already looking forward to the next time you make it. Trust me, this is one of those cornerstone recipes that will quickly find a permanent spot in your weekly rotation because it consistently delivers on taste and ease, making weeknights feel a little more special and weekend gatherings a lot more effortless. It has a magical way of impressing without requiring hours of labor, which, in my book, is the ultimate win for any home cook. This recipe truly simplifies delicious dining.
Now, let’s talk about making this incredible meal your own. One of the many brilliant aspects of this recipe is its incredible versatility. For serving, the possibilities are truly endless, allowing you to tailor it to whatever you’re craving or whatever you have on hand. My absolute favorite way to enjoy it is spooned generously over a bed of fluffy white rice, which soaks up every drop of that glorious sauce, creating a symphony of flavors in every bite. But don’t stop there! If you’re a noodle enthusiast, imagine this delightful chicken tossed with stir-fried lo mein or delicate rice noodles; it’s an absolute game-changer. For those seeking a lighter option, a vibrant side salad with a simple vinaigrette provides a wonderful contrast to the rich flavors, or you could opt for steamed or roasted green beans, broccoli florets, or asparagus to add a pop of color and freshness. During colder months, creamy mashed potatoes would be an utterly comforting pairing, allowing the sauce to meld beautifully with the smooth texture. Even something as simple as a hearty quinoa or couscous can serve as an excellent base, making it a complete and balanced meal. Don’t be afraid to experiment with your starch or vegetable of choice; this sauce is incredibly forgiving and enhances almost anything it touches, making every combination a delightful discovery. Think about adding a sprinkle of toasted sesame seeds or finely chopped green onions right before serving for an extra layer of texture and a burst of fresh flavor, elevating the presentation and taste significantly.
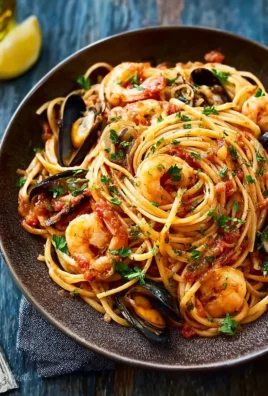
Beyond the serving suggestions, this recipe is also ripe for variations, allowing you to tweak it to perfectly suit your family’s preferences or dietary needs. For a little kick, consider adding a pinch of red pepper flakes or a dash of sriracha to the sauce mixture – a spicy Honey Garlic Chicken is absolutely divine and adds a thrilling dimension to the classic profile. If chicken isn’t your only protein of choice, feel free to substitute with other options! This glorious sauce works exceptionally well with shrimp, pork tenderloin, or even firm tofu for a fantastic vegetarian or vegan-friendly version (just adjust cooking times accordingly). You could also bulk it up with extra vegetables by tossing in some bell peppers, sliced carrots, or snap peas during the last few minutes of cooking, turning it into a fantastic one-pan-ish meal. Imagine the vibrant colors and added nutrients! For a deeper, more robust flavor, a tiny splash of toasted sesame oil at the very end can truly elevate the dish, adding an authentic, nutty aroma that is simply irresistible. This is your kitchen, your rules, and this recipe is wonderfully adaptable to your creative whims. Every slight alteration can lead to a new favorite version, making it a recipe that keeps on giving, always providing fresh excitement and keeping your taste buds on their toes with delightful surprises.
So, there you have it. My sincere hope is that I’ve convinced you of the sheer deliciousness and absolute simplicity that this recipe brings to the table. I genuinely encourage you, with all my heart, to roll up your sleeves, gather your ingredients, and give this a try very soon. You won’t regret it! Picture the aroma filling your kitchen, the sizzle on the pan, and finally, that first glorious bite. It’s a moment you deserve. And once you’ve experienced the magic for yourself, I would be absolutely thrilled to hear all about it! Please don’t keep your culinary triumphs to yourself. Share your experiences, your successes, and even your unique variations. What did you serve it with? Did you add extra spice? Who did you share it with? Your insights and feedback not only brighten my day but also inspire countless other home cooks who are looking for their next favorite meal. Let’s build a community of happy, well-fed food lovers who share a passion for creating amazing meals at home. Happy cooking, and I can’t wait to hear how much you loved it!
Honey Garlic Chicken
Succulent chicken meets a luscious, sticky glaze of golden honey and pungent garlic, creating an irresistible symphony of sweet and savory notes. This modern interpretation of timeless ingredients makes for a universally beloved, versatile weeknight hero.
Ingredients
-
8 boneless, skinless chicken thighs
-
2 tbsp cornstarch
-
½ tsp salt
-
½ tsp black pepper
-
2 tbsp vegetable oil
-
1 tbsp unsalted butter
-
4 cloves garlic, minced
-
1/3 cup honey (110g)
-
1/3 cup chicken stock (80ml)
-
1 tbsp rice vinegar
-
1 tbsp light soy sauce
-
1 tbsp fresh parsley, chopped
-
½ tsp chili flakes
-
Boiled rice, for serving
Instructions
-
Step 1
Pat chicken thighs dry and cut into 1-1.5 inch bite-sized pieces. Season thoroughly with salt and black pepper. -
Step 2
Prepare the Honey Garlic sauce: In a medium bowl, whisk together honey, chicken stock, rice vinegar, light soy sauce, minced garlic, and chili flakes until well combined. -
Step 3
Heat vegetable oil and unsalted butter in a large skillet over medium-high heat. Sear chicken in a single layer (in batches if necessary to avoid overcrowding) for 3-5 minutes per side, until golden brown and cooked through (internal temperature 165°F / 74°C). Remove chicken and set aside. -
Step 4
Lower heat to medium. Pour the prepared sauce mixture into the pan, scraping up any browned bits from the bottom. Bring to a gentle simmer. -
Step 5
In a small separate bowl, whisk 2 tablespoons of cornstarch with 2 tablespoons of cold water until smooth. Slowly pour the cornstarch slurry into the simmering sauce, whisking continuously for 1-2 minutes until the sauce thickens and becomes glossy. -
Step 6
Return the cooked chicken pieces to the skillet with the thickened sauce. Toss gently until every piece is thoroughly coated in the glaze. Let it simmer together for another minute or two to meld flavors. -
Step 7
Garnish generously with chopped fresh parsley. Serve immediately over fluffy boiled rice.
Important Information
Nutrition Facts (Per Serving)
It is important to consider this information as approximate and not to use it as definitive health advice.
Allergy Information
Please check ingredients for potential allergens and consult a health professional if in doubt.
Leave a Comment