
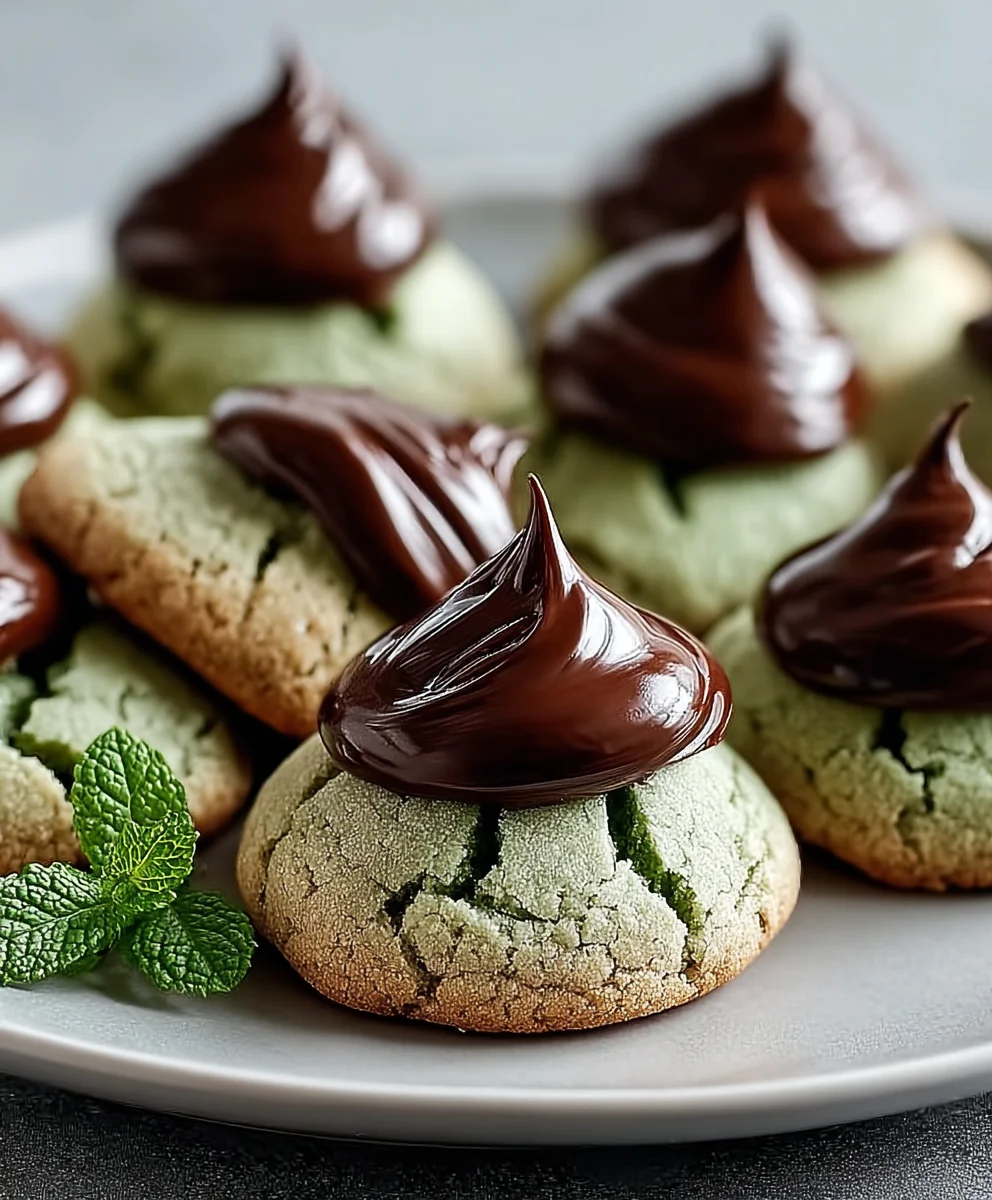
Mint Kiss Cookies are more than just a sweet treat; they are a delightful culinary experience that promises a refreshing burst of cool mint enveloped in a tender, melt-in-your-mouth cookie, all crowned with a decadent chocolate kiss. Imagine a cookie that not only satisfies your sweet tooth but also invigorates your palate with a crisp, clean finish. That’s precisely what these charming confections deliver, making them an instant favorite for any occasion.
A Nostalgic Twist on a Beloved Classic
While the precise historical genesis of these specific Mint Kiss Cookies might be a modern adaptation, they draw inspiration from a beloved tradition: the “kiss” cookie. These iconic cookies, often featuring a small chocolate candy pressed into their warm centers, have graced American holiday tables and potlucks for decades, bringing smiles and a touch of nostalgic charm. They evoke memories of festive gatherings and shared moments, and our minty version simply adds an exciting, refreshing twist to this cherished concept, making them perfect for celebrations or a cozy night in.
What truly makes these cookies universally adored is their unparalleled combination of flavors and textures. The vibrant, cool essence of mint perfectly complements the rich, creamy chocolate and the comforting softness of the cookie base. They’re incredibly easy to make, visually stunning on any dessert platter, and the irresistible surprise of that soft chocolate kiss melting slightly into the warm cookie is simply divine. Get ready to bake a batch of these extraordinary Mint Kiss Cookies and discover why they are destined to become a new favorite in your recipe repertoire!

Ingredients:
- 2 ½ cups (300g) all-purpose flour, sifted
- 1 teaspoon baking powder
- ½ teaspoon salt
- 1 cup (226g) unsalted butter, softened to room temperature
- 1 ½ cups (300g) granulated sugar
- 1 large egg
- 1 ½ teaspoons pure peppermint extract
- 4-6 drops green gel food coloring (optional, but highly recommended for that classic mint look)
- 1 cup (120g) powdered sugar, for rolling the cookies
- 48 Hershey’s Kisses, unwrapped (milk chocolate or mint truffle variety are both delightful options!)
Equipment You’ll Need:
Before we dive into the fun of baking, let’s gather our tools to ensure a smooth and enjoyable process. You’ll want to have the following on hand:
- Stand mixer with paddle attachment or a large mixing bowl with an electric hand mixer
- Rubber spatula
- Measuring cups and spoons
- Sifter (if sifting your flour)
- Two large baking sheets
- Parchment paper or silicone baking mats
- Small cookie scoop (approximately 1 tablespoon size)
- Small bowls for the powdered sugar coating
- Wire cooling rack
- Whisk
Preparing Your Workspace and Ingredients:
Success in baking often starts with good preparation, or as they say, “mise en place.” Let’s get everything ready before we mix a single ingredient.
- Preheat Your Oven: First things first, preheat your oven to 350°F (175°C). It’s important for your oven to be at the correct temperature when the cookies go in, as this helps them bake evenly and prevents spreading.
- Prepare Baking Sheets: Line two large baking sheets with parchment paper or silicone baking mats. This prevents sticking and makes for easy cleanup. Trust me, you’ll thank yourself later when you’re not scrubbing burnt cookie bits!
- Unwrap Hershey’s Kisses: Unwrap all 48 Hershey’s Kisses. This might seem like a small detail, but you’ll need to work quickly when the cookies come out of the oven, and having them ready will save you from a sticky situation (literally!). I like to place them on a small plate next to my cooling rack.
- Softened Butter: Ensure your unsalted butter is genuinely softened to room temperature. This means it should be pliable enough to leave a slight indentation when pressed, but not melted or greasy. Cold butter won’t cream properly, and melted butter will lead to greasy, flat cookies. If you forgot to take it out, a quick microwave session (10-15 seconds at a time) can help, but be very careful not to melt it.
- Sift Dry Ingredients: In a medium bowl, whisk together the sifted all-purpose flour, baking powder, and salt. Sifting the flour helps to aerate it and remove any lumps, ensuring a smoother, more consistent dough. This step is particularly important for delicate cookies like these. Set this bowl aside.
Making the Mint Cookie Dough:
Now for the heart of our Mint Kiss Cookies – creating that wonderfully soft, flavorful dough. Precision here will pay off with perfectly textured cookies.
- Cream the Butter and Granulated Sugar: In the bowl of your stand mixer fitted with the paddle attachment, or using a large bowl and a hand mixer, combine the softened unsalted butter and granulated sugar. Beat on medium speed for 2-3 minutes, or until the mixture is light, fluffy, and pale in color. This creaming process is absolutely crucial as it incorporates air into the butter, which will contribute to the cookies’ tender texture and help them rise. Make sure to scrape down the sides of the bowl frequently with your rubber spatula to ensure everything is well combined and no sugar granules are left clinging to the bottom.
- Incorporate Egg and Peppermint Extract: Add the large egg and the pure peppermint extract to the creamed butter and sugar mixture. Beat on medium speed for another minute, until just combined. Be careful not to overmix at this stage; we just want everything to come together. The peppermint extract is where the magic happens, giving our cookies that signature cool, refreshing flavor.
- Add Green Food Coloring (Optional): If you’re opting for that vibrant green color (which I highly recommend for “mint” cookies!), add 4-6 drops of green gel food coloring now. Start with fewer drops and add more until you achieve your desired shade. Beat on low speed until the color is evenly distributed throughout the mixture. Gel food coloring provides a much more intense color without adding excess liquid, which can thin out your dough.
- Gradually Add Dry Ingredients: With the mixer on low speed, gradually add the sifted flour mixture to the wet ingredients. Add about a third at a time, mixing just until the flour is almost incorporated before adding the next batch. Once all the flour is added, mix only until no dry streaks remain. Do not overmix! Overmixing develops the gluten in the flour, which can lead to tough, dense cookies. We’re aiming for a tender, melt-in-your-mouth texture.
- Chill the Dough: Cover the bowl with plastic wrap and refrigerate the dough for at least 30 minutes, or up to 2 hours. Chilling the dough is an important step that helps to solidify the butter, preventing the cookies from spreading too much in the oven. It also allows the flavors to meld beautifully and makes the dough much easier to handle. While the dough chills, you can take a moment to clean up your workspace or just anticipate the deliciousness to come!
Forming and Baking the Cookies:
Now that our dough is perfectly chilled and ready, it’s time to transform it into those delightful cookie balls that will soon cradle a chocolate kiss.
- Roll the Dough into Balls: Remove the chilled dough from the refrigerator. Using a small cookie scoop (approximately 1 tablespoon in size), scoop out portions of dough and roll them gently between your palms to form smooth, uniform balls. Aim for consistency in size, as this helps them bake evenly. Place the cookie balls about 2 inches apart on your prepared baking sheets. Giving them enough space prevents them from merging into one giant cookie during baking.
- Bake the Cookies: Transfer one baking sheet to your preheated oven. Bake for 8-10 minutes, or until the edges are just set and very lightly golden. The centers might still look a little soft, which is exactly what we want! Overbaking will result in dry cookies, and we’re going for soft and chewy. Baking one sheet at a time, or rotating sheets halfway through, helps ensure even baking.
- Add the Hershey’s Kisses: This is a crucial step! As soon as you remove the baking sheet from the oven, immediately press one unwrapped Hershey’s Kiss firmly into the center of each warm cookie. The heat from the cookie will gently melt the base of the chocolate, allowing it to adhere and become deliciously gooey. If you wait too long, the cookies will start to firm up, and the kisses won’t stick as well, potentially cracking the cookies.
- Cool on Baking Sheet: Let the cookies with their chocolate kisses cool on the baking sheet for about 5 minutes. This initial cooling period allows the cookies to set up a bit more and prevents them from breaking when you transfer them. It also gives the chocolate a moment to slightly firm up without fully hardening.
- Roll in Powdered Sugar: While the cookies are still warm (but not so hot that they burn your fingers or completely melt the chocolate kiss), carefully transfer them to a small bowl filled with powdered sugar. Gently roll each cookie in the powdered sugar, ensuring it gets a nice, even coating on all sides. This sweet, snowy coating is not only beautiful but also adds another layer of sweetness and texture, contrasting beautifully with the rich chocolate and mint.
- Cool Completely: Transfer the powdered sugar-coated cookies to a wire rack to cool completely. As they cool, the chocolate will fully set, and the powdered sugar coating will adhere beautifully. Resist the urge to eat them all immediately! Allowing them to cool completely enhances their texture and flavor.
- Second Powdered Sugar Coating (Optional, but recommended): For an extra-beautiful, truly snowy look that lasts, I like to roll the cookies in powdered sugar a second time once they have completely cooled. This helps to create a more robust coating that won’t absorb into the cookie as much over time, giving them that classic “snowball” appearance.
Tips for Perfect Mint Kiss Cookies:
Achieving cookie perfection is all about attention to detail. Here are some of my top tips to ensure your Mint Kiss Cookies turn out absolutely irresistible every time.
- Don’t Overmix the Dough: I can’t stress this enough! Overmixing, especially after adding the flour, develops gluten, which can make your cookies tough. Mix just until no streaks of dry flour remain. A good rule of thumb is to stop mixing as soon as everything looks combined.
- Chill Your Dough Thoroughly: This step is non-negotiable for tender, perfectly shaped cookies. Chilling the dough helps the butter solidify, which prevents the cookies from spreading too much in the oven. It also allows the flavors to meld, resulting in a more delicious cookie. If your kitchen is warm, you might even consider chilling the shaped cookie balls for 10-15 minutes before baking.
- Use Room Temperature Ingredients: Ensure your butter and egg are at room temperature. This allows them to cream together properly, creating an emulsified mixture that traps air, leading to a lighter, fluffier cookie. Cold ingredients don’t incorporate as well and can result in a lumpy, less uniform dough.
- Precision in Measuring: Baking is a science, so precise measurements are key. Especially with flour, it’s best to spoon it into your measuring cup and then level it off with a straight edge rather than scooping directly from the bag (which can compact the flour and lead to using too much). Using a kitchen scale for flour is even better for accuracy.
- Fresh Baking Powder: Baking powder loses its potency over time. Always check the expiration date, and if you’re unsure, you can test it by adding a teaspoon to a small bowl of hot water. If it fizzes vigorously, it’s still good. A fresh leavening agent ensures your cookies get the proper lift and texture.
- Quality Peppermint Extract: The flavor of your cookies largely depends on the quality of your peppermint extract. Opt for pure peppermint extract over artificial mint flavorings for the best, most authentic taste.
- Timing the Hershey’s Kisses: This is probably the trickiest part. Press the kisses onto the cookies immediately after they come out of the oven. If you wait too long, the cookies will set, and the kisses won’t adhere properly, potentially cracking the cookie when you try to insert them. If they are too hot, the chocolate can melt too much. You want a gentle melt that just fuses the kiss to the cookie.
- Don’t Forget the Double Roll: For that truly beautiful, snowy finish that lasts, give your cookies a second roll in powdered sugar once they’ve completely cooled. The first roll adheres to the warm cookie, but some of it gets absorbed. The second roll provides a fresh, bright white layer that really makes them pop.
- Storage: Store your Mint Kiss Cookies in an airtight container at room temperature for up to 5-7 days. If stacking, you might want to place small pieces of parchment paper between layers to prevent the powdered sugar from transferring or the kisses from sticking together.
- Freezing Dough or Baked Cookies:
- Dough: You can prepare the dough, form it into balls, and freeze them on a baking sheet until solid. Then transfer to a freezer-safe bag for up to 3 months. When ready to bake, place frozen dough balls on a baking sheet and bake for a few extra minutes (about 12-14 minutes total).
- Baked Cookies: Baked and cooled cookies (without the powdered sugar coating) can be frozen in an airtight container for up to 3 months. Thaw at room temperature and then roll in powdered sugar before serving.
Troubleshooting Common Issues:
Even experienced bakers run into little hiccups. Here are some common problems you might encounter and how to fix them, or what might have caused them.
- Cookies Spreading Too Much:
- Cause: This is usually due to butter being too soft or melted, insufficient chilling time for the dough, or too much leavening agent (baking powder).
- Fix: Ensure butter is only softened, not melted. Always chill the dough for at least 30 minutes, or longer if your kitchen is warm. Make sure your oven temperature is accurate (an oven thermometer can be very helpful here, as some ovens run hot or cold).
- Cookies Are Too Hard/Dry:
- Cause: Most often, this is a sign of overbaking or overmixing the dough.
- Fix: Keep a close eye on your baking time. These cookies should look just set at the edges with slightly soft centers. Remove them promptly. Also, remember the golden rule: mix the dough only until just combined after adding flour.
- Hershey’s Kisses Melt Completely:
- Cause: The cookies were too hot when the kisses were added, or the kisses were left on the hot baking sheet for too long.
- Fix: While you need to add the kisses immediately, be sure to transfer the cookies to a wire rack after just 5 minutes on the baking sheet. If your cookies are coming out exceptionally hot, you might wait an extra 30 seconds before adding the kisses. Some types of Kisses (like certain limited editions) might also melt faster.
- Dough is Too Sticky to Handle:
- Cause: Not enough flour (imprecise measuring) or the dough hasn’t been chilled sufficiently.
- Fix: Return the dough to the refrigerator for another 30 minutes to an hour. If it’s still too sticky, you can try adding a tablespoon or two of flour, but be very cautious not to add too much, as this will make the cookies tough. Ensure you are accurately measuring your flour by spooning it into the cup and leveling it.
- Powdered Sugar Disappears/Absorbs:
- Cause: This happens if the cookies are too warm when rolled, or if there’s too much moisture in the air.
- Fix: While you do want to roll them warm initially, make sure they’ve cooled enough not to be steaming. The trick of the double roll (once warm, once completely cool) effectively combats this, giving you a lasting, beautiful coating.
Conclusion:
And there you have it, my friends! We’ve journeyed through the delightful process of creating a batch of cookies that are truly something special. If there’s one recipe I’d implore you to try, it’s this one. It’s more than just a cookie; it’s a moment of pure, unadulterated bliss, a tiny package of joy waiting to unfold in your mouth. The combination of the refreshingly cool mint and the rich, decadent chocolate is simply unbeatable, a classic pairing elevated to new heights with that iconic chocolate kiss nestled right in the center.
Why are these Mint Kiss Cookies an absolute must-try for your baking repertoire? First and foremost, it’s the unparalleled flavor profile. Imagine a soft, slightly chewy cookie that melts in your mouth, carrying a vibrant whisper of mint that perfectly balances the deep cocoa notes. Then, just when you think it couldn’t get any better, you bite into that luscious, melty chocolate kiss, creating an explosion of texture and taste that will leave you reaching for another, and another! They are incredibly addictive, yet surprisingly light, making them perfect for any occasion – from a casual afternoon pick-me-up to a show-stopping dessert at your next dinner party.
Beyond the incredible taste, these cookies offer a wonderful baking experience. The process is straightforward and enjoyable, making them accessible even for novice bakers, while still offering enough charm to captivate seasoned pros. There’s a particular satisfaction in rolling each dough ball, pressing in that iconic chocolate kiss, and watching them transform in the oven into golden-edged, perfectly domed masterpieces. The aroma alone will fill your kitchen with an intoxicating fragrance, a promise of the deliciousness to come. They’re also visually stunning, with their subtle green hue and the prominent chocolate kiss, making them a fantastic addition to any cookie platter or holiday spread. Seriously, prepare for compliments!
Elevate Your Cookie Experience: Serving Suggestions & Creative Variations
Once your batch of these incredible cookies is baked and cooled (if you can wait that long!), the serving possibilities are endless. They are absolutely divine on their own, perhaps with a tall glass of cold milk, a steaming mug of coffee, or a refreshing cup of tea. For a truly decadent treat, try them slightly warmed, allowing that chocolate kiss to become even gooier and more irresistible. They make fantastic edible gifts, packaged in pretty boxes or bags for friends, family, or neighbors. Trust me, anyone who receives a gift of these cookies will be eternally grateful!
But why stop there? While the classic recipe is pure perfection, don’t hesitate to experiment and make these cookies uniquely yours. Here are a few ideas to get your creative juices flowing:
- Different Kisses: While a classic Hershey’s Kiss is ideal, consider using other varieties! Caramel Kisses would add a wonderful chewy sweetness, while cherry-filled Kisses could introduce a fruity tang. Dark chocolate Kisses would intensify the chocolate flavor, perfect for true cocoa lovers.
- Extract Experiments: If you’re feeling adventurous, a tiny drop of almond extract alongside the mint could add an intriguing layer of flavor. Or, if you prefer a sharper mint, you could opt for peppermint extract instead of spearmint. Just remember, a little goes a long way with extracts!
- Decorative Touches: For extra flair, once the cookies are baked and the chocolate kisses are soft, you could gently press some festive sprinkles onto the still-soft chocolate. A drizzle of melted white chocolate or even more melted dark chocolate over the cooled cookies would also add an elegant touch.
- Gluten-Free & Dairy-Free: With a few mindful substitutions, these cookies can often be adapted for various dietary needs. For gluten-free, explore high-quality gluten-free all-purpose flour blends. For dairy-free, use a good plant-based butter alternative and dairy-free chocolate kisses (if available, or simply use dairy-free chocolate chunks pressed into the warm cookies). Always ensure all ingredients fit your specific dietary requirements.
My hope is that you feel inspired to head into your kitchen and whip up a batch of these glorious cookies. There’s something truly magical about baking from scratch, about filling your home with wonderful aromas and creating something delicious with your own hands. So, go on, give these Mint Kiss Cookies a try! I promise, you won’t regret it. Once you’ve experienced the joy of baking and tasting them, I would absolutely love to hear from you. Please, share your experience in the comments below, tag me on social media with your beautiful creations, or simply tell a friend about your new favorite cookie. Your feedback and stories truly make my day! Happy baking, and enjoy every single delightful bite!
Frequently Asked Questions (FAQs)
Q: How should I store these Mint Kiss Cookies to keep them fresh?
A: To keep your cookies wonderfully fresh, store them in an airtight container at room temperature for up to 3-5 days. If you want to keep them longer, you can store them in the refrigerator for up to a week, just be sure to let them come to room temperature before serving for the best texture and flavor.
Q: Can I prepare the cookie dough ahead of time?
A: Absolutely! Preparing the dough in advance is a great time-saver. You can make the dough, form it into a disk, wrap it tightly in plastic wrap, and refrigerate it for up to 2-3 days. When you’re ready to bake, let the dough sit at room temperature for about 15-20 minutes to soften slightly before rolling and baking as directed. You can also roll the dough balls and press the kisses into them, then chill them before baking.
Q: Are these cookies suitable for freezing?
A: Yes, these cookies freeze beautifully! You have a couple of options:
- Baked Cookies: Allow baked cookies to cool completely. Place them in a single layer on a baking sheet and freeze until solid. Once frozen, transfer them to a freezer-safe airtight container or bag, separated by parchment paper, for up to 2-3 months. Thaw at room temperature.
- Unbaked Dough Balls: Form the dough into balls with the chocolate kiss pressed in. Place them on a baking sheet and freeze until solid. Then transfer to a freezer-safe bag. When ready to bake, bake directly from frozen, adding a minute or two to the baking time.
Q: What if I don’t have Hershey’s Kisses? Can I use other chocolate?
A: While the Hershey’s Kiss gives these cookies their signature look and melty center, you can certainly adapt! If you don’t have kisses, you can press a small square of your favorite chocolate bar (milk, dark, or semi-sweet) into the warm cookies as soon as they come out of the oven. Alternatively, you could use chocolate chunks or even mini chocolate chips mixed into the dough itself, though you’ll miss that distinct “kiss” effect.
Q: Can I adjust the intensity of the mint flavor?
A: Yes, you absolutely can! The recipe provides a good starting point for a balanced mint flavor. If you prefer a stronger mint, you can add an extra 1/8 to 1/4 teaspoon of mint extract. Conversely, if you prefer a very subtle hint of mint, reduce the extract by about 1/4 teaspoon. Always taste a tiny bit of the dough (before adding eggs, for safety, or a small baked test cookie) to ensure it’s to your liking before baking the whole batch.
Q: What makes these cookies different from other mint chocolate chip cookies?
A: The unique characteristic of these cookies lies in the “kiss” – the whole chocolate Hershey’s Kiss pressed into the center of each cookie right after baking. While mint chocolate chip cookies have chocolate distributed throughout, Mint Kiss Cookies offer a delightful surprise of a warm, melty, gooey chocolate center with every bite. This creates a distinct texture contrast and an elevated presentation that truly sets them apart!
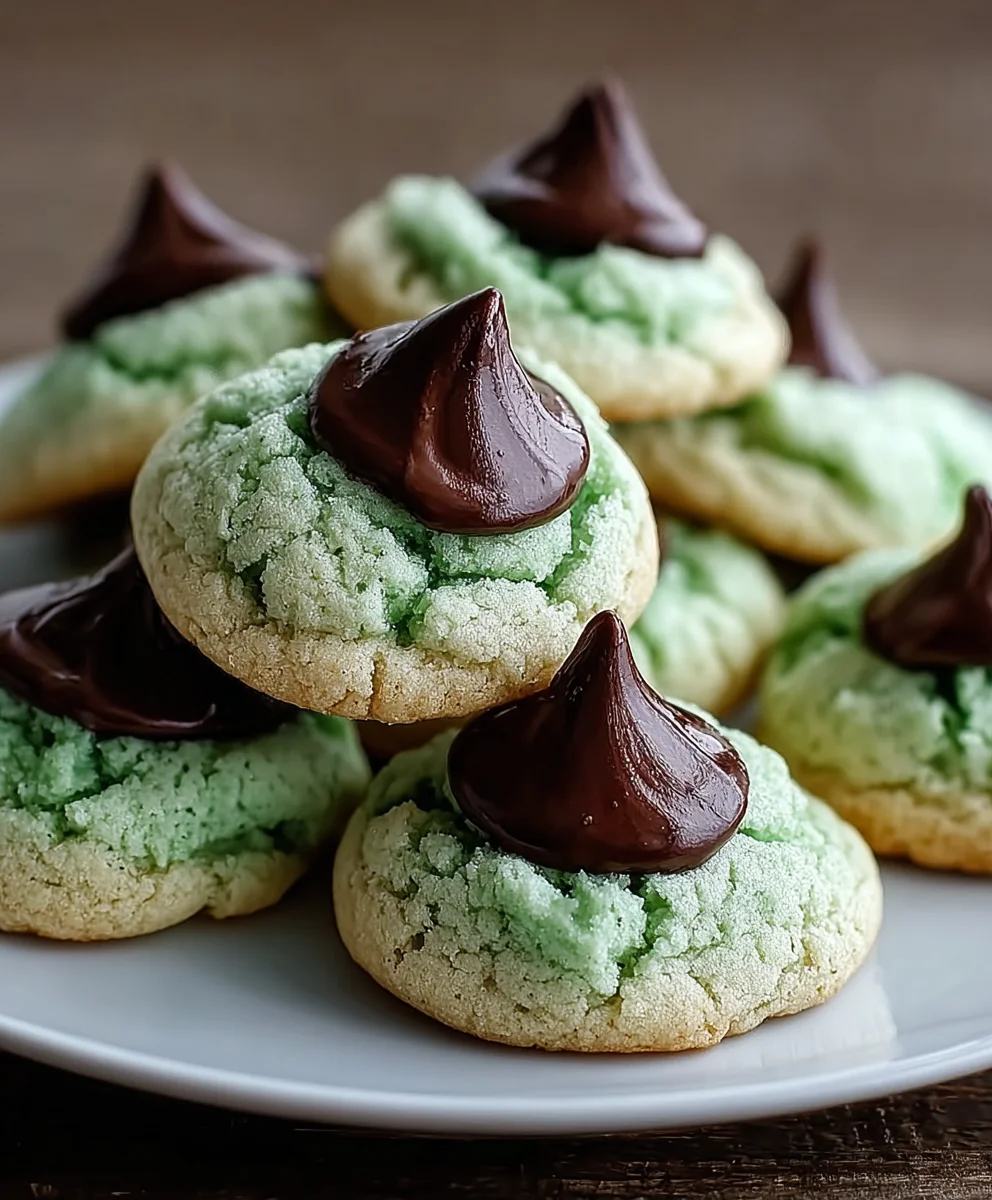
Irresistible Mint Kiss Cookies: Your New Favorite Dessert!
Deliciously soft and chewy mint cookies, colored green and topped with a creamy Hershey’s Kiss, then rolled in powdered sugar for a festive, irresistible treat.
Ingredients
-
2 ½ cups (300g) all-purpose flour, sifted
-
1 teaspoon baking powder
-
½ teaspoon salt
-
1 cup (226g) unsalted butter, softened
-
1 ½ cups (300g) granulated sugar
-
1 large egg
-
1 ½ teaspoons pure peppermint extract
-
4-6 drops green gel food coloring (optional)
-
1 cup (120g) powdered sugar, for rolling
-
48 Hershey’s Kisses, unwrapped
Instructions
-
Step 1
Preheat oven to 350°F (175°C). Line two large baking sheets with parchment paper. Unwrap all 48 Hershey’s Kisses and set aside. Ensure butter is softened to room temperature. -
Step 2
In a medium bowl, whisk together the sifted all-purpose flour, baking powder, and salt. Set aside. -
Step 3
In a stand mixer (or with a hand mixer), cream softened unsalted butter and granulated sugar on medium speed for 2-3 minutes until light, fluffy, and pale. Scrape down the bowl. -
Step 4
Add the large egg and pure peppermint extract to the creamed mixture. Beat on medium speed for 1 minute until just combined. If using, add 4-6 drops of green gel food coloring and mix on low until evenly distributed. -
Step 5
With the mixer on low speed, gradually add the flour mixture to the wet ingredients, a third at a time. Mix only until no dry streaks remain; do not overmix. -
Step 6
Cover the bowl with plastic wrap and refrigerate the dough for at least 30 minutes, or up to 2 hours. -
Step 7
Remove chilled dough. Using a 1-tablespoon cookie scoop, roll dough into smooth balls and place 2 inches apart on prepared baking sheets. Bake for 8-10 minutes, or until edges are just set and very lightly golden (centers may still be soft). -
Step 8
Immediately upon removing from the oven, press one unwrapped Hershey’s Kiss firmly into the center of each warm cookie. -
Step 9
Let cookies cool on the baking sheet for 5 minutes. While still warm, carefully transfer to a bowl of powdered sugar and gently roll to coat all sides. Transfer to a wire rack to cool completely. -
Step 10
For a truly snowy finish, re-roll completely cooled cookies in powdered sugar a second time before serving or storing.
Important Information
Nutrition Facts (Per Serving)
It is important to consider this information as approximate and not to use it as definitive health advice.
Allergy Information
Please check ingredients for potential allergens and consult a health professional if in doubt.

Leave a Comment