
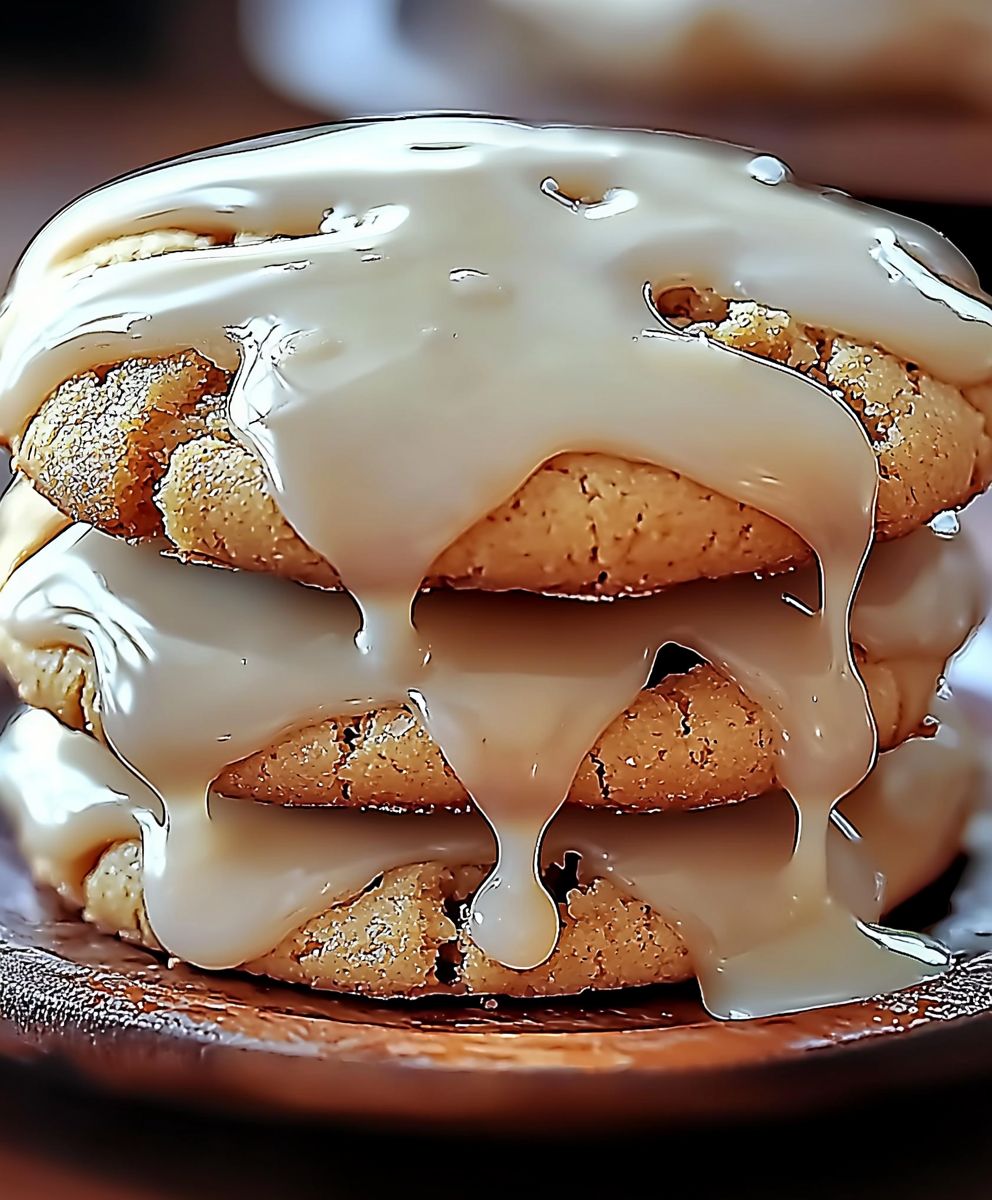
Maple Cookies Icing: the secret to transforming ordinary cookies into extraordinary treats! Have you ever bitten into a cookie so perfectly glazed, so irresistibly sweet, that it stopped you in your tracks? That, my friends, is the magic of maple icing. This isn’t just any frosting; it’s a velvety smooth, intensely flavorful glaze that elevates simple cookies to bakery-worthy status.
Maple, with its rich and distinctive flavor, has been a beloved ingredient in North American cuisine for centuries. From the indigenous peoples who first tapped maple trees to the modern-day pancake enthusiast, the allure of maple syrup is undeniable. And when that luscious syrup is transformed into a delicate maple cookies icing, the result is pure bliss.
People adore maple icing for its unique taste a warm, caramel-like sweetness with a hint of earthy depth. It’s not cloyingly sweet like some frostings; instead, it offers a sophisticated flavor profile that complements a wide variety of cookies. Plus, it’s incredibly easy to make! With just a few simple ingredients and minimal effort, you can whip up a batch of this delectable glaze and take your cookie game to the next level. Whether you’re baking for a holiday gathering, a special occasion, or simply a sweet treat for yourself, maple icing is guaranteed to impress.

Ingredients:
- For the Maple Cookies:
- 3 cups all-purpose flour, plus more for dusting
- 1 teaspoon baking powder
- 1/2 teaspoon baking soda
- 1/4 teaspoon salt
- 1 cup (2 sticks) unsalted butter, softened
- 1 cup granulated sugar
- 1/2 cup packed light brown sugar
- 2 large eggs
- 2 teaspoons pure maple extract
- 1/4 cup milk
- For the Maple Icing:
- 4 cups powdered sugar
- 1/2 cup (1 stick) unsalted butter, softened
- 1/4 cup pure maple syrup
- 2-4 tablespoons milk, or more as needed
- 1 teaspoon pure vanilla extract
- Pinch of salt
Preparing the Maple Cookie Dough
- Combine Dry Ingredients: In a medium bowl, whisk together the flour, baking powder, baking soda, and salt. This ensures that the leavening agents are evenly distributed throughout the dough, resulting in a more consistent bake. Set aside for now.
- Cream Butter and Sugars: In a large bowl (or the bowl of a stand mixer), cream together the softened butter, granulated sugar, and brown sugar until light and fluffy. This process incorporates air into the butter, which contributes to the cookies’ tender texture. I usually cream them for about 3-5 minutes on medium speed. You’ll know it’s ready when the mixture is noticeably lighter in color and has a fluffy consistency.
- Incorporate Eggs and Maple Extract: Beat in the eggs one at a time, making sure each egg is fully incorporated before adding the next. Then, stir in the maple extract. The maple extract is crucial for that signature maple flavor, so don’t skimp on it! I always use pure maple extract for the best results.
- Alternate Wet and Dry Ingredients: Gradually add the dry ingredients to the wet ingredients, alternating with the milk, beginning and ending with the dry ingredients. This method prevents overmixing, which can lead to tough cookies. Start by adding about one-third of the dry ingredients, then half of the milk, then another third of the dry ingredients, the remaining milk, and finally the last of the dry ingredients. Mix until just combined. Be careful not to overmix!
- Chill the Dough: Wrap the dough in plastic wrap and chill in the refrigerator for at least 2 hours, or preferably overnight. Chilling the dough allows the gluten to relax, which results in a more tender cookie. It also prevents the cookies from spreading too much during baking. I find that overnight chilling yields the best results, but 2 hours will do in a pinch.
Baking the Maple Cookies
- Preheat Oven and Prepare Baking Sheets: Preheat your oven to 375°F (190°C). Line baking sheets with parchment paper or silicone baking mats. Parchment paper prevents the cookies from sticking and makes cleanup a breeze.
- Roll Out the Dough: On a lightly floured surface, roll out the chilled dough to about 1/4-inch thickness. If the dough is sticking, add a little more flour to your rolling surface.
- Cut Out Cookies: Use cookie cutters to cut out your desired shapes. I love using maple leaf cookie cutters for these cookies, but any shape will work.
- Place Cookies on Baking Sheets: Place the cut-out cookies onto the prepared baking sheets, leaving about 1 inch of space between each cookie. This allows for even baking and prevents the cookies from sticking together.
- Bake: Bake for 8-10 minutes, or until the edges are lightly golden brown. Keep a close eye on them, as they can burn easily. The baking time will vary depending on your oven, so start checking them at 8 minutes.
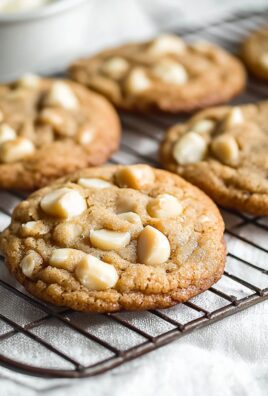
- Cool: Let the cookies cool on the baking sheets for a few minutes before transferring them to a wire rack to cool completely. This prevents them from breaking while they’re still warm and soft.
Preparing the Maple Icing
- Cream Butter: In a large bowl (or the bowl of a stand mixer), cream the softened butter until smooth and fluffy. This is similar to the cookie dough process, and it ensures that the icing is light and airy.
- Add Powdered Sugar: Gradually add the powdered sugar, beating on low speed until combined. Adding the powdered sugar gradually prevents it from creating a cloud of dust in your kitchen.
- Incorporate Maple Syrup, Vanilla Extract, and Salt: Stir in the maple syrup, vanilla extract, and salt. The maple syrup is the star of the show here, so use a good quality pure maple syrup for the best flavor. The vanilla extract enhances the maple flavor, and the salt balances the sweetness.
- Adjust Consistency with Milk: Add milk, one tablespoon at a time, until the icing reaches your desired consistency. You want the icing to be thick enough to hold its shape but thin enough to spread easily. I usually start with 2 tablespoons and add more as needed.
Icing the Maple Cookies
- Let Cookies Cool Completely: Make sure the cookies are completely cool before icing them. If the cookies are still warm, the icing will melt and run off.
- Ice the Cookies: Spread the maple icing evenly over the cooled cookies. You can use a knife, a spatula, or a piping bag to ice the cookies. If you’re using a piping bag, make sure the icing is smooth and free of lumps.
- Decorate (Optional): If desired, decorate the iced cookies with sprinkles, chopped nuts, or a drizzle of melted chocolate. Get creative and have fun with it!
- Let Icing Set: Allow the icing to set completely before serving or storing the cookies. This usually takes about 30 minutes to an hour.
Tips for Perfect Maple Cookies:
- Use High-Quality Maple Extract and Syrup: The quality of your maple extract and syrup will greatly impact the flavor of the cookies. Opt for pure maple extract and 100% pure maple syrup for the best results.
- Don’t Overmix the Dough: Overmixing the dough can lead to tough cookies. Mix until just combined.
- Chill the Dough: Chilling the dough is crucial for preventing the cookies from spreading too much during baking.
- Bake Evenly: Rotate the baking sheets halfway through baking to ensure even baking.
- Cool Completely: Let the cookies cool completely before icing them to prevent the icing from melting.
Storage Instructions:
Store the iced maple cookies in an airtight container at room temperature for up to 3-5 days. You can also freeze the cookies for longer storage. To freeze, place the cookies in a single layer on a baking sheet and freeze until solid. Then, transfer the frozen cookies to an airtight container or freezer bag. They can be stored in the freezer for up to 2-3 months. Thaw the cookies at room temperature before serving.
Conclusion:
And there you have it! I truly believe this recipe for maple cookies with icing is a must-try for anyone who loves a touch of sweetness and warmth in their baked goods. The combination of the subtly spiced cookie and the rich, smooth maple cookies icing is simply divine. It’s the kind of treat that makes you want to curl up with a good book and a warm drink, or share with loved ones on a cozy afternoon.
But why is this recipe so special? It’s more than just the delicious flavor. It’s the simplicity of the ingredients and the straightforward instructions that make it accessible to bakers of all skill levels. You don’t need to be a professional pastry chef to whip up a batch of these beauties. Plus, the aroma that fills your kitchen while they’re baking is pure bliss a promise of the delightful treat to come.
Beyond the basic recipe, there’s so much room for personalization! For a festive touch, consider adding a sprinkle of chopped pecans or walnuts to the icing before it sets. Or, if you’re feeling adventurous, try incorporating a hint of cinnamon or nutmeg into the cookie dough itself. You could even experiment with different types of maple syrup a darker, more robust syrup will give the icing a deeper, more intense flavor.
Serving suggestions? Oh, the possibilities are endless! These cookies are perfect on their own, of course, but they also pair beautifully with a cup of hot coffee, tea, or even a glass of cold milk. They make a wonderful addition to a holiday cookie platter, a thoughtful homemade gift, or a simple dessert after a comforting meal. Imagine serving them warm, fresh from the oven, with a scoop of vanilla ice cream pure heaven!
And don’t forget about variations! If you’re looking for a slightly healthier option, you could substitute some of the all-purpose flour with whole wheat flour. This will give the cookies a slightly nuttier flavor and a more substantial texture. You could also reduce the amount of sugar in the dough or icing, or use a sugar substitute. Just be sure to adjust the other ingredients accordingly to maintain the proper consistency.
I’m so excited for you to try this recipe and experience the joy of baking these delicious maple cookies with icing for yourself. I’ve poured my heart into perfecting this recipe, and I truly believe it’s a winner.
So, what are you waiting for? Gather your ingredients, preheat your oven, and get ready to create some magic in your kitchen. I promise you won’t be disappointed.
And most importantly, I want to hear about your experience! Did you make any modifications to the recipe? Did you try any of the serving suggestions? What did your family and friends think? Share your photos and stories with me in the comments below. I can’t wait to see your creations and hear all about your baking adventures. Happy baking! I am confident that you will love this maple cookies icing recipe.
Maple Cookies Icing: The Ultimate Guide to Deliciously Decorated Treats
Soft, tender maple cookies with a luscious maple icing. Bursting with maple flavor, perfect for any occasion!
Ingredients
- 3 cups all-purpose flour, plus more for dusting
- 1 teaspoon baking powder
- 1/2 teaspoon baking soda
- 1/4 teaspoon salt
- 1 cup (2 sticks) unsalted butter, softened
- 1 cup granulated sugar
- 1/2 cup packed light brown sugar
- 2 large eggs
- 2 teaspoons pure maple extract
- 1/4 cup milk
- 4 cups powdered sugar
- 1/2 cup (1 stick) unsalted butter, softened
- 1/4 cup pure maple syrup
- 2-4 tablespoons milk, or more as needed
- 1 teaspoon pure vanilla extract
- Pinch of salt
Instructions
- Combine Dry Ingredients: In a medium bowl, whisk together the flour, baking powder, baking soda, and salt. Set aside.
- Cream Butter and Sugars: In a large bowl (or the bowl of a stand mixer), cream together the softened butter, granulated sugar, and brown sugar until light and fluffy (about 3-5 minutes on medium speed).
- Incorporate Eggs and Maple Extract: Beat in the eggs one at a time, making sure each egg is fully incorporated before adding the next. Then, stir in the maple extract.
- Alternate Wet and Dry Ingredients: Gradually add the dry ingredients to the wet ingredients, alternating with the milk, beginning and ending with the dry ingredients. Mix until just combined.
- Chill the Dough: Wrap the dough in plastic wrap and chill in the refrigerator for at least 2 hours, or preferably overnight.
- Preheat Oven and Prepare Baking Sheets: Preheat your oven to 375°F (190°C). Line baking sheets with parchment paper or silicone baking mats.
- Roll Out the Dough: On a lightly floured surface, roll out the chilled dough to about 1/4-inch thickness.
- Cut Out Cookies: Use cookie cutters to cut out your desired shapes.
- Place Cookies on Baking Sheets: Place the cut-out cookies onto the prepared baking sheets, leaving about 1 inch of space between each cookie.
- Bake: Bake for 8-10 minutes, or until the edges are lightly golden brown.
- Cool: Let the cookies cool on the baking sheets for a few minutes before transferring them to a wire rack to cool completely.
- Cream Butter: In a large bowl (or the bowl of a stand mixer), cream the softened butter until smooth and fluffy.
- Add Powdered Sugar: Gradually add the powdered sugar, beating on low speed until combined.
- Incorporate Maple Syrup, Vanilla Extract, and Salt: Stir in the maple syrup, vanilla extract, and salt.
- Adjust Consistency with Milk: Add milk, one tablespoon at a time, until the icing reaches your desired consistency.
- Let Cookies Cool Completely: Make sure the cookies are completely cool before icing them.
- Ice the Cookies: Spread the maple icing evenly over the cooled cookies.
- Decorate (Optional): If desired, decorate the iced cookies with sprinkles, chopped nuts, or a drizzle of melted chocolate.
- Let Icing Set: Allow the icing to set completely before serving or storing the cookies.
Notes
- Use high-quality maple extract and syrup for the best flavor.
- Don’t overmix the dough.
- Chilling the dough is crucial for preventing the cookies from spreading too much during baking.
- Rotate the baking sheets halfway through baking to ensure even baking.
- Let the cookies cool completely before icing them to prevent the icing from melting.
- Store the iced maple cookies in an airtight container at room temperature for up to 3-5 days.
- You can also freeze the cookies for longer storage. To freeze, place the cookies in a single layer on a baking sheet and freeze until solid. Then, transfer the frozen cookies to an airtight container or freezer bag. They can be stored in the freezer for up to 2-3 months. Thaw the cookies at room temperature before serving.


Leave a Comment