
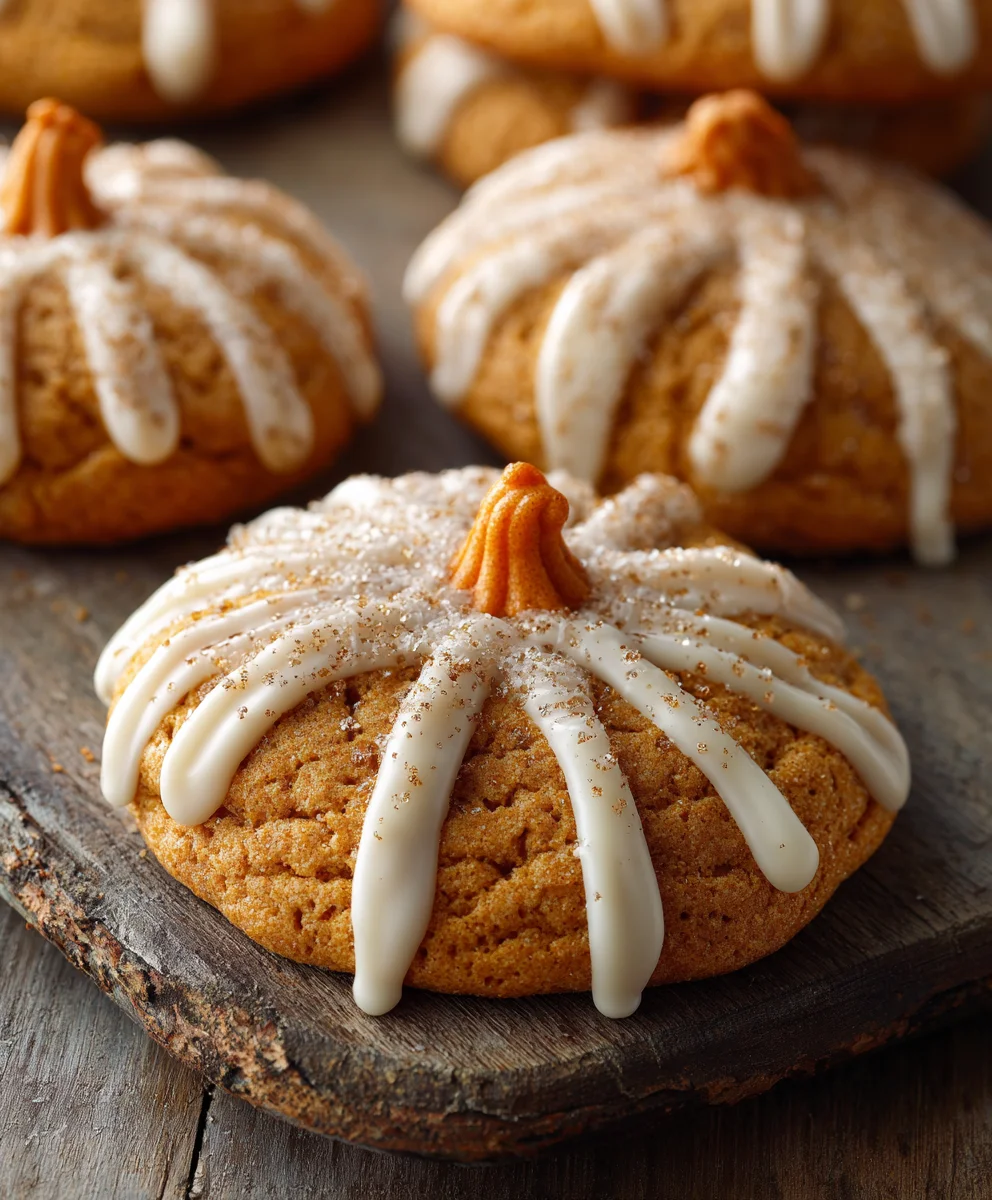
Pumpkin Cookie Decorating Ideas are more than just a seasonal craft; they are an invitation to infuse your autumn celebrations with warmth, creativity, and a touch of edible magic. As the leaves turn golden and the air crisps, there’s a unique joy in baking up a batch of soft, spiced pumpkin cookies, their aroma filling your home with quintessential fall comfort. But the real fun, I find, begins once those delicious treats have cooled. It’s then that the blank canvas awaits, ready for your artistic touch, transforming simple dough into delightful edible art.
Why We Adore Decorated Pumpkin Cookies
Historically, pumpkin itself holds a special place in harvest festivities, symbolizing abundance and the bounty of the season. While pumpkin cookies might be a more modern adaptation, they beautifully carry forward this tradition of celebratory baking, becoming a beloved staple for Halloween parties, Thanksgiving gatherings, or simply a cozy afternoon treat. What makes these decorated delights so universally adored isn’t just their irresistible blend of sweet pumpkin and aromatic spices, but the sheer joy and personal expression they offer. Exploring various Pumpkin Cookie Decorating Ideas transforms a simple cookie into a personalized masterpiece, perfect for sharing, gifting, or simply enjoying with a cup of cider. I truly believe that the act of decorating is as satisfying as the first bite, adding a unique, personal flourish to every occasion.

Ingredients:
-
For the Spiced Pumpkin Cookies:
- 2 ½ cups (300g) all-purpose flour: I always make sure to properly measure my flour by spooning it into a measuring cup and then leveling it off with a straight edge. This prevents adding too much flour, which can lead to dry, crumbly cookies.
- 1 teaspoon baking powder: Make sure yours is fresh for the best lift!
- ½ teaspoon fine sea salt: Just a touch to balance out the sweetness and enhance all those lovely spice flavors.
- 1 teaspoon ground cinnamon: For that classic warming spice note.
- ½ teaspoon ground ginger: Adds a lovely subtle kick.
- ¼ teaspoon ground nutmeg: Essential for a well-rounded pumpkin spice flavor.
- ⅛ teaspoon ground cloves: A little goes a long way to deepen the spice profile.
- 1 cup (226g) unsalted butter: Softened to room temperature. This is crucial for properly creaming with the sugar, creating a light and airy base for our cookies. If your butter is too cold, it won’t cream properly, and if it’s melted, it’ll make your dough greasy.
- 1 cup (200g) granulated sugar: Fine granulated sugar works best here for a smooth cookie texture.
- ½ cup (120g) canned pumpkin puree: IMPORTANT: Make sure this is pure pumpkin puree, not pumpkin pie filling. Pie filling has added spices and sweeteners that we don’t want in this recipe, as we’re adding our own blend! Drain any excess liquid if your puree seems watery.
- 1 large egg: Also at room temperature. A room temperature egg emulsifies better with the butter and sugar mixture, leading to a more consistent dough.
- 1 teaspoon pure vanilla extract: Use a good quality one; it truly makes a difference in the overall flavor of your cookies.
-
For the Royal Icing:
- 4 tablespoons meringue powder: This is a key ingredient for royal icing, giving it stability and a beautiful hard finish. You can find it in the baking aisle of most craft stores or specialty grocery stores.
- ½ cup (120ml) warm water: Helps to dissolve the meringue powder smoothly.
- 4 cups (480g) powdered sugar: Also known as confectioners’ sugar. It’s absolutely essential to sift this sugar to prevent any lumps in your icing, which can clog your piping tips!
- 1 teaspoon clear vanilla extract (or almond extract): I prefer clear extracts here so they don’t tint my bright white or colored icing.
- Gel food coloring: A variety of colors for your Pumpkin Cookie Decorating Ideas! I recommend orange, green, brown, and a tiny bit of black for details. Gel colors are highly concentrated and won’t thin your icing as much as liquid colors.
Preparing the Cookie Dough
- Whisk Dry Ingredients: In a medium bowl, I start by whisking together my all-purpose flour, baking powder, fine sea salt, ground cinnamon, ground ginger, ground nutmeg, and ground cloves. I make sure to whisk them really well to ensure all the spices and leavening agents are evenly distributed throughout the flour. This means every cookie will have that perfect, consistent flavor. Set this aside for a moment.
- Cream Butter and Sugar: In a large mixing bowl, using an electric mixer (either a stand mixer with a paddle attachment or a hand mixer), I cream together the softened unsalted butter and granulated sugar on medium speed. I let this go for about 2-3 minutes, until the mixture is light, fluffy, and pale in color. This process incorporates air into the butter, which will give our cookies a wonderful tender texture. Don’t rush this step; it’s foundational! I often scrape down the sides of the bowl once or twice during this process to ensure everything is evenly combined.
- Add Wet Ingredients: Next, I beat in the pure pumpkin puree, large room temperature egg, and pure vanilla extract. I mix on medium-low speed until everything is just combined. It’s important not to overmix at this stage. The mixture might look a little curdled at first, but don’t worry, it will come together as you continue to beat. I always make sure to scrape down the bowl again after adding the wet ingredients to ensure no unmixed pockets remain.
- Combine Wet and Dry: Now, it’s time to slowly add the dry ingredient mixture to the wet ingredients. I do this in two or three additions, mixing on low speed after each addition until just combined. The key here is not to overmix the dough once the flour is added. Overmixing can develop the gluten too much, leading to tough cookies. As soon as you no longer see streaks of dry flour, stop mixing. The dough will be soft and slightly sticky, which is perfectly normal for a pumpkin cookie dough.
- Divide and Chill the Dough: I divide the dough into two equal portions. Each portion, I shape into a flattened disk, about 1-inch thick. I then wrap each disk tightly in plastic wrap. Chilling the dough is an absolutely critical step for cut-out cookies! It allows the gluten to relax, prevents the cookies from spreading too much during baking, and makes the dough much easier to handle when rolling. I pop these disks into the refrigerator for at least 2 hours, but often I’ll chill them overnight. Don’t skip this step! It’s what gives us nice, crisp edges perfect for all our Pumpkin Cookie Decorating Ideas.
Chilling and Rolling the Dough
- Prepare Your Work Surface: Once the dough is thoroughly chilled, I lightly flour my work surface and my rolling pin. I find it helpful to roll the dough between two sheets of parchment paper or waxed paper. This prevents the dough from sticking to the counter or the rolling pin and also makes for easier cleanup.
- Roll the Dough: I take one disk of chilled dough (leaving the other in the fridge) and place it on my prepared surface. Using my rolling pin, I roll the dough out to about ¼-inch thick. Consistency in thickness is key here; if some parts are thicker than others, they will bake unevenly. Thicker cookies will be softer, while thinner ones will be crispier, and we want a uniform batch. I try to lift and rotate the dough occasionally if not using parchment to ensure it’s not sticking.
- Cut Out Shapes: Now for the fun part! I grab my favorite pumpkin-shaped cookie cutters. Dip the cookie cutter in a little flour before each cut to prevent sticking. Press straight down firmly and lift straight up. Avoid twisting the cutter, as this can distort the shape of the cookie. I try to place my cuts as close together as possible to minimize dough scraps, which will need to be re-rolled.
- Transfer to Baking Sheets: Carefully, using a thin spatula, I transfer the cut-out pumpkin shapes onto baking sheets lined with parchment paper or silicone baking mats. I leave about an inch or so between each cookie to allow for a little spread. If the dough has become too soft to handle, I’ll pop the cut-out shapes on the baking sheet into the freezer for 5-10 minutes before baking. This helps them hold their shape even better!
- Re-Roll Scraps: Gather any dough scraps, gently press them together into a new disk, and re-chill for about 15-20 minutes before re-rolling and cutting. This brief re-chill is important because the dough warms up as you handle it, and warm dough spreads more.
Baking the Cookies
- Preheat Oven: I preheat my oven to 350°F (175°C). It’s important to give your oven plenty of time to come to temperature and maintain it.
- Bake: I bake the cookies for 8-10 minutes. The baking time can vary slightly depending on your oven and the exact thickness of your cookies. I know they’re ready when the edges are set and just barely starting to turn a light golden brown. The centers should still look slightly soft. Do not overbake them! We want tender, not crunchy, cookies for decorating.
- Cool: Once baked, I immediately transfer the cookies from the hot baking sheet to a wire cooling rack using a spatula. This stops the cooking process and prevents them from becoming too crisp on the bottom. I let them cool completely on the wire rack. This is critical for decorating! If you try to ice warm cookies, the icing will melt and run. They need to be completely cool, usually at least an hour or two, or even overnight, before you even think about applying royal icing.
Preparing the Royal Icing
- Mix Meringue Powder and Water: In a large mixing bowl, I combine the meringue powder and warm water. I whisk them together well until the meringue powder is fully dissolved and slightly frothy. This usually takes about 1-2 minutes.
- Add Powdered Sugar: Gradually, I add the sifted powdered sugar to the meringue mixture. I do this in several additions, mixing on low speed to prevent a cloud of sugar from erupting in my kitchen!
- Beat to Stiff Peaks: Once all the sugar is incorporated, I increase the mixer speed to medium-high and beat for 5-7 minutes. I’m looking for the icing to become thick, glossy, and to form stiff peaks. When I lift the beater, the icing should hold its shape firmly. This is our base royal icing.
- Add Extract: Finally, I beat in the clear vanilla or almond extract. This adds a lovely flavor without affecting the color of the icing.
Coloring and Bagging the Icing
- Divide the Icing: I divide the prepared royal icing into several small bowls, one for each color I plan to use for my Pumpkin Cookie Decorating Ideas. I usually keep a significant portion white for general use and then color the rest.
- Color the Icing: Using gel food coloring, I carefully add color to each bowl, starting with a tiny amount and adding more until I achieve the desired shade. Remember, a little gel color goes a long way! I always mix thoroughly to ensure uniform color. For pumpkin cookies, I typically want a vibrant orange, a deep green for stems and leaves, a bit of brown, and sometimes black for facial features.
- Achieve Outline Consistency: For outlining cookies, I need a thicker consistency. This is usually the consistency I have directly after mixing, or I might add a tiny bit more sifted powdered sugar if it seems too thin. When I draw a line with a spoon through the icing, it should hold its shape for about 10-15 seconds before melting back into itself. This outline consistency should be thick enough to create a barrier that holds in the flood icing.
- Achieve Flood Consistency: For flooding the cookies (filling in the outlined areas), I need a thinner consistency. I achieve this by adding warm water, a tiny bit at a time (about ¼ teaspoon at a time), to the outline consistency icing. I stir gently after each addition and test the consistency. When I draw a line through the icing with a spoon, it should disappear and become smooth again within 5-10 seconds. This is often referred to as “5-second” or “10-second” icing. Too thin, and it will run off the cookie; too thick, and it won’t settle smoothly.
- Prepare Piping Bags: I transfer the different colored and consistency icings into separate piping bags fitted with small round piping tips (e.g., PME #1 or #2 for outlining, #2 or #3 for flooding) or simply cut a tiny snip off the end of the bag for flooding. I secure the end with a rubber band or bag tie to prevent the icing from drying out or oozing.
Pumpkin Cookie Decorating Ideas: Basic Techniques
Now that our cookies are baked and cooled, and our icing is ready, it’s time for the most creative part – bringing our pumpkin cookies to life! These are some fantastic Pumpkin Cookie Decorating Ideas to get you started.
-
Classic Outline and Flood Pumpkin:
This is the foundation for many Pumpkin Cookie Decorating Ideas. First, I use orange royal icing at outline consistency to carefully draw a border around the edge of a cooled pumpkin cookie. I try to make this line as smooth and even as possible. This creates a dam for the flood icing. Once the outline is complete, I immediately switch to orange royal icing at flood consistency. I pipe the flood icing into the outlined area, using a generous amount, and then gently spread it to the edges with a small spoon or a scribe tool. I usually work from the outside in. If there are any air bubbles, I pop them with my scribe tool. I let this base layer dry completely for at least 6-8 hours, or preferably overnight, before adding any further details. This ensures the colors don’t bleed into each other and the surface is firm.
-
Wet-on-Wet Swirls and Dots:
This is a super fun way to add immediate detail and is one of my favorite quick Pumpkin Cookie Decorating Ideas. While the flood icing (from the previous step) is still wet, I switch to a contrasting color – perhaps a darker orange, white, or even green. Using a small piping tip, I pipe dots or small concentric circles onto the wet flood icing. Then, immediately, using a scribe tool or a toothpick, I gently drag the tip through the dots or circles to create swirls, hearts, or marble effects. Because the flood layer is still wet, the piped details will sink into the base, creating a perfectly smooth, level surface when dry. For example, you could flood a pumpkin orange, then pipe a few green dots, and drag your scribe tool through them to create little leaf-like impressions directly on the pumpkin.
-
Simple Stems and Vines:
Once your pumpkin base layer is completely dry, you can add lovely dimensional details. Using green royal icing at outline consistency, I pipe a small stem at the top of the pumpkin. For simple vines, I pipe thin, delicate squiggles extending from the stem. You can also add small dots or simple leaf shapes. These details will sit on top of the dried flood layer, creating a nice textural contrast. This is a quick yet effective way to enhance your Pumpkin Cookie Decorating Ideas.
Advanced Pumpkin Cookie Decorating Ideas
Once you’ve mastered the basics, you can move on to more intricate and creative Pumpkin Cookie Decorating Ideas. These techniques will truly make your cookies stand out!
-
Creating Pumpkin Ribs (Dimensional Effect):
For a more realistic pumpkin look, I love to add “ribs” to my cookies. After the initial orange flood layer has completely dried, I switch to orange royal icing at a slightly thicker consistency than flood, but not quite as thick as outline (sometimes called a “20-second” consistency). With a small round tip, I pipe curved lines from the top of the pumpkin down to the bottom, following the natural curve of the cookie. These lines will be slightly raised, giving the illusion of the pumpkin’s segments. I sometimes use a darker orange for these lines to create more depth. This adds a wonderful, subtle texture that elevates the look of your Pumpkin Cookie Decorating Ideas significantly.
-
Jack-o’-Lantern Faces:
No collection of Pumpkin Cookie Decorating Ideas would be complete without a classic jack-o’-lantern! Once the base orange flood layer is completely dry, I use black royal icing at outline consistency (or a very fine-tipped edible marker for even more precision) to draw the eyes, nose, and mouth. For the eyes, I usually go for classic triangles, or perhaps some spooky ovals. For the nose, a small triangle or a dot. The mouth can be a jagged smile or a mischievous smirk. If using icing, I carefully pipe the outline and then immediately flood the small areas with black flood icing. Since these areas are small, they dry relatively quickly. If you want glowing eyes, you could flood the eyes with yellow or white first, let them dry, then pipe thin black outlines around them. This technique is fantastic for Halloween-themed Pumpkin Cookie Decorating Ideas.
-
Textured Pumpkins (Brush Embroidery):
For a truly elegant touch among your Pumpkin Cookie Decorating Ideas, try brush embroidery. After the base orange flood layer is completely dry, I use a slightly thinned outline consistency (maybe 15-second consistency) of orange or even white icing. I pipe a small section of an outline or a line, then immediately take a damp (but not wet) food-safe brush, and gently pull the wet icing inwards towards the center of the cookie. This creates a beautiful feathered, embroidered effect. I work in small sections, allowing each to set slightly before moving to the next. This can be used to create intricate patterns on your pumpkin or even to add a rustic texture around the edges. It’s a bit more time-consuming but yields stunning results!
-
Glitter and Sprinkles:
A simple yet effective way to add sparkle to your Pumpkin Cookie Decorating Ideas is by using edible glitter or sprinkles. While your flood icing is still wet (before it completely dries), I gently sprinkle edible glitter, sugar crystals, or tiny nonpareils over the surface. This creates a dazzling effect. For a more controlled application, I sometimes let the flood layer dry, then pipe specific details (like a swirl or a dot) with wet icing, and immediately sprinkle only on those wet areas. This allows for selective sparkle. Remember to use only edible glitter! This is especially popular for festive and whimsical Pumpkin Cookie Decorating Ideas.
-
Hand-Painted Details:
For truly artistic Pumpkin Cookie Decorating Ideas, try hand-painting! Once your royal icing is completely dry (preferably overnight), you can use gel food coloring diluted with a tiny drop of clear alcohol (like vodka or lemon extract) to create edible “paint.” I use a fine-tipped food-safe paintbrush to add intricate details like shadows, highlights, tiny leaf veins, or even miniature scenes. This technique allows for incredibly detailed work that piping alone can’t achieve. You can mix custom colors and create depth, giving your pumpkin cookies a unique, handcrafted look. Just remember, a very small amount of liquid is needed; you want a paint-like consistency, not watery.
-
Layered Dimensional Pumpkins:
For a show-stopping effect, you can create layered dimensional Pumpkin Cookie Decorating Ideas. This involves piping and drying layers of icing to build up texture. For example, after your base orange flood layer is dry, you can pipe raised sections (like the pumpkin ribs mentioned earlier) with a thicker consistency icing and let them dry. Then, you can pipe smaller elements like leaves or vines on top of those raised sections. Each layer needs to dry thoroughly before the next is applied to prevent crushing or smudging. This technique can create incredible depth and realism, making your pumpkin cookies true works of art!
Conclusion:
This recipe isn’t just another sweet treat; it’s an experience, a delightful journey into the heart of autumn’s coziness that I truly believe will become a cherished part of your seasonal baking repertoire. We’ve crafted this recipe to be not only incredibly flavorful but also surprisingly simple, ensuring that even a novice baker can achieve spectacular results. The aroma alone, as these bake, is enough to warm any home, promising that comforting blend of spices and rich pumpkin that perfectly encapsulates the spirit of the season. Forget complicated techniques or obscure ingredients; this is about pure, unadulterated baking joy and an outcome that will exceed all your expectations. I genuinely feel a sense of pride in sharing something so delightful and accessible.
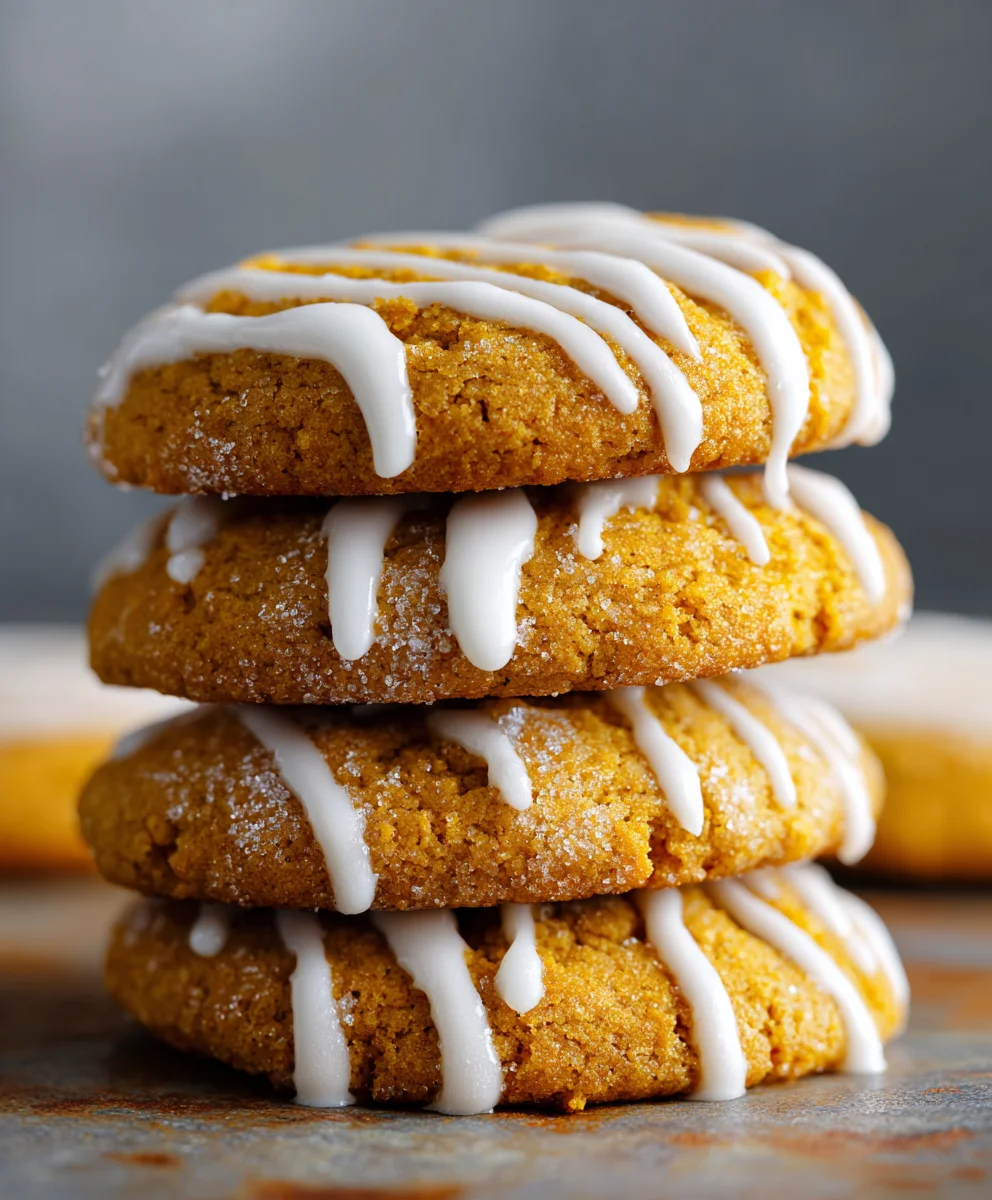
Seriously, these cookies are a game-changer. Imagine biting into a soft, chewy, yet slightly crisp cookie, bursting with the earthy sweetness of real pumpkin, perfectly balanced with a symphony of cinnamon, nutmeg, ginger, and just a hint of clove. It’s the kind of treat that conjures up images of crisp fall evenings, crackling fires, and warm mugs of cider. These aren’t just cookies; they’re little pockets of pure autumnal bliss, designed to bring joy and comfort with every single bite. The texture is what truly sets them apart – that ideal balance between a tender interior and a wonderfully delicate exterior that melts in your mouth. Each one is a comforting hug in edible form, leaving you with a lingering, pleasant warmth from the spices. I promise you, the taste is even better than it sounds on paper; it’s a truly harmonious blend that will make these an instant favorite.
Beyond their incredible flavor, their versatility is another reason why you’ll adore this recipe. Once baked, these beauties are incredibly versatile. They are absolutely divine on their own, perhaps with a simple dusting of powdered sugar or a quick vanilla glaze. I personally love serving them alongside a steaming mug of spiced chai tea or a robust cup of coffee on a chilly morning, transforming a simple break into a luxurious moment. They also make an excellent addition to a dessert platter for any gathering, pairing wonderfully with a scoop of vanilla bean ice cream or a dollop of fresh whipped cream. For a truly indulgent experience, try crumbling one over a bowl of plain Greek yogurt for a surprisingly delightful breakfast or snack that feels wonderfully decadent. They’re equally fantastic packed in a lunchbox for a midday treat or shared with friends and family during a cozy evening in, making any occasion feel a little more special.
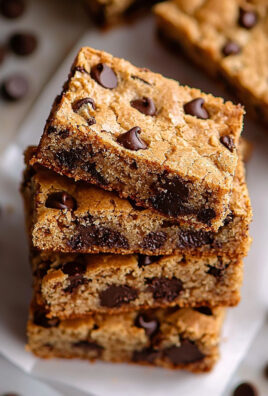
But where the real fun begins is in the customization! While the base recipe is perfect as is, there are so many delightful ways to make these cookies uniquely your own. Consider adding a handful of mini chocolate chips, white chocolate chunks, or even chopped pecans or walnuts to the dough for extra texture and an added layer of flavor. A delicate drizzle of caramel or a sprinkle of flaky sea salt can elevate them even further, adding a gourmet touch. And for those who love to get truly creative, this recipe provides the perfect canvas for your artistic flair. Think about different glazes – a tangy cream cheese frosting would be absolutely heavenly, or perhaps a rich maple glaze for an extra touch of fall flavor that complements the pumpkin beautifully. This is where your imagination can truly run wild, especially when it comes to
Pumpkin Cookie Decorating Ideas
. You could use royal icing to create intricate autumn leaves, friendly ghosts for Halloween, or even mini pumpkins on top for a festive touch. Simple sprinkles in fall colors, edible glitter, or even a dusting of cocoa powder through a stencil can transform them into visually stunning masterpieces. Don’t be afraid to experiment with different edible decorations to make each cookie unique and reflective of your personal style and the occasion.
So, my dear friends, I implore you: roll up your sleeves, gather your ingredients, and give this utterly delightful recipe a try this season. I promise you won’t be disappointed; it’s a truly rewarding baking experience that culminates in a batch of cookies that are sure to bring smiles and warmth to everyone who tastes them. Once you’ve whipped up your own batch of these delightful treats, I would absolutely love to hear all about your experience! Did you stick to the original recipe, or did you venture into some exciting variations? What were your favorite
Pumpkin Cookie Decorating Ideas
or serving suggestions? Please share your thoughts, your successes, and even your creative customizations with us. Snap a picture and imagine sharing it with our community – I’m always so inspired by what you all create in your kitchens. Your feedback and personal touches are what make our culinary journey together so incredibly rich and enjoyable. Happy baking, my friends, and enjoy every single delicious bite!
Spiced Pumpkin Cookies with Royal Icing
Delicious spiced pumpkin cookies decorated with royal icing, perfect for autumn celebrations, Halloween, and Thanksgiving gatherings. This recipe includes instructions for baking tender pumpkin cookies and preparing royal icing with various decorating techniques.
Ingredients
-
2 ½ cups (300g) all-purpose flour
-
1 tsp baking powder
-
½ tsp fine sea salt
-
1 tsp ground cinnamon
-
½ tsp ground ginger
-
¼ tsp ground nutmeg
-
⅛ tsp ground cloves
-
1 cup (226g) unsalted butter, softened
-
1 cup (200g) granulated sugar
-
½ cup (120g) canned pumpkin puree (not pie filling), drained
-
1 large egg, room temperature
-
1 tsp pure vanilla extract
-
4 tbsp meringue powder
-
½ cup (120ml) warm water
-
4 cups (480g) powdered sugar, sifted
-
1 tsp clear vanilla extract (or almond extract)
-
Gel food coloring (orange, green, brown, black)
Instructions
-
Step 1
In a medium bowl, whisk together flour, baking powder, salt, cinnamon, ginger, nutmeg, and cloves. In a large mixing bowl, cream softened unsalted butter and granulated sugar on medium speed for 2-3 minutes until light and fluffy. Beat in pumpkin puree, large egg, and pure vanilla extract until just combined. Gradually add the dry ingredient mixture to the wet ingredients in 2-3 additions, mixing on low speed after each until just combined; do not overmix. -
Step 2
Divide the dough into two equal portions. Shape each into a flattened disk (about 1-inch thick), wrap tightly in plastic wrap, and chill in the refrigerator for at least 2 hours or overnight. This step is critical for cut-out cookies. -
Step 3
Lightly flour your work surface and rolling pin. Roll one disk of chilled dough to about ¼-inch thick, ensuring consistent thickness. Cut out pumpkin shapes using a cookie cutter, dipping the cutter in flour before each cut. Carefully transfer cut-out shapes onto baking sheets lined with parchment paper, leaving about an inch between each. Gather dough scraps, gently press into a new disk, and re-chill for 15-20 minutes before re-rolling and cutting. -
Step 4
Preheat oven to 350°F (175°C). Bake cookies for 8-10 minutes, until the edges are set and just barely starting to turn a light golden brown; centers should still look slightly soft. Do not overbake. -
Step 5
Immediately transfer baked cookies from the hot baking sheet to a wire cooling rack using a spatula. Let them cool completely. Cookies must be completely cool (at least 1-2 hours, or overnight) before applying royal icing. -
Step 6
In a large mixing bowl, combine meringue powder and warm water; whisk until fully dissolved and slightly frothy (1-2 minutes). Gradually add sifted powdered sugar in several additions, mixing on low speed. Increase mixer speed to medium-high and beat for 5-7 minutes until the icing is thick, glossy, and forms stiff peaks. Beat in the clear vanilla or almond extract. -
Step 7
Divide the prepared royal icing into several small bowls for different colors (e.g., orange, green, brown, black). Add gel food coloring, mixing thoroughly to achieve desired shades. Adjust consistency: for outlining, icing should hold its shape for 10-15 seconds when a line is drawn through it; for flooding, add warm water (¼ tsp at a time) until icing smooths back within 5-10 seconds. Transfer icings into separate piping bags fitted with small round tips or with a tiny snip off the end. -
Step 8
Using orange royal icing at outline consistency, carefully draw a border around the edge of a cooled pumpkin cookie. Immediately fill the outlined area with orange royal icing at flood consistency, spreading gently to the edges with a small spoon or scribe tool. Pop any air bubbles. Let this base layer dry completely for at least 6-8 hours, or preferably overnight, before adding further details. -
Step 9
Once your pumpkin base layer is completely dry, use green royal icing at outline consistency to pipe a small stem at the top of the pumpkin. Pipe thin, delicate squiggles extending from the stem for simple vines, or add small dots/leaf shapes. -
Step 10
For a dimensional effect, once the orange flood layer is completely dry, use orange royal icing at a slightly thicker consistency (e.g., 20-second) to pipe curved lines from the top of the pumpkin down to the bottom, following the natural curve of the cookie. These lines will be slightly raised, creating the illusion of segments. -
Step 11
Once the base orange flood layer is completely dry, use black royal icing at outline consistency (or a fine-tipped edible marker) to draw eyes, nose, and mouth for a jack-o’-lantern. If using icing, carefully pipe the outline and then immediately flood these small areas with black flood icing. -
Step 12
For intricate details, once royal icing is completely dry (preferably overnight), dilute gel food coloring with a tiny drop of clear non-alcoholic liquid (like lemon extract or clear vanilla extract) to create edible ‘paint’. Use a fine-tipped food-safe paintbrush to add shadows, highlights, tiny leaf veins, or miniature scenes.
Important Information
Nutrition Facts (Per Serving)
It is important to consider this information as approximate and not to use it as definitive health advice.
Allergy Information
Please check ingredients for potential allergens and consult a health professional if in doubt.
Leave a Comment