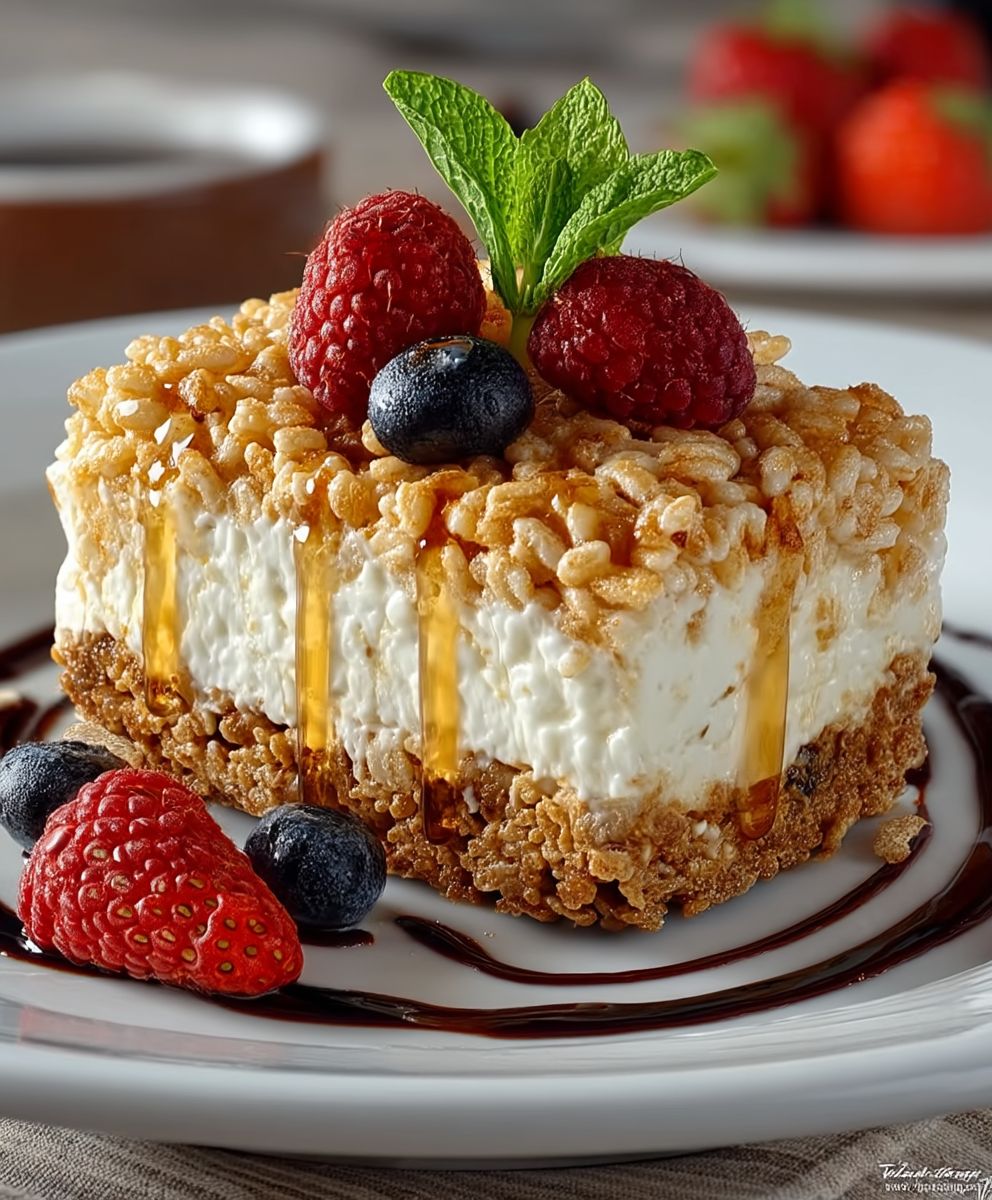
Rice Krispie Treat Cheesecake: Prepare to have your dessert world rocked! Imagine the nostalgic, comforting crunch of a classic Rice Krispie Treat, but elevated to a whole new level of decadent delight. We’re talking about a creamy, dreamy cheesecake infused with the irresistible sweetness and satisfying texture of those beloved childhood squares. This isn’t just dessert; it’s a flavor explosion that will transport you back to simpler times while simultaneously impressing even the most discerning palates.
While the Rice Krispie Treat itself doesn’t boast a long, storied history, its invention in the 1930s during the Great Depression speaks to the ingenuity of home cooks seeking affordable and comforting treats. This Rice Krispie Treat Cheesecake builds upon that legacy, taking a humble classic and transforming it into something truly extraordinary.
Why do people adore this dish? It’s the perfect marriage of textures the smooth, velvety cheesecake filling against the chewy, slightly crisp Rice Krispie Treat base. The sweetness is balanced, not cloying, and the overall experience is pure joy. Plus, it’s surprisingly easy to make! This Rice Krispie Treat Cheesecake is guaranteed to be a crowd-pleaser, perfect for birthdays, potlucks, or simply a special treat for yourself. Get ready to experience dessert bliss!
Ingredients:
- For the Rice Krispie Treat Crust:
- 6 tablespoons (3 oz) unsalted butter
- 6 cups Rice Krispies cereal
- 10 oz marshmallows (about 40 large or 10 cups mini)
- 1/4 teaspoon salt
- For the Cheesecake Filling:
- 32 oz cream cheese, softened to room temperature
- 1 1/2 cups granulated sugar
- 1/4 cup sour cream
- 2 large eggs
- 1 teaspoon vanilla extract
- For the Rice Krispie Treat Topping:
- 3 tablespoons (1.5 oz) unsalted butter
- 3 cups Rice Krispies cereal
- 5 oz marshmallows (about 20 large or 5 cups mini)
- 1/8 teaspoon salt
Making the Rice Krispie Treat Crust
Okay, let’s start with the foundation of our masterpiece the Rice Krispie Treat crust! This is where the magic begins, and trust me, it’s easier than you think.
- Melt the Butter: In a large saucepan, melt the 6 tablespoons of butter over medium heat. Keep a close eye on it so it doesn’t burn. We want it nice and melted, not browned.
- Add the Marshmallows: Once the butter is melted, add the 10 ounces of marshmallows to the saucepan. Stir constantly until the marshmallows are completely melted and smooth. This might take a few minutes, so be patient and keep stirring to prevent sticking.
- Stir in the Salt: Stir in the 1/4 teaspoon of salt. This little bit of salt helps to balance the sweetness and enhances the flavor of the Rice Krispie treats.
- Add the Rice Krispies: Remove the saucepan from the heat and immediately add the 6 cups of Rice Krispies cereal. Stir everything together until the cereal is evenly coated with the melted marshmallow mixture. Make sure you get all those little Krispies covered!
- Press into the Pan: Grease a 9-inch springform pan with cooking spray. This is crucial to prevent the cheesecake from sticking. Pour the Rice Krispie mixture into the prepared pan. Using the bottom of a measuring cup or your hands (lightly greased), firmly press the mixture evenly into the bottom of the pan and slightly up the sides to create a crust. Make sure it’s nice and compact!
- Chill the Crust: Place the springform pan in the refrigerator to chill for at least 30 minutes. This will help the crust to set and become firm, making it easier to work with when we add the cheesecake filling.
Preparing the Cheesecake Filling
Now, let’s move on to the creamy, dreamy cheesecake filling. This is where the real indulgence begins!
- Preheat the Oven: Preheat your oven to 325°F (160°C). It’s important to have the oven at the right temperature before we start baking.
- Beat the Cream Cheese: In a large mixing bowl, beat the softened cream cheese with an electric mixer until it’s smooth and creamy. Make sure there are no lumps! This is the key to a silky-smooth cheesecake.
- Add the Sugar: Gradually add the 1 1/2 cups of granulated sugar to the cream cheese, beating until well combined. Scrape down the sides of the bowl as needed to ensure everything is mixed evenly.
- Mix in the Sour Cream: Add the 1/4 cup of sour cream and beat until just combined. The sour cream adds a lovely tang and helps to keep the cheesecake moist.
- Add the Eggs: Add the 2 large eggs, one at a time, beating well after each addition. Be careful not to overmix at this stage, as overmixing can incorporate too much air into the batter, which can cause the cheesecake to crack.
- Stir in the Vanilla Extract: Stir in the 1 teaspoon of vanilla extract. Vanilla extract enhances the flavor of the cheesecake and adds a touch of warmth.
Baking the Cheesecake
Time to bake our cheesecake! This is where patience is key. We want a perfectly baked cheesecake with a smooth, creamy texture.
- Pour Filling into Crust: Pour the cheesecake filling over the chilled Rice Krispie Treat crust in the springform pan. Spread the filling evenly over the crust.
- Bake in Water Bath (Recommended): For the best results, bake the cheesecake in a water bath. Wrap the bottom of the springform pan tightly with heavy-duty aluminum foil to prevent water from seeping in. Place the wrapped pan in a larger roasting pan. Pour hot water into the roasting pan until it reaches about halfway up the sides of the springform pan.
- Bake (Without Water Bath): If you don’t want to use a water bath, you can bake the cheesecake directly in the oven. However, be aware that it may be more prone to cracking.
- Baking Time: Bake for 60-75 minutes, or until the edges of the cheesecake are set but the center still has a slight jiggle. The jiggle is important it means the cheesecake will be perfectly creamy when it cools.
- Cooling Process: Turn off the oven and crack the oven door slightly. Let the cheesecake cool in the oven for 1 hour. This slow cooling process helps to prevent cracking.
- Refrigerate: Remove the cheesecake from the oven and let it cool completely at room temperature. Then, cover it with plastic wrap and refrigerate for at least 4 hours, or preferably overnight. This allows the cheesecake to fully set and develop its flavor.
Making the Rice Krispie Treat Topping
Almost there! Now for the final touch the Rice Krispie Treat topping. This adds a fun and delicious layer of texture and flavor to our cheesecake.
- Melt the Butter: In a medium saucepan, melt the 3 tablespoons of butter over medium heat.
- Add the Marshmallows: Add the 5 ounces of marshmallows to the saucepan. Stir constantly until the marshmallows are completely melted and smooth.
- Stir in the Salt: Stir in the 1/8 teaspoon of salt.
- Add the Rice Krispies: Remove the saucepan from the heat and immediately add the 3 cups of Rice Krispies cereal. Stir everything together until the cereal is evenly coated with the melted marshmallow mixture.
- Spread over Cheesecake: Remove the chilled cheesecake from the refrigerator. Carefully remove the sides of the springform pan. Spread the Rice Krispie Treat topping evenly over the top of the cheesecake.
- Cut and Serve: Cut the cheesecake into slices and serve. Enjoy the delicious combination of creamy cheesecake and crunchy Rice Krispie treats!
Tips for Success:
- Room Temperature Ingredients: Make sure your cream cheese and eggs are at room temperature. This will help them blend together smoothly and prevent lumps in your cheesecake filling.
- Don’t Overmix: Overmixing the cheesecake batter can incorporate too much air, which can cause the cheesecake to crack during baking. Mix until just combined.
- Water Bath: Baking the cheesecake in a water bath helps to keep it moist and prevents cracking. If you don’t want to use a water bath, you can place a pan of hot water on the rack below the cheesecake.
- Cooling Slowly: Cooling the cheesecake slowly in the oven helps to prevent cracking. Don’t rush the cooling process!
- Chilling Time: Make sure to chill the cheesecake for at least 4 hours, or preferably overnight. This allows it to fully set and develop its flavor.
Variations:
- Chocolate Chips: Add 1/2 cup of chocolate chips to the cheesecake filling for a chocolatey twist.
- Peanut Butter: Add 1/4 cup of peanut butter to the cheesecake filling for a peanut butter flavor.
- Different Cereal: Experiment with different cereals for the crust and topping. Cocoa Krispies or Fruity Pebbles would be fun options!
Conclusion:
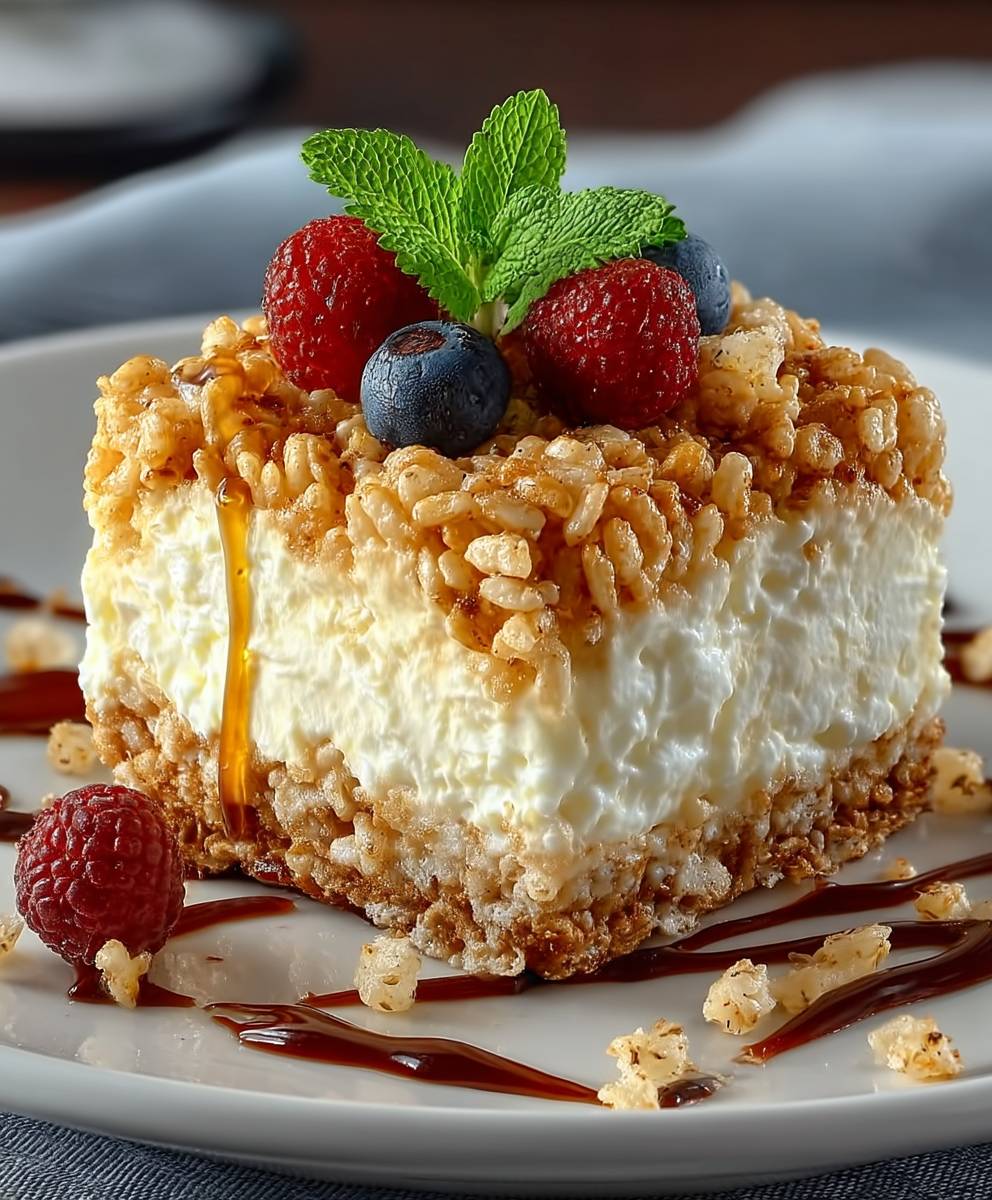
So, there you have it! This Rice Krispie Treat Cheesecake isn’t just a dessert; it’s a nostalgic trip down memory lane combined with the sophisticated indulgence of a creamy cheesecake. Its truly the best of both worlds, and I promise, once you take that first bite, you’ll understand why I’m so excited to share this recipe with you. It’s the perfect balance of textures the gooey, chewy Rice Krispie Treat crust, the smooth, rich cheesecake filling, and that optional (but highly recommended!) chocolate ganache drizzle. Seriously, what’s not to love?
Why is this a must-try? Well, beyond the sheer deliciousness, this cheesecake is surprisingly easy to make. You don’t need to be a professional baker to pull this off. The Rice Krispie Treat crust is incredibly forgiving, and the cheesecake filling comes together quickly with just a few simple ingredients. Plus, it’s a guaranteed crowd-pleaser. Whether you’re bringing it to a potluck, serving it at a birthday party, or just treating yourself on a weekend, this cheesecake is sure to be a hit. Its a conversation starter, a smile inducer, and a memory maker all rolled into one delectable dessert.
But the fun doesn’t stop there! Feel free to get creative with your serving suggestions and variations. For a truly decadent experience, serve each slice with a scoop of vanilla ice cream and a sprinkle of extra Rice Krispies. Or, if you’re feeling adventurous, try adding some chopped nuts or mini chocolate chips to the cheesecake filling. You could even swirl in some caramel sauce for an extra layer of sweetness. For a festive twist, use different colored Rice Krispies to create a themed crust for holidays or special occasions. Imagine a red and green crust for Christmas or a pastel-colored crust for Easter! The possibilities are endless.
Here are a few more ideas to spark your creativity:
- Peanut Butter Bliss: Add a layer of peanut butter to the top of the crust before adding the cheesecake filling.
- Cookies and Cream Dream: Crush some Oreo cookies and mix them into the cheesecake filling.
- Berrylicious Delight: Top the finished cheesecake with fresh berries and a drizzle of berry sauce.
- S’mores Sensation: Toast mini marshmallows and sprinkle them on top of the chocolate ganache.
I truly believe that this Rice Krispie Treat Cheesecake will become a new favorite in your household. It’s a fun, unique, and utterly delicious dessert that’s perfect for any occasion. So, what are you waiting for? Gather your ingredients, preheat your oven, and get ready to embark on a cheesecake adventure! I’m confident that you’ll be amazed by the results.
And now, for the most important part: I want to hear about your experience! Did you try the recipe? Did you make any variations? What did your friends and family think? Please, share your photos and stories in the comments below. I can’t wait to see your creations and hear all about your cheesecake triumphs. Happy baking!
Rice Krispie Treat Cheesecake: The Ultimate Dessert Recipe
A creamy, dreamy cheesecake with a fun and crunchy Rice Krispie Treat crust and topping. This unique dessert combines the best of both worlds for an unforgettable treat!
Ingredients
- 6 tablespoons (3 oz) unsalted butter
- 6 cups Rice Krispies cereal
- 10 oz marshmallows (about 40 large or 10 cups mini)
- 1/4 teaspoon salt
- 32 oz cream cheese, softened to room temperature
- 1 1/2 cups granulated sugar
- 1/4 cup sour cream
- 2 large eggs
- 1 teaspoon vanilla extract
- 3 tablespoons (1.5 oz) unsalted butter
- 3 cups Rice Krispies cereal
- 5 oz marshmallows (about 20 large or 5 cups mini)
- 1/8 teaspoon salt
Instructions
- In a large saucepan, melt the 6 tablespoons of butter over medium heat.
- Add the 10 ounces of marshmallows to the saucepan. Stir constantly until the marshmallows are completely melted and smooth.
- Stir in the 1/4 teaspoon of salt.
- Remove the saucepan from the heat and immediately add the 6 cups of Rice Krispies cereal. Stir everything together until the cereal is evenly coated with the melted marshmallow mixture.
- Grease a 9-inch springform pan with cooking spray. Pour the Rice Krispie mixture into the prepared pan. Using the bottom of a measuring cup or your hands (lightly greased), firmly press the mixture evenly into the bottom of the pan and slightly up the sides to create a crust.
- Place the springform pan in the refrigerator to chill for at least 30 minutes.
- Preheat your oven to 325°F (160°C).
- In a large mixing bowl, beat the softened cream cheese with an electric mixer until it’s smooth and creamy.
- Gradually add the 1 1/2 cups of granulated sugar to the cream cheese, beating until well combined. Scrape down the sides of the bowl as needed.
- Add the 1/4 cup of sour cream and beat until just combined.
- Add the 2 large eggs, one at a time, beating well after each addition. Be careful not to overmix.
- Stir in the 1 teaspoon of vanilla extract.
- Pour the cheesecake filling over the chilled Rice Krispie Treat crust in the springform pan. Spread the filling evenly over the crust.
- For the best results, bake the cheesecake in a water bath. Wrap the bottom of the springform pan tightly with heavy-duty aluminum foil to prevent water from seeping in. Place the wrapped pan in a larger roasting pan. Pour hot water into the roasting pan until it reaches about halfway up the sides of the springform pan.
- If you don’t want to use a water bath, you can bake the cheesecake directly in the oven. However, be aware that it may be more prone to cracking.
- Bake for 60-75 minutes, or until the edges of the cheesecake are set but the center still has a slight jiggle.
- Turn off the oven and crack the oven door slightly. Let the cheesecake cool in the oven for 1 hour.
- Remove the cheesecake from the oven and let it cool completely at room temperature. Then, cover it with plastic wrap and refrigerate for at least 4 hours, or preferably overnight.
- In a medium saucepan, melt the 3 tablespoons of butter over medium heat.
- Add the 5 ounces of marshmallows to the saucepan. Stir constantly until the marshmallows are completely melted and smooth.
- Stir in the 1/8 teaspoon of salt.
- Remove the saucepan from the heat and immediately add the 3 cups of Rice Krispies cereal. Stir everything together until the cereal is evenly coated with the melted marshmallow mixture.
- Remove the chilled cheesecake from the refrigerator. Carefully remove the sides of the springform pan. Spread the Rice Krispie Treat topping evenly over the top of the cheesecake.
- Cut the cheesecake into slices and serve.
Notes
- Make sure your cream cheese and eggs are at room temperature.
- Overmixing the cheesecake batter can incorporate too much air.
- Baking the cheesecake in a water bath helps to keep it moist and prevents cracking.
- Cooling the cheesecake slowly in the oven helps to prevent cracking.
- Make sure to chill the cheesecake for at least 4 hours, or preferably overnight.
- Add 1/2 cup of chocolate chips to the cheesecake filling for a chocolatey twist.
- Add 1/4 cup of peanut butter to the cheesecake filling for a peanut butter flavor.
- Experiment with different cereals for the crust and topping.

Leave a Comment