
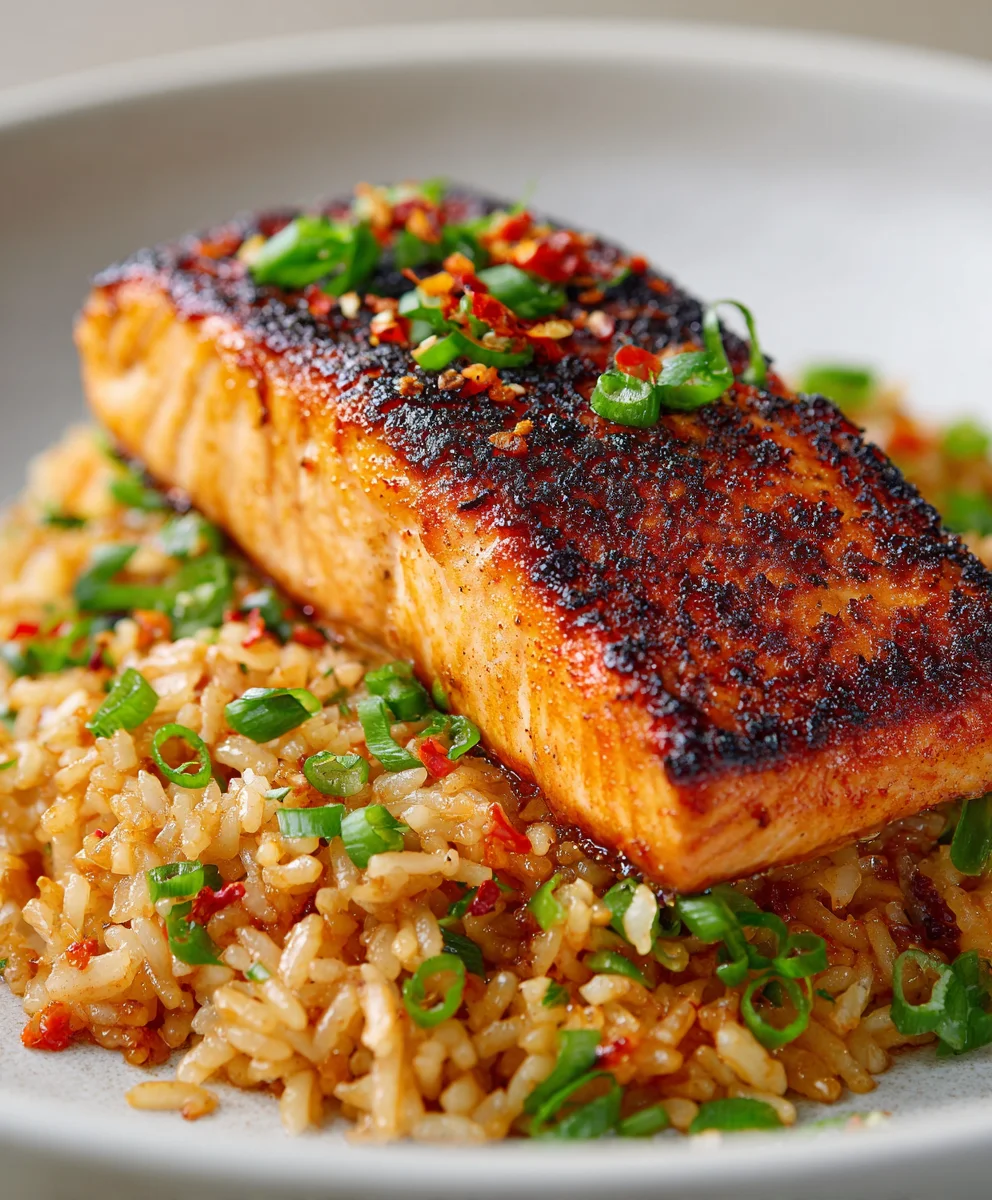
Salmon Crispy Rice isn’t just a dish; it’s an experience, a symphony of textures and flavors that has captivated palates worldwide. Imagine biting into a perfectly golden, crunchy rice patty, yielding to a tender, flaky salmon topping, all brought together with a delicate, savory sauce. It’s truly a culinary revelation that promises to tantalize your taste buds from the very first bite.
The Irresistible Allure of Crispy Rice
While the foundational concept of crispy rice boasts deep roots across various Asian cuisines, the modern, sushi-inspired iteration – often crowned with delectable spicy tuna or salmon – soared in popularity through the innovative menus of Japanese-American fusion restaurants. This contemporary classic beautifully marries traditional Japanese culinary artistry with a fresh, accessible appeal. I find myself constantly drawn to the incredible textural contrast this dish offers – the satisfying shatter of the meticulously prepared rice against the luscious, buttery richness of the salmon.
People adore this particular Salmon Crispy Rice recipe not only for its irresistible taste and elegant presentation but also for its surprisingly approachable preparation, making it a fantastic choice for both seasoned home cooks and adventurous culinary enthusiasts. It delivers that coveted restaurant-quality sensation right in your own kitchen, offering a delightful burst of umami with every perfect, textural bite. Get ready to elevate your home dining!

Ingredients:
For the Sushi Rice:
- 2 cups short-grain sushi rice
- 2 ½ cups water (for cooking rice)
- ¼ cup rice vinegar (unseasoned)
- 2 tablespoons granulated sugar
- 1 teaspoon fine sea salt
For the Spicy Salmon Topping:
- 10-12 ounces sushi-grade salmon fillet, skin removed
- ¼ cup Kewpie mayonnaise (or your favorite Japanese mayonnaise)
- 2-3 tablespoons Sriracha sauce, or to taste (adjust for your preferred spice level)
- 1 tablespoon soy sauce (light or low-sodium)
- 1 teaspoon toasted sesame oil
- 1 teaspoon fresh lime juice
- ½ teaspoon granulated sugar (optional, helps balance flavors)
- 2 green onions, thinly sliced (white and light green parts)
- 1 tablespoon toasted sesame seeds
For Assembly and Frying:
- 3-4 cups neutral oil for frying (such as canola, vegetable, or grapeseed oil)
- Optional garnishes:
- Thinly sliced jalapeños or serrano peppers
- Fresh cilantro leaves
- Microgreens
- Additional toasted sesame seeds
- A drizzle of eel sauce (unagi sauce) or spicy mayo
- A tiny dollop of masago or tobiko (fish roe) for an extra pop of flavor and texture
- Small sheets of nori (seaweed) for serving
Preparing the Perfect Sushi Rice for Your Salmon Crispy Rice
- Rinse the Rice Thoroughly: My first step for any great sushi rice is always a thorough rinse. Place the short-grain sushi rice in a fine-mesh sieve or a large bowl. Rinse it under cold running water, agitating the rice with your hand, until the water runs clear. This usually takes about 5-7 rinses. This crucial step removes excess starch, which helps achieve that perfect, slightly sticky yet individual grain texture we want for our Salmon Crispy Rice. After rinsing, let the rice drain for about 15-20 minutes in the sieve.
- Cook the Rice: Transfer the rinsed and drained rice to a medium saucepan with a tight-fitting lid. Add 2 ½ cups of cold water. Bring it to a boil over medium-high heat. Once boiling, reduce the heat to the lowest setting, cover the pot tightly, and simmer for 18-20 minutes. It’s important not to lift the lid during this process, as you’ll lose steam vital for cooking the rice evenly. After 18-20 minutes, turn off the heat and let the rice steam, still covered, for another 10-15 minutes. This final steaming period allows the rice to fully absorb any remaining moisture and become perfectly tender.
- Prepare the Sushi Vinegar Seasoning: While the rice is cooking and steaming, prepare the seasoning. In a small microwave-safe bowl or a very small saucepan, combine the rice vinegar, granulated sugar, and sea salt. Heat gently until the sugar and salt have completely dissolved. You can do this in the microwave for 30-60 seconds or over very low heat on the stovetop. Stir well to ensure everything is fully incorporated. Let this mixture cool slightly.
- Season the Cooked Rice: Transfer the hot, cooked rice to a large, shallow wooden or plastic bowl (traditionally, a hangiri is used, but any large non-metallic bowl works well to prevent the rice from tasting metallic). Pour the prepared sushi vinegar mixture evenly over the rice. Using a rice paddle or a large, flat wooden spoon, gently fold and “cut” the seasoning into the rice. The goal is to distribute the seasoning without mashing the rice. Continue to gently fold and fan the rice (a small handheld fan works wonderfully, or simply let it air cool) until it reaches room temperature. This fanning process helps to dry the surface of the rice slightly, giving it a beautiful sheen and the ideal texture for forming our crispy rice blocks. Ensure the rice is completely cool before proceeding, as warm rice won’t hold its shape as well when pressed. This perfectly seasoned and cooled sushi rice is the essential foundation for truly exceptional Salmon Crispy Rice.
Crafting the Irresistible Spicy Salmon Topping
- Prepare the Salmon: Ensure your sushi-grade salmon is very cold. This makes it easier to cut cleanly. Lay the salmon fillet on a clean cutting board. Using a very sharp knife, carefully cut the salmon into small, even cubes, about ¼ to ⅓ inch in size. Uniformity here is key for both texture and presentation. Place the diced salmon into a medium mixing bowl.
- Mix the Spicy Mayo Base: In a separate small bowl, combine the Kewpie mayonnaise, Sriracha sauce (start with 2 tablespoons and add more if you like it extra spicy!), soy sauce, toasted sesame oil, fresh lime juice, and the optional ½ teaspoon of granulated sugar. Whisk everything together thoroughly until the mixture is smooth and well-emulsified. Taste and adjust seasonings as needed – perhaps a little more Sriracha for heat, or a tiny pinch more sugar to balance the acidity. This spicy mayo is the heart of our Salmon Crispy Rice topping!
- Combine and Finish the Topping: Pour the spicy mayo mixture over the diced salmon. Add the thinly sliced green onions and toasted sesame seeds to the bowl. Gently fold everything together with a spoon or spatula until the salmon pieces are evenly coated with the spicy mayo. Be careful not to mash the delicate salmon. Cover the bowl and refrigerate the spicy salmon mixture for at least 15-20 minutes. This allows the flavors to meld beautifully and ensures the salmon stays cold and fresh, which is crucial for safety and taste, especially since it’s served raw. Chilling the salmon topping is a small but mighty step that really elevates the final Salmon Crispy Rice experience.
Forming and Frying the Crispy Rice Foundations
-
Form the Rice Blocks: Line a baking sheet with parchment paper. Now for the fun part: shaping our crispy rice bases! You have a few options here.
- Method 1 (Best for Uniformity): Lightly moisten your hands with water to prevent sticking. Take a handful of the cooled sushi rice (about ¼ cup per block) and firmly press it into a rectangular or square shape, roughly 1-inch thick. Aim for pieces that are about 1.5-2 inches long and 1 inch wide. The key is to press the rice very firmly so it holds together during frying.
- Method 2 (Using a Mold): For perfectly uniform blocks, you can use a small rectangular sushi mold or even a square cookie cutter. Line the mold with a small piece of plastic wrap, press the rice firmly into it, then carefully unmold.
Place each formed rice block onto the prepared baking sheet. Once all the rice is shaped, cover the baking sheet with plastic wrap and refrigerate the rice blocks for at least 30 minutes, or up to a few hours. Chilling the rice blocks is absolutely essential; it helps them firm up and maintain their shape, preventing them from falling apart when they hit the hot oil, ensuring you get that perfect crispy exterior for your Salmon Crispy Rice.
- Heat the Frying Oil: In a deep, heavy-bottomed pan or a Dutch oven, pour in enough neutral oil to reach a depth of about 1 ½ to 2 inches. Heat the oil over medium-high heat to 350-375°F (175-190°C). If you don’t have a thermometer, you can test the oil by dropping a tiny piece of rice into it; it should immediately sizzle vigorously and float to the surface. Be cautious not to overheat the oil, as it can cause the rice to burn quickly on the outside before it crisps through.
- Fry the Rice Blocks to Golden Perfection: Carefully lower a few chilled rice blocks into the hot oil using tongs. Do not overcrowd the pan, as this will lower the oil temperature and result in soggy rice. Fry the rice for about 2-4 minutes per side, or until each side is beautifully golden brown and wonderfully crispy. You’ll hear that delightful sizzle and see the edges turning a rich, appetizing color.
- Drain the Crispy Rice: Once golden and crispy on all sides, carefully remove the rice blocks from the oil with tongs and transfer them to a wire rack set over a baking sheet lined with paper towels. This allows excess oil to drain off and helps maintain their crispness. Repeat with the remaining rice blocks, ensuring the oil returns to temperature between batches. The incredible crunch of these perfectly fried rice blocks is what makes our Salmon Crispy Rice truly special! Let the crispy rice cool for a few minutes until they are warm to the touch but not piping hot, as they can be difficult to handle immediately after frying.
Assembling Your Delicious Salmon Crispy Rice
- Prepare for Assembly: Gather your beautifully crispy rice blocks and your chilled spicy salmon topping. Have any desired garnishes ready and within reach. This is where your Salmon Crispy Rice truly comes to life!
- Top the Crispy Rice: Take a small spoon and generously dollop a mound of the spicy salmon mixture onto the top of each warm crispy rice block. You can be quite generous here, ensuring a good ratio of salmon to rice in every bite. I love seeing a bit of the salmon spilling over the edges, it just looks so inviting.
-
Garnish and Serve: This is where you can add your personal flair.
- For a touch of heat and vibrant color, delicately place a thin slice of jalapeño or serrano pepper on top of the salmon.
- A few fresh cilantro leaves or microgreens add freshness and a gourmet touch.
- A final sprinkle of extra toasted sesame seeds can enhance the nutty aroma.
- If you enjoy a sweeter note, a light drizzle of eel sauce (unagi sauce) over the salmon and rice is a fantastic addition. Alternatively, an extra swirl of spicy mayo offers more creaminess and heat.
- For an authentic sushi bar feel, a tiny dollop of masago or tobiko on each piece adds an extra pop of brininess and texture.
- Serve your finished Salmon Crispy Rice immediately while the rice is still warm and crispy. I often serve them alongside small sheets of nori (seaweed), allowing guests to wrap their crispy rice for an interactive and delightful eating experience.
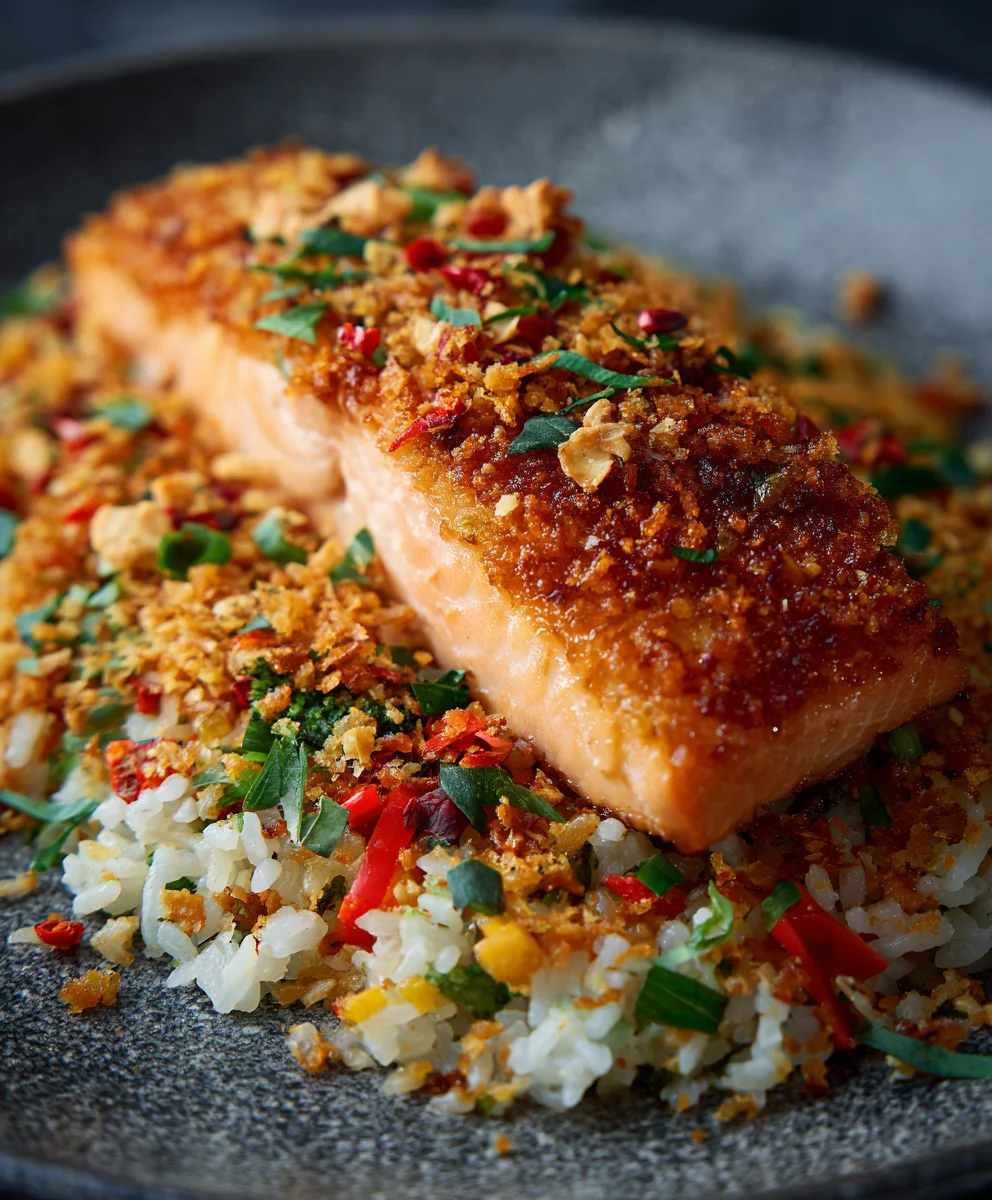
The combination of the warm, crunchy rice and the cool, creamy, spicy salmon is absolutely divine. Each bite offers a delightful contrast in temperatures and textures, from the firm crunch of the rice to the tender, melt-in-your-mouth salmon. It’s a truly satisfying appetizer or light meal that’s always a crowd-pleaser and quite impressive to serve. Enjoy every single bite of this homemade masterpiece!
Conclusion:
This recipe, my friends, isn’t just another dish; it’s an experience, a delightful journey for your taste buds that I’ve meticulously crafted and perfected. I’ve poured my heart into this particular combination because I truly believe it represents the pinnacle of modern home cooking: impressive yet approachable, sophisticated yet utterly comforting. The symphony of textures is what truly elevates it: the satisfying crunch of the golden-brown rice, the melt-in-your-mouth tenderness of the perfectly cooked salmon, and the creamy, savory notes of the accompanying sauces. It’s a dish that manages to be both light and substantial, offering a delicate balance of flavors that dance on your palate.
Think about the joy of serving something that looks like it came straight from a high-end restaurant kitchen, but knowing you created it right in your own home with confidence and ease. That’s the magic here! It’s a guaranteed crowd-pleaser, a conversation starter, and quite frankly, addictively delicious. The delightful contrast of the warm, subtly seasoned crispy rice base against the cool, fresh, and vibrant salmon is something truly special. This specific Salmon Crispy Rice recipe, with its carefully balanced ingredients and straightforward steps, is designed to empower you to recreate that culinary delight without any intimidation.
We’ve tackled the often-intimidating prospect of perfectly crispy rice, making it achievable without a deep fryer, and ensuring the salmon remains succulent and flavorful, never overcooked. It’s a testament to the fact that extraordinary meals don’t require extraordinary effort, just the right guidance and a little bit of passion. I’ve personally found that even the most discerning palates are captivated by this dish, making it a reliable choice for elegant dinner parties, indulgent weekend treats, or even a special weeknight meal when you want to elevate the ordinary.
Now, let’s talk about taking your
Salmon Crispy Rice
to the next level with some amazing serving suggestions and creative variations. While the recipe as written is absolutely fantastic on its own, the true beauty of this dish lies in its incredible versatility. For a classic and universally loved approach, a generous drizzle of spicy mayo (easily made by mixing sriracha with mayonnaise to your preferred heat level) and a sprinkle of toasted sesame seeds are, in my book, non-negotiable. These additions provide that iconic sushi-inspired flavor profile we all adore.
But please, don’t stop there! Consider adding thinly sliced fresh avocado for an extra layer of luxurious creaminess and healthy fats, which beautifully complements the salmon. A few slivers of fresh jalapeño can provide a wonderful, vibrant kick and a refreshing crunch, elevating the flavor profile even further for those who appreciate a little heat. If you’re feeling particularly adventurous and want to introduce a delightful pop and briny taste, a touch of masago or tobiko can be a fantastic addition. For those who love an umami bomb, a brush of good quality unagi sauce (often called eel sauce, but frequently made without actual eel) before serving can add a beautiful, glossy sheen and a sweet, savory depth that is truly irresistible.
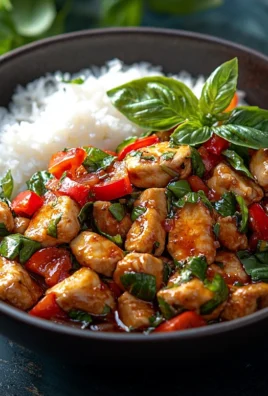
Thinking beyond the original: What if you don’t have salmon on hand, or simply want to try something new? This recipe framework is incredibly adaptable! You could easily substitute the salmon with thinly sliced, beautifully seared tuna for a different oceanic flavor experience. Cooked shrimp, finely chopped and mixed with a little spicy mayo, also works wonderfully. For a fantastic vegetarian twist, consider using finely diced, well-seasoned avocado or even some beautifully marinated and pan-seared tofu. The crispy rice base is truly a canvas, and your imagination is the artist! You can also play with the shape of your crispy rice. Instead of traditional squares, try elegant rounds using a cookie cutter for a more refined presentation. The thickness of the rice patties can also be adjusted; thinner patties will be crispier all the way through, while thicker ones will offer a lovely contrast of a crispy exterior with a softer, tender interior. Experiment with different oils for frying the rice – a neutral oil is standard, but a touch of sesame oil in the frying oil can impart a subtle, nutty aroma that enhances the overall experience. Serving them as a sophisticated appetizer at your next gathering is always a hit, or assemble them into a larger portion for a satisfying light lunch or dinner. They pair wonderfully with a crisp, dry white wine or a refreshing sake, making any meal feel like an occasion.
So, I genuinely urge you to set aside some time this week and dive into making this
Salmon Crispy Rice
. You’ll be absolutely amazed at how achievable it is to create something so utterly delicious, texturally exciting, and visually stunning right in your own kitchen. Don’t be intimidated by the seemingly fancy restaurant-level presentation; follow the clear, step-by-step instructions provided, trust the process, and get ready to impress yourself and anyone lucky enough to share a bite. I truly believe that cooking should be a joyous and rewarding experience, and this particular recipe delivers on both fronts with flying colors. It’s more than just food; it’s an opportunity to create, to savor, and to share a truly memorable dish with loved ones.
Once you’ve experienced the magic of that first perfect bite, I would absolutely love to hear about it! Your experiences, your triumphs, and even your creative variations mean the world to me. Did you try the avocado? Did you use tuna instead? How did your family and friends react to this impressive creation? Please, don’t hesitate to share your culinary adventures, your photos, and your valuable feedback. Let’s build a vibrant community of home cooks who aren’t afraid to push the boundaries of flavor and texture, transforming simple ingredients into extraordinary meals. Happy cooking, and I can’t wait to see your Salmon Crispy Rice masterpieces!
Salmon Crispy Rice
Salmon Crispy Rice is a culinary experience, offering a symphony of textures and flavors. This modern, sushi-inspired dish, marrying traditional Japanese culinary artistry with fresh appeal, features perfectly golden, crunchy rice patties topped with tender, flaky salmon and a delicate, savory sauce. It’s a restaurant-quality sensation, surprisingly approachable to prepare at home, delivering umami in every textural bite.
Ingredients
-
2 cups short-grain sushi rice
-
2 ½ cups water
-
¼ cup rice vinegar (unseasoned)
-
2 tablespoons granulated sugar
-
1 teaspoon fine sea salt
-
10-12 ounces sushi-grade salmon fillet, skin removed, diced
-
¼ cup Kewpie mayonnaise
-
2-3 tablespoons Sriracha sauce
-
1 tablespoon soy sauce
-
1 teaspoon toasted sesame oil
-
1 teaspoon fresh lime juice
-
½ teaspoon granulated sugar (optional)
-
2 green onions, thinly sliced
-
1 tablespoon toasted sesame seeds
-
3-4 cups neutral oil for frying
Instructions
-
Step 1
Rinse 2 cups short-grain sushi rice under cold running water until clear; drain for 15-20 minutes. -
Step 2
Combine rinsed rice with 2 ½ cups cold water in a saucepan. Bring to a boil, then reduce heat to low, cover tightly, and simmer for 18-20 minutes. Turn off heat and let steam, still covered, for another 10-15 minutes. -
Step 3
While rice cooks, prepare sushi vinegar: Gently heat ¼ cup rice vinegar, 2 tablespoons granulated sugar, and 1 teaspoon sea salt until sugar and salt are dissolved. Let cool slightly. -
Step 4
Transfer hot, cooked rice to a large non-metallic bowl. Pour cooled sushi vinegar evenly over rice. Gently fold and ‘cut’ the seasoning into the rice until distributed. Fan and cool the rice completely to room temperature. -
Step 5
Prepare salmon: Dice 10-12 oz sushi-grade salmon fillet into ¼ to ⅓ inch cubes. Place in a medium mixing bowl. -
Step 6
Mix spicy mayo base: In a separate small bowl, combine ¼ cup Kewpie mayonnaise, 2-3 tablespoons Sriracha, 1 tablespoon soy sauce, 1 teaspoon toasted sesame oil, 1 teaspoon fresh lime juice, and optional ½ teaspoon granulated sugar. Whisk until smooth. -
Step 7
Combine and chill topping: Pour spicy mayo over diced salmon. Add 2 thinly sliced green onions and 1 tablespoon toasted sesame seeds. Gently fold. Cover and refrigerate for at least 15-20 minutes to meld flavors and keep salmon cold. -
Step 8
Form rice blocks: Lightly moisten hands or use a mold. Take about ¼ cup of cooled sushi rice and firmly press into rectangular or square shapes (approx. 1.5-2 inches long, 1 inch wide, 1-inch thick). Place on a parchment-lined baking sheet. Cover and refrigerate for at least 30 minutes to firm up. -
Step 9
Heat frying oil: In a deep pan, heat 3-4 cups neutral oil to 350-375°F (175-190°C). -
Step 10
Fry rice blocks: Carefully lower a few chilled rice blocks into hot oil. Fry for 2-4 minutes per side until beautifully golden brown and crispy. Do not overcrowd. -
Step 11
Drain crispy rice: Remove fried rice to a wire rack set over paper towels to drain excess oil. Repeat with remaining blocks, ensuring oil returns to temperature. Let cool for a few minutes until warm to the touch. -
Step 12
Assemble and serve: Generously dollop the chilled spicy salmon mixture onto each warm crispy rice block. Garnish with desired toppings such as thinly sliced jalapeños, fresh cilantro leaves, extra toasted sesame seeds, a drizzle of eel sauce or spicy mayo, a tiny dollop of masago/tobiko, or small sheets of nori. Serve immediately and enjoy!
Important Information
Nutrition Facts (Per Serving)
It is important to consider this information as approximate and not to use it as definitive health advice.
Allergy Information
Please check ingredients for potential allergens and consult a health professional if in doubt.


Leave a Comment