
Halloween Cheesecake – the very name conjures images of spooky delight and decadent indulgence, perfectly capturing the spirit of this festive season! As autumn leaves fall and the air grows crisp, our thoughts often turn to comforting, yet exciting, treats. Cheesecake, with its origins tracing back to ancient Greece, has evolved into a beloved dessert enjoyed worldwide for its rich, creamy texture and versatile flavors. But when October arrives, we seek something truly special to complement our costumes and haunted decorations.
Why This Halloween Cheesecake is a Must-Try!
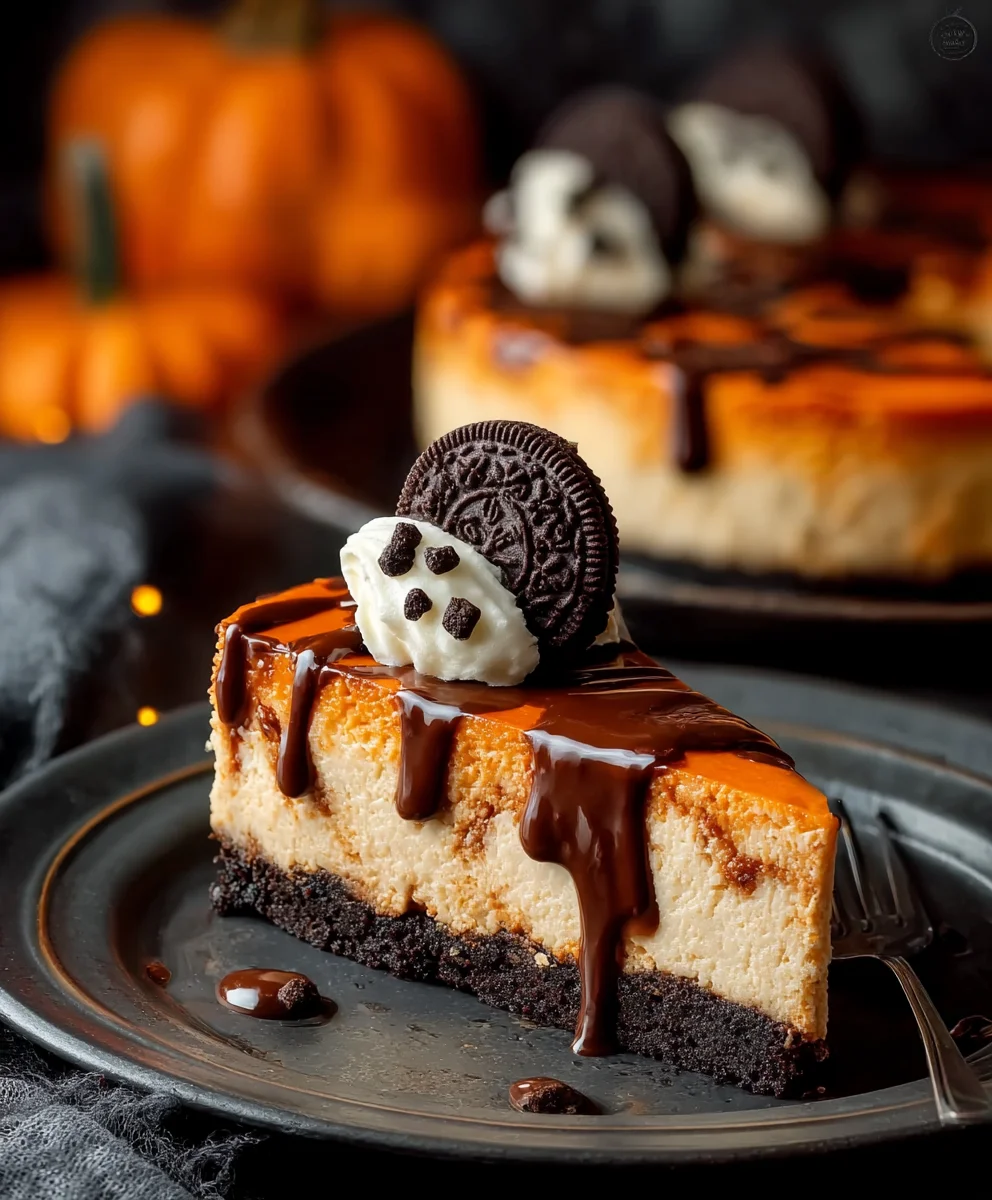
That’s precisely where the magic of a festive Halloween Cheesecake comes in. It’s not just a dessert; it’s a centerpiece, a conversation starter, and an irresistible treat that combines the classic elegance of a perfect cheesecake with a playful, spooky twist. Imagine a velvety smooth filling, perhaps infused with a hint of pumpkin or spiced with autumnal notes, all adorned with delightfully eerie decorations. It’s the ultimate showstopper for any ghoulish gathering, offering a sophisticated sweetness that everyone, from little goblins to adult monsters, will adore. I believe you’ll find that this unique blend of traditional richness and seasonal fun makes our Halloween Cheesecake an absolutely unforgettable experience.

Ingredients:
-
For the Spooky Chocolate Cookie Crust:
- 24 chocolate sandwich cookies (such as Oreos, approximately 1 standard package, about 280g)
- 6 tablespoons unsalted butter, melted
- 1/4 teaspoon fine sea salt (optional, but enhances chocolate flavor)
-
For the Bewitching Orange Cheesecake Filling:
- 4 (8-ounce) packages full-fat cream cheese, softened to room temperature (32 ounces total)
- 1 3/4 cups granulated sugar
- 3 tablespoons cornstarch (helps prevent cracks)
- 1/2 cup sour cream, at room temperature
- 1/4 cup heavy cream, at room temperature
- 2 teaspoons pure vanilla extract
- 1 tablespoon orange zest (from 1-2 medium oranges)
- 1/2 – 1 teaspoon orange gel food coloring (adjust to desired intensity)
- 4 large eggs, at room temperature
-
For the Creepy Web Topping and Spooky Decorations:
- 6 ounces good quality dark chocolate, finely chopped
- 1/2 cup heavy cream
- 2 ounces white chocolate, finely chopped
- Additional Halloween candies, sprinkles, or edible decorations (e.g., gummy worms, candy corn, edible googly eyes, black licorice whips for spider legs)
For the Spooky Chocolate Cookie Crust:
My favorite part of any cheesecake is often the crust, and for our Halloween masterpiece, we’re going with a rich, dark chocolate cookie crust that’s both flavorful and perfectly spooky. It’s super simple to make, but pays huge dividends in texture and taste.
-
First things first, we need to crush our chocolate sandwich cookies. You have a couple of options here. My preferred method is using a food processor: simply toss the whole cookies (cream filling and all!) into the processor and pulse until you have fine crumbs. It should look like dark, sandy soil, perfectly eerie for a Halloween treat! If you don’t have a food processor, no worries! You can place the cookies in a large, heavy-duty Ziploc bag, seal it, and then use a rolling pin or the bottom of a heavy skillet to crush them until they are uniformly fine crumbs. The key is to get them as fine as possible so they bind together nicely.
-
Once your crumbs are ready, transfer them to a medium-sized bowl. Add the 6 tablespoons of melted unsalted butter and the optional 1/4 teaspoon of fine sea salt. The salt really helps to cut through the sweetness and enhances the chocolate flavor, so I highly recommend it! Use a fork or a spatula to mix everything together until the crumbs are evenly moistened. They should resemble wet sand – if you press a small handful together, it should hold its shape.
-
Now, let’s get our springform pan ready. I’m using a 9-inch springform pan for this Halloween Cheesecake. Press the buttered crumbs firmly and evenly into the bottom of the pan. I like to use the flat bottom of a drinking glass or a measuring cup to really pack them down. You want a compact crust that won’t crumble when you slice into it. You can also press some of the mixture up the sides of the pan if you like a thicker edge, creating a nice border for your filling. Ensure the crust is level and solid.
-
Preheat your oven to 350°F (175°C). Once preheated, bake the crust for 8-10 minutes. This pre-baking step helps to set the crust, making it less likely to get soggy once the filling is added and giving it a lovely toasted flavor. While it’s baking, the kitchen will start to smell wonderfully of chocolate, getting you even more excited for the deliciousness to come! Once baked, remove it from the oven and set it aside to cool slightly while you prepare the filling. Don’t worry about turning the oven off; we’ll be using it again shortly.
For the Bewitching Orange Cheesecake Filling:
This is where the magic truly happens, transforming simple ingredients into a creamy, dreamy, and vibrantly orange Halloween Cheesecake. The secret to a perfect cheesecake is patience and room temperature ingredients – trust me on this!
-
First, make sure your four packages of full-fat cream cheese are truly at room temperature. This is paramount! If the cream cheese is cold, it won’t blend smoothly, and you’ll end up with lumps in your filling, which is a cheesecake no-no. So, take it out of the fridge at least an hour or two before you plan to bake. In a large bowl of a stand mixer fitted with the paddle attachment (or using a hand mixer), beat the softened cream cheese on medium speed until it’s incredibly smooth and creamy, about 2-3 minutes. Scrape down the sides of the bowl often to ensure no lumps are lurking.
-
In a separate small bowl, whisk together the granulated sugar and cornstarch. The cornstarch is our secret weapon here; it helps stabilize the cheesecake, reducing the risk of cracks and giving it that perfectly smooth, silky texture we all adore. Gradually add this sugar-cornstarch mixture to the cream cheese, beating on low speed until just combined. Don’t overmix at this stage; we want to incorporate the sugar without whipping too much air into the mixture.
-
Next, add the room temperature sour cream, heavy cream, vanilla extract, and orange zest to the bowl. Beat on low speed until everything is just incorporated. Again, be gentle. Scrape down the bowl thoroughly to make sure all ingredients are evenly distributed. The orange zest is going to give a beautiful, subtle citrus note that brightens up the rich cheesecake, making it even more irresistible.
-
Now for the fun Halloween touch – the orange gel food coloring! Add 1/2 teaspoon of the orange gel food coloring to the mixture and mix on low speed. Check the color. Do you want it brighter, more vibrant? Add another 1/4 to 1/2 teaspoon until you achieve your desired “bewitching” orange hue. Gel food coloring is fantastic because it gives intense color without adding excess liquid, which could throw off the cheesecake’s texture. We’re aiming for a color that screams Halloween, but still looks appetizing!
-
Finally, we’re adding the eggs. This is perhaps the most crucial step for a crack-free cheesecake. Add the eggs one at a time, beating on very low speed only until each egg is just combined with the mixture. As soon as you see the yolk disappear, stop mixing and add the next egg. Overmixing after adding the eggs is the primary cause of cracks in cheesecakes. We want to incorporate them gently, not whip air into the batter, as too much air expands during baking and then collapses, leading to those unsightly fissures.
-
Prepare your springform pan for a water bath. This step is absolutely essential for a perfectly creamy, uncracked cheesecake. Wrap the bottom and sides of your springform pan with several layers of heavy-duty aluminum foil. Make sure it’s sealed tightly to prevent any water from seeping in. The water bath provides a moist, even heat environment, which allows the cheesecake to bake slowly and gently, resulting in that wonderfully smooth, custardy texture we crave. Place the foil-wrapped pan into a larger roasting pan.
-
Pour the vibrantly orange cheesecake filling into the pre-baked and cooled chocolate cookie crust. Smooth the top with a spatula. Carefully place the roasting pan, with the cheesecake inside, into the preheated 350°F (175°C) oven. Once in the oven, pour hot water into the larger roasting pan, making sure it comes about halfway up the sides of the springform pan. Be careful not to splash any water into the cheesecake itself!
-
Bake for 60-75 minutes, or until the edges are set but the center still has a slight wobble when you gently shake the pan. This wobble is what we’re looking for! It means the cheesecake is cooked through but still incredibly moist. Resist the urge to open the oven door frequently, as sudden temperature changes can also contribute to cracking.
-
Once baked, turn off the oven, but leave the cheesecake inside with the oven door ajar for one hour. This gradual cooling process is another key to preventing cracks. After an hour, remove the cheesecake from the water bath and the roasting pan. Carefully remove the foil from around the springform pan. Let it cool completely on a wire rack at room temperature for another 1-2 hours. Finally, cover it loosely with plastic wrap and transfer it to the refrigerator to chill for at least 6-8 hours, or preferably overnight. This chilling time is crucial for the cheesecake to fully set and for the flavors to meld. I know it’s tempting, but don’t rush this step!
For the Creepy Web Topping and Spooky Decorations:
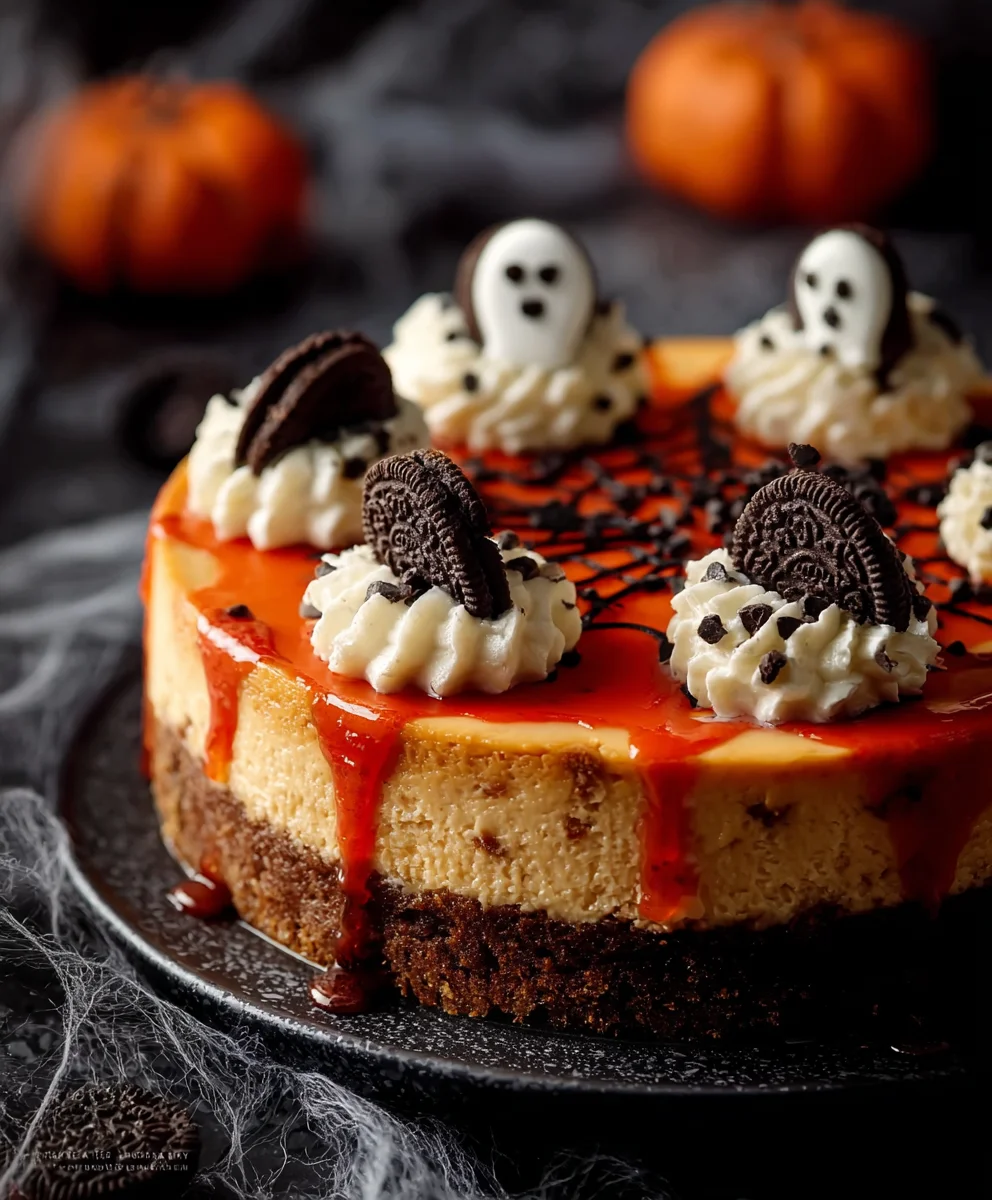
Now for the really fun part! This is where we transform our beautiful orange cheesecake into a truly “Halloween Cheesecake” with a ghoulishly delightful chocolate ganache and a classic spider web design.
-
Once your cheesecake is thoroughly chilled and set, it’s time to make the dark chocolate ganache. Place the finely chopped dark chocolate in a medium, heat-proof bowl. In a small saucepan, heat the 1/2 cup of heavy cream over medium heat until it just begins to simmer around the edges (don’t let it boil vigorously). Immediately pour the hot cream over the chopped chocolate. Let it sit undisturbed for 5 minutes. This allows the hot cream to melt the chocolate perfectly. After 5 minutes, gently whisk the mixture starting from the center and working your way out, until it’s completely smooth, glossy, and luscious. It should be a beautiful, deep, dark chocolate sauce.
-
Let the ganache cool slightly at room temperature, about 10-15 minutes, until it’s still pourable but not piping hot. Carefully pour the ganache over the top of your chilled Halloween Cheesecake. Use an offset spatula or the back of a spoon to gently spread it evenly across the entire surface. If you have some overflow down the sides, that’s perfectly fine; it adds to the rustic, homemade charm! Place the cheesecake back in the fridge for about 15-20 minutes, just until the ganache starts to set slightly but is still soft enough to work with for the web design.
-
While the ganache is setting, prepare your white chocolate for the web. Melt the 2 ounces of finely chopped white chocolate. You can do this gently in a microwave (in 30-second intervals, stirring between each, until smooth) or over a double boiler. Once melted and smooth, transfer the white chocolate to a small piping bag fitted with a very fine round tip, or simply use a Ziploc bag with a tiny corner snipped off.
-
Retrieve your ganache-topped Halloween Cheesecake from the fridge. Now, let’s create the spooky spider web! Starting from the very center of the cheesecake, pipe concentric circles of white chocolate onto the dark ganache. Make them progressively larger as you move towards the edge of the cheesecake, leaving about an inch or so between each circle. You don’t need to be perfectly precise here; a slightly wobbly web can look even more authentic!
-
Once you have your circles, immediately take a clean toothpick or the tip of a small knife. Starting from the center and dragging outwards towards the edge, draw straight lines through the white chocolate circles, dividing the cheesecake into wedge-shaped sections (like slicing a pie). For a classic web effect, I like to drag lines outwards every 1-2 inches around the perimeter. Then, for an extra spooky touch, you can drag lines inwards from the edge towards the center between some of your outward lines. This creates the characteristic spider web pattern. Work relatively quickly while the ganache is still soft enough for the white chocolate to sink into slightly.
-
Now for the additional Halloween flair! This is your chance to get creative. You can use extra melted white chocolate, perhaps tinted with black, green, or purple gel food coloring, to pipe little bats, ghosts, or small spiders directly onto the web or around the edges of the cheesecake. Edible googly eyes are always a hit for adding character to any spooky treat. Place gummy worms emerging from the edges, arrange candy corn strategically, or use black licorice whips as spider legs coming out from under a candy spider. The possibilities are endless for making your Halloween Cheesecake truly unique and terrifyingly delicious!
Chilling and Serving Your Halloween Cheesecake:
You’ve put in all this wonderful effort, and now comes the final, essential step to ensure your Halloween Cheesecake is perfect for its grand reveal.
-
After all your artistic endeavors, gently place the decorated Halloween Cheesecake back into the refrigerator for at least another 2-4 hours to allow the ganache and white chocolate web to set completely, and for all the flavors to fully meld. This final chill will also ensure clean slices and an optimal texture. Patience is a virtue, especially with cheesecake!
-
When you’re ready to serve, carefully release the springform pan collar. If your cheesecake is sticking to the sides at all, you can run a thin, warm knife around the edge before releasing the collar. This will give you a pristine edge. For the cleanest slices, dip a sharp knife in hot water and wipe it clean between each cut. This creates those beautiful, smooth cheesecake slices everyone admires.
-
Present your magnificent Halloween Cheesecake on a spooky platter, perhaps surrounded by dry ice (for a fog effect, be careful!), or alongside other Halloween treats. Watch as your guests are both delighted by its ghoulish appearance and enchanted by its rich, creamy flavor. This isn’t just a dessert; it’s a centerpiece for your Halloween celebration!
Conclusion:
And so, we arrive at the grand finale! I truly believe this recipe isn’t just another dessert; it’s an experience waiting to unfold in your kitchen and at your table. We’ve journeyed through the steps to create something genuinely spectacular, a confection that promises to be the undisputed star of any gathering. What makes this particular recipe an absolute must-try, in my humble opinion, is its unparalleled blend of creamy richness and delightful flavor complexity, all wrapped up in a presentation that is as visually stunning as it is delicious. It’s the kind of dessert that elicits gasps of admiration before the first forkful even touches a plate. Imagine the velvety smooth texture, the delicate yet distinct flavors dancing on your palate, leaving a lasting impression that lingers long after the last crumb is savored. This isn’t just about satisfying a sweet tooth; it’s about crafting a moment, a memory, a center of conversation, and a testament to the joy of homemade goodness.
I often find that the best recipes are those that offer both comfort and excitement, and this one delivers on both fronts. The satisfaction of pulling such a beautiful creation from your oven, knowing you crafted it yourself, is immense. It’s a showstopper that doesn’t demand professional pastry chef skills, making it accessible for home bakers looking to impress without the stress. From its perfectly set texture to its nuanced taste profile, every element has been carefully considered to ensure a truly unforgettable dessert experience for you and your guests. This isn’t merely a sweet treat; it’s a testament to the simple luxury of homemade indulgence, a dessert that truly speaks volumes about the care and effort you put into making your special occasions, well, truly special.
Elevate Your Dessert Experience: Serving Suggestions & Creative Variations
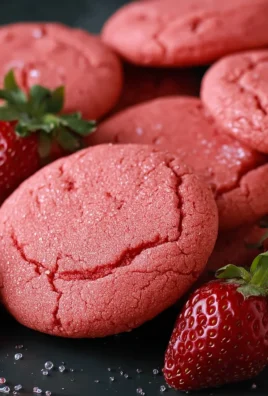
Now that you’ve mastered the art of creating this magnificent dessert, let’s talk about how to present it and even how to make it your own with some delightful twists. For a classic, elegant presentation, a simple dusting of high-quality cocoa powder or powdered sugar can be utterly transformative, highlighting its sophisticated simplicity. If you’re feeling a bit more adventurous, consider drizzling each slice with a vibrant berry coulis – a raspberry or strawberry sauce would add a beautiful tart counterpoint to its richness. A decadent chocolate ganache or a salted caramel sauce could also elevate it to new heights, adding another layer of luxurious indulgence.
When it comes to toppings, the possibilities are truly endless! Fresh seasonal berries, a dollop of freshly whipped cream, or even a scattering of toasted nuts could add wonderful texture and contrasting flavors. For a playful touch, especially if you’re making the star of the show, our very own Halloween Cheesecake, imagine adorning it with some spooky edible decorations like mini chocolate spiders, candy corn, or even a creative “spiderweb” design using melted chocolate. You could also crumble some themed cookies over the top for an extra layer of crunch and visual appeal. And don’t forget the perfect accompaniment: a robust cup of coffee, a delicate tea, or even a dessert wine can beautifully complement its flavors, rounding out the entire experience.
Unleash Your Inner Chef: Flavor Twists and Customizations
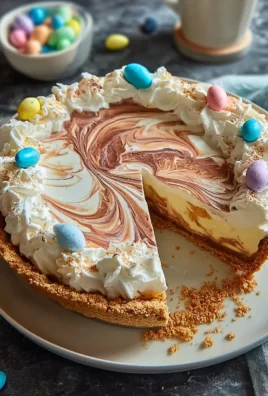
But why stop there? Feel empowered to put your unique spin on this recipe! Perhaps you could infuse the filling with a hint of orange zest for a bright, citrusy note, or a touch of almond extract for a deeper, more complex aroma. Changing the crust is another fantastic way to customize. Instead of the classic, try an Oreo crumb crust for an even richer chocolatey base, or a ginger snap crust for a spicy kick that would pair wonderfully with the creamy filling. For those who love a bit of texture, consider folding some crushed candy bar pieces or mini chocolate chips into the batter before baking. And if you’re entertaining a crowd, think about making individual mini versions in muffin tins; they’re incredibly charming and perfect for portion control.
I truly encourage you to take this recipe and make it your own. Don’t be afraid to experiment with flavors and garnishes that speak to your personal taste and the occasion. The beauty of baking is that it’s a creative outlet, and this dessert provides a fantastic canvas for your culinary imagination. Whether you stick to the recipe religiously or veer off into new flavor territories, the foundational quality of this dessert will shine through.
Your Turn to Shine: Try, Share, and Inspire!
Now, it’s your turn! I have absolutely loved sharing this recipe with you, and my greatest hope is that you’ll carve out some time in your schedule to bring this incredible creation to life in your own kitchen. There’s something profoundly satisfying about the process of baking, especially when the outcome is as rewarding as this dessert. Imagine the aroma filling your home, the anticipation building as it chills, and the sheer delight on the faces of your loved ones when they take that first bite. This isn’t just a recipe; it’s an invitation to create joy, to celebrate moments, and to share something truly special with those around you.
I am incredibly excited for you to experience the magic of this recipe firsthand. Please, when you do bake it, don’t keep the results to yourself! I would absolutely love to hear about your experience. Did you add any unique twists? What did your family and friends think? Share your successes, your serving suggestions, and especially your photos! Tag me or simply send me a message – seeing your beautiful creations truly brightens my day and inspires me to keep sharing. Let’s build a community of enthusiastic bakers who appreciate the art of a truly exceptional dessert, especially if you’re proudly showcasing your amazing Halloween Cheesecake creation. Happy baking, my friends!
Spooky Halloween Cheesecake
A deliciously creamy Halloween Cheesecake, perfect for festive gatherings. This recipe features a rich chocolate cookie crust, a vibrant orange cheesecake filling, and a creepy spider web dark and white chocolate topping, adorned with spooky candies.
Ingredients
-
24 chocolate sandwich cookies (Oreos)
-
6 tbsp unsalted butter, melted
-
1/4 tsp fine sea salt
-
4 (8-ounce) pkgs full-fat cream cheese, softened
-
1 3/4 cups granulated sugar
-
3 tbsp cornstarch
-
1/2 cup sour cream, room temp
-
1/4 cup heavy cream, room temp
-
2 tsp pure vanilla extract
-
1 tbsp orange zest
-
1/2 – 1 tsp orange gel food coloring
-
4 large eggs, room temp
-
6 oz dark chocolate, finely chopped
-
1/2 cup heavy cream (for ganache)
-
2 oz white chocolate, finely chopped
-
Additional Halloween candies, sprinkles, or edible decorations (e.g., gummy worms, candy corn, edible googly eyes, black licorice whips)
Instructions
-
Step 1
Preheat oven to 350°F (175°C). Crush 24 chocolate sandwich cookies into fine crumbs. Mix crumbs with 6 tbsp melted unsalted butter and 1/4 tsp sea salt until moistened. Press crumb mixture firmly into the bottom of a 9-inch springform pan. Bake for 8-10 minutes. Cool slightly. -
Step 2
Beat 32 oz softened full-fat cream cheese until smooth and creamy (2-3 minutes). Gradually add 1 3/4 cups granulated sugar and 3 tbsp cornstarch, beating on low speed until just combined. Mix in 1/2 cup room temperature sour cream, 1/4 cup room temperature heavy cream, 2 tsp pure vanilla extract, and 1 tbsp orange zest until just incorporated. Add 1/2 – 1 tsp orange gel food coloring; mix on low until desired vibrant orange hue is achieved. Add 4 large eggs one at a time, beating on very low speed only until each egg is just combined; do not overmix. -
Step 3
Wrap the bottom and sides of the springform pan with several layers of heavy-duty aluminum foil. Pour the orange cheesecake filling into the pre-baked and cooled chocolate cookie crust. Place the foil-wrapped springform pan into a larger roasting pan. Carefully place in the preheated 350°F (175°C) oven, then pour hot water into the roasting pan until it comes about halfway up the sides of the springform pan. Bake for 60-75 minutes, or until the edges are set but the center still has a slight wobble. -
Step 4
Turn off the oven but leave the cheesecake inside with the oven door ajar for 1 hour. Remove from the water bath and roasting pan. Carefully remove the foil. Let it cool completely on a wire rack at room temperature for 1-2 hours. Cover loosely and refrigerate for at least 6-8 hours, or preferably overnight, to fully set. -
Step 5
For the dark chocolate ganache: Place 6 oz finely chopped dark chocolate in a heat-proof bowl. Heat 1/2 cup heavy cream until it simmers; pour over chocolate. Let sit 5 minutes, then whisk until smooth and glossy. Let ganache cool slightly (10-15 minutes). Pour over the chilled cheesecake, spreading evenly. Chill for 15-20 minutes until the ganache begins to set. For the white chocolate web: Melt 2 oz finely chopped white chocolate. Transfer to a small piping bag with a fine tip (or a Ziploc bag with a tiny corner snipped off). -
Step 6
Retrieve the ganache-topped cheesecake. Starting from the center, pipe concentric circles of white chocolate onto the dark ganache. Immediately, using a clean toothpick or small knife, drag lines from the center outwards through the white chocolate circles to create a spider web pattern. For added detail, drag some lines inwards from the edge. Decorate with additional Halloween candies such as gummy worms, candy corn, edible googly eyes, or black licorice whips for spider legs. -
Step 7
Refrigerate the decorated cheesecake for at least another 2-4 hours to allow the ganache and white chocolate web to set completely and flavors to meld. When ready to serve, carefully release the springform pan collar. For clean slices, dip a sharp knife in hot water and wipe it clean between each cut. Serve chilled.
Important Information
Nutrition Facts (Per Serving)
It is important to consider this information as approximate and not to use it as definitive health advice.
Allergy Information
Please check ingredients for potential allergens and consult a health professional if in doubt.
Leave a Comment