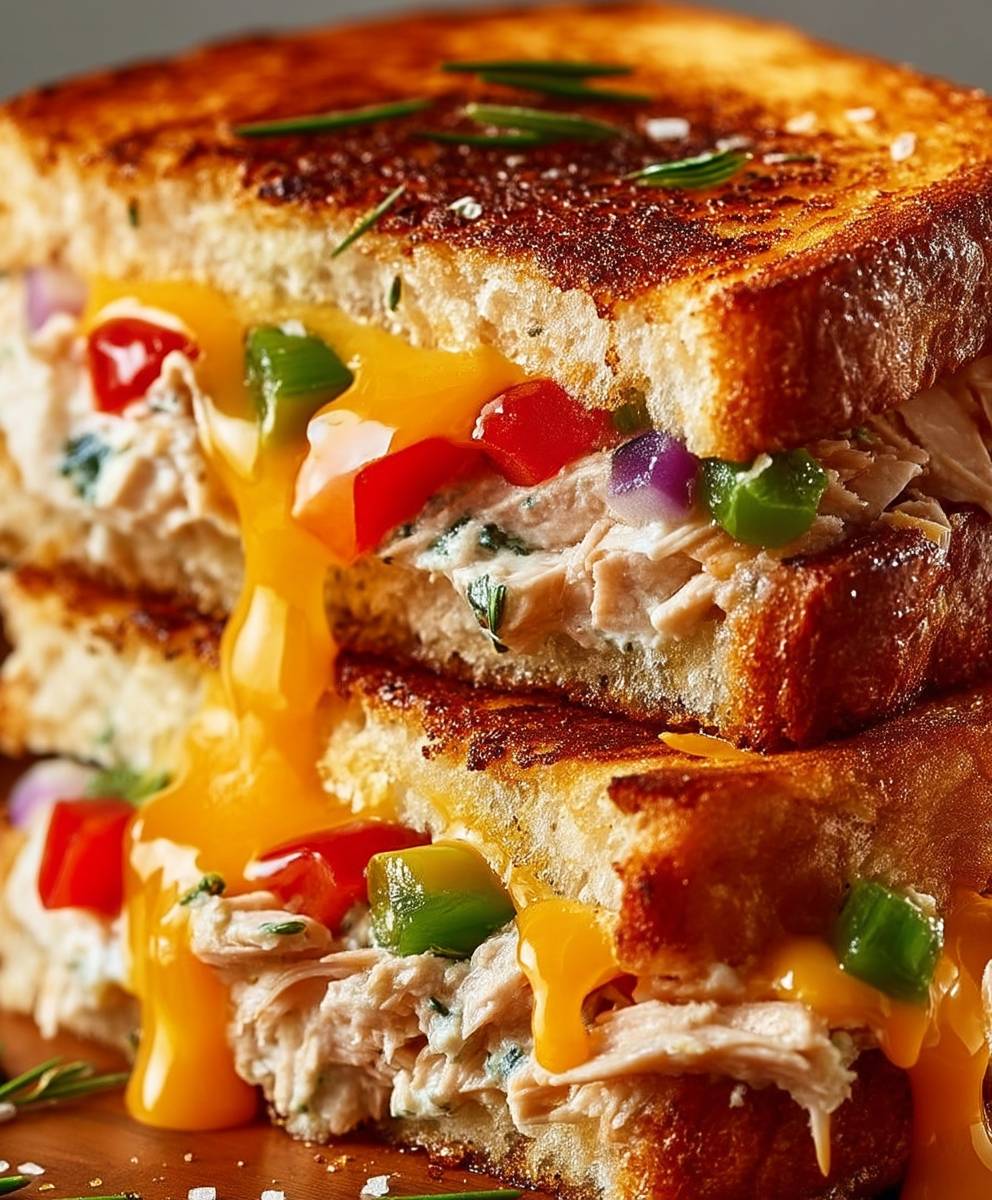
Tuna Melt: the ultimate comfort food that’s ready in minutes! Are you craving a warm, cheesy, and satisfying sandwich that requires minimal effort? Then look no further! This isn’t just any sandwich; it’s a culinary hug on a plate, a symphony of flavors and textures that will transport you back to simpler times.
While the exact origins of the tuna melt are debated, its popularity soared in the mid-20th century, becoming a staple in American diners and lunch counters. It represents a time when quick, affordable, and delicious meals were highly valued. Think of it as a modern twist on the classic tuna salad sandwich, elevated with the magic of melted cheese.
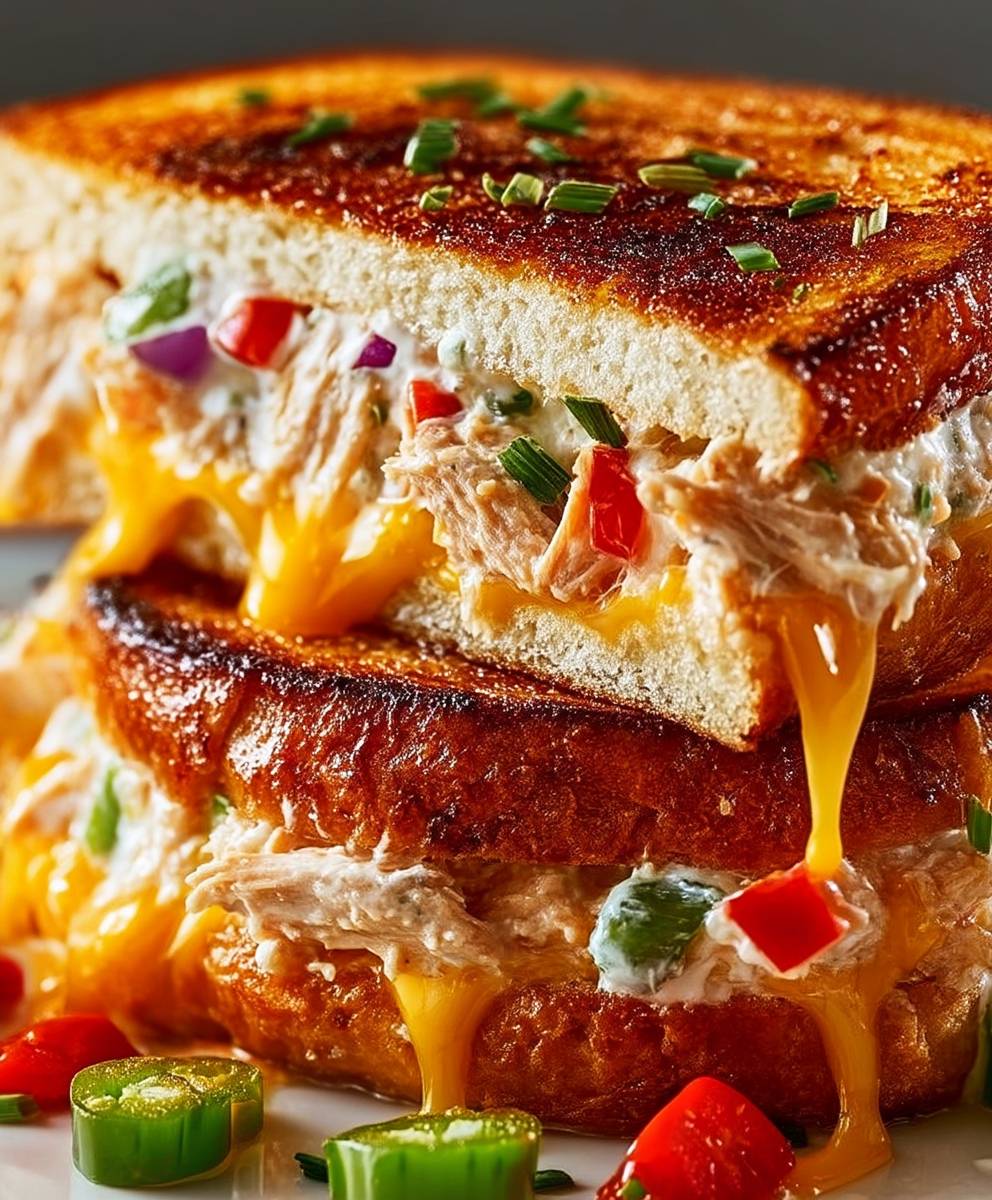
What makes the tuna melt so irresistible? It’s the perfect combination of creamy, savory tuna salad, the crispness of toasted bread, and the gooey, melted cheese that pulls it all together. It’s incredibly versatile, easily customizable to your liking, and a fantastic way to use pantry staples. Whether you’re looking for a quick lunch, a comforting dinner, or a satisfying snack, the tuna melt is always a winning choice. Get ready to experience sandwich perfection!
Ingredients:
- 5 ounces canned tuna in water, drained well
- 1/4 cup mayonnaise
- 2 tablespoons finely chopped celery
- 1 tablespoon finely chopped red onion
- 1 teaspoon Dijon mustard
- 1/4 teaspoon black pepper
- Pinch of salt, or to taste
- 4 slices of your favorite bread (I love sourdough or rye!)
- 4 slices of cheddar cheese (or your preferred melting cheese, like Swiss or Monterey Jack)
- 2 tablespoons butter, softened
Preparing the Tuna Salad:
Okay, let’s get started! The heart of a great tuna melt is, of course, the tuna salad. We want it flavorful and creamy, but not too wet. Here’s how I make mine:
- Drain the Tuna Thoroughly: This is crucial! Press the tuna against the side of the can with a fork to squeeze out as much water as possible. You can even use a clean paper towel to blot it dry. Excess moisture will make your sandwich soggy, and nobody wants that.
- Combine Ingredients in a Bowl: In a medium-sized bowl, add the drained tuna, mayonnaise, celery, red onion, Dijon mustard, black pepper, and salt.
- Mix Gently: Use a fork to gently combine all the ingredients. Be careful not to overmix, as you want to keep some texture in the tuna salad. We’re not aiming for a paste here!
- Taste and Adjust Seasoning: Now, the most important part taste it! Does it need a little more salt? A touch more pepper? Maybe a tiny bit more Dijon for a tangier flavor? Adjust the seasoning to your liking. Remember, you can always add more, but you can’t take it away.
Assembling the Tuna Melts:
Now comes the fun part building our masterpiece! This is where the magic happens, and we transform simple ingredients into a warm, gooey, and satisfying sandwich.
- Butter the Bread: Spread a thin, even layer of softened butter on one side of each slice of bread. This will create a golden-brown, crispy crust when we cook the sandwiches. Don’t skimp on the butter it’s what makes the outside so delicious!
- Layer the Cheese: Place two slices of cheese on the unbuttered side of two slices of bread. Make sure the cheese covers most of the bread surface, as this will help it melt evenly.
- Add the Tuna Salad: Spread half of the tuna salad evenly over the cheese on each of the two slices of bread. Don’t overload the sandwich, or it will be difficult to manage and the filling might squish out.
- Top with More Cheese: Place the remaining two slices of cheese on top of the tuna salad. This creates a cheesy barrier that helps hold the tuna salad in place and adds extra gooeyness.
- Top with Bread: Place the remaining two slices of bread, butter-side up, on top of the cheese. Now you have two assembled tuna melts, ready for cooking!
Cooking the Tuna Melts:
There are a few ways to cook a tuna melt, but my favorite is in a skillet on the stovetop. It gives you the best control over the browning and melting process. Here’s how I do it:
- Heat a Skillet: Place a large skillet (preferably non-stick) over medium-low heat. You want the skillet to be hot enough to melt the cheese and brown the bread, but not so hot that it burns the outside before the inside is warmed through.
- Cook the Sandwiches: Carefully place the assembled tuna melts in the heated skillet. Make sure they have enough space and aren’t overcrowded. If your skillet isn’t big enough, you may need to cook them in batches.
- Press Gently: Use a spatula to gently press down on the sandwiches. This helps them cook evenly and ensures that the cheese melts properly.
- Cook for 3-5 Minutes per Side: Cook the sandwiches for 3-5 minutes per side, or until the bread is golden brown and the cheese is melted and gooey. Keep a close eye on them to prevent burning. You may need to adjust the heat slightly depending on your stove.
- Flip Carefully: Use a spatula to carefully flip the sandwiches. Be gentle, as the melted cheese can be messy.
- Continue Cooking: Continue cooking the sandwiches for another 3-5 minutes, or until the second side is golden brown and the cheese is completely melted.
- Check for Doneness: To check if the tuna melts are done, gently press down on the center of the sandwich. If the cheese oozes out and the bread is golden brown, they’re ready!
Alternative Cooking Methods:
While I prefer the skillet method, here are a couple of other options you can try:
Using a Griddle:
A griddle works similarly to a skillet, but it provides a larger, flatter surface for cooking multiple sandwiches at once. Simply heat the griddle to medium-low heat and follow the same cooking instructions as above.
Using a Panini Press:
A panini press is a great option for creating perfectly pressed and grilled tuna melts. Preheat the panini press according to the manufacturer’s instructions. Place the assembled sandwiches in the press and close the lid. Cook for 3-5 minutes, or until the bread is golden brown and the cheese is melted. Be careful not to overfill the press, as this can prevent it from closing properly.
Serving and Enjoying Your Tuna Melt:
Once your tuna melts are cooked to perfection, it’s time to serve and enjoy! Here are a few tips for the ultimate tuna melt experience:
- Cut in Half: Use a sharp knife to cut the tuna melts in half diagonally. This makes them easier to handle and eat.
- Serve Immediately: Tuna melts are best served hot and fresh, while the cheese is still melted and gooey.
- Pair with Sides: Tuna melts are delicious on their own, but they also pair well with a variety of sides. Some of my favorites include:
- Tomato soup
- Potato chips
- Pickles
- Coleslaw
- A simple green salad
- Garnish (Optional): For a little extra flair, you can garnish your tuna melts with a sprinkle of paprika or a few chopped chives.
Tips and Variations:
The beauty of a tuna melt is that it’s so versatile! Here are a few ideas for customizing your tuna melt to your liking:
Cheese Variations:
While cheddar cheese is a classic choice, don’t be afraid to experiment with other types of cheese. Here are a few suggestions:
- Swiss Cheese: Adds a nutty and slightly tangy flavor.
- Monterey Jack Cheese: Melts beautifully and has a mild, creamy flavor.
- Pepper Jack Cheese: Adds a spicy kick.
- Provolone Cheese: A good melting cheese with a slightly sharp flavor.
- Gruyere Cheese: A rich and complex cheese that adds a sophisticated touch.
Adding Vegetables:
You can add other vegetables to your tuna salad for extra flavor and texture. Some popular additions include:
- Diced Tomatoes: Adds a juicy and refreshing element.
- Pickled Relish: Adds a tangy and sweet flavor.
- Chopped Dill Pickles: Adds a crunchy and sour element.
- Avocado Slices: Adds a creamy and healthy element (add after cooking).
- Spinach or Arugula: Adds a fresh and leafy element (add after cooking).
Spice it Up:
If you like a little heat, try adding a pinch of red pepper flakes or a dash of hot sauce to your tuna salad.
Bread Options:
While sourdough and rye are my go-to choices, you can use any type of bread you like. Here are a few other options:
- White Bread: A classic choice for a simple and comforting tuna melt.
- Wheat Bread: A healthier option with a slightly nutty flavor.
- Multigrain Bread: Adds a hearty and wholesome element.
- Ciabatta Bread: A crusty and flavorful bread that holds up well to the filling.
Tuna Options:
You can use tuna packed in water or oil, depending on your preference. Tuna packed in oil will have a richer flavor, but it will also be higher in calories. You can also use
Conclusion:
So there you have it! This isn’t just any tuna melt; it’s the tuna melt you’ve been searching for. The perfect balance of creamy, savory, and cheesy goodness, all nestled between slices of perfectly toasted bread. I truly believe this recipe is a must-try because it elevates a simple classic to something truly special. It’s quick enough for a weeknight dinner, satisfying enough for a weekend lunch, and honestly, impressive enough to serve to guests (who will undoubtedly ask for the recipe!).
But why is it so special? It’s the attention to detail, the little tweaks that make a big difference. The lemon zest brightens the tuna mixture, the Dijon mustard adds a subtle tang, and the combination of cheeses creates a melt that’s both gooey and flavorful. It’s a symphony of flavors that will have your taste buds singing!
And the best part? It’s incredibly versatile! Feel free to experiment with different types of bread. Sourdough, rye, or even a crusty baguette would work beautifully. For a lighter option, try using whole wheat bread. You could also swap out the cheddar and Monterey Jack for other cheeses like provolone, Gruyere, or even a sharp white cheddar for an extra kick.
Serving Suggestions and Variations:
* Make it a meal: Serve your tuna melt with a side of crispy potato chips, a fresh green salad, or a bowl of creamy tomato soup.
* Spice it up: Add a pinch of red pepper flakes to the tuna mixture for a little heat.
* Go gourmet: Use high-quality tuna in olive oil for a richer flavor.
* Open-faced tuna melt: Toast the bread slices and then broil the tuna mixture on top for an open-faced version.
* Tuna melt sliders: Use slider buns for a fun and easy appetizer.
* Add some veggies: Thinly sliced tomatoes, avocado, or sprouts can add a fresh element.
* Grilled Cheese Hybrid: For an extra decadent treat, spread a thin layer of mayonnaise on the outside of the bread before grilling for a golden brown and extra crispy crust.
This recipe is more than just a set of instructions; it’s an invitation to create something delicious and satisfying. I’ve poured my heart into perfecting this tuna melt, and I’m confident that you’ll love it as much as I do.
So, what are you waiting for? Head to the kitchen, gather your ingredients, and get ready to experience the ultimate tuna melt. I promise you won’t be disappointed.
And most importantly, I want to hear about your experience! Did you try the recipe as is, or did you put your own spin on it? What were your favorite variations? Share your photos and comments below! I can’t wait to see what you create. Happy cooking! I’m sure you will love this recipe as much as I do.
Tuna Melt: The Ultimate Guide to a Perfect Sandwich
A warm, comforting, and cheesy tuna melt sandwich made with a creamy tuna salad and your favorite melting cheese, grilled to golden-brown perfection.
Ingredients
- 5 ounces canned tuna in water, drained well
- 1/4 cup mayonnaise
- 2 tablespoons finely chopped celery
- 1 tablespoon finely chopped red onion
- 1 teaspoon Dijon mustard
- 1/4 teaspoon black pepper
- Pinch of salt, or to taste
- 4 slices of your favorite bread (I love sourdough or rye!)
- 4 slices of cheddar cheese (or your preferred melting cheese, like Swiss or Monterey Jack)
- 2 tablespoons butter, softened
Instructions
- Prepare the Tuna Salad: Drain the tuna thoroughly, pressing out excess water. In a medium bowl, combine the drained tuna, mayonnaise, celery, red onion, Dijon mustard, black pepper, and salt. Mix gently with a fork, being careful not to overmix. Taste and adjust seasoning as needed.
- Assemble the Tuna Melts: Butter one side of each slice of bread. Place two slices of cheese on the unbuttered side of two slices of bread. Spread half of the tuna salad evenly over the cheese on each of the two slices of bread. Place the remaining two slices of cheese on top of the tuna salad. Top with the remaining two slices of bread, butter-side up.
- Cook the Tuna Melts: Heat a large skillet (preferably non-stick) over medium-low heat. Carefully place the assembled tuna melts in the heated skillet. Press gently with a spatula. Cook for 3-5 minutes per side, or until the bread is golden brown and the cheese is melted and gooey. Flip carefully with a spatula.
- Serve: Cut the tuna melts in half diagonally and serve immediately.
Notes
- Thoroughly draining the tuna is crucial to prevent a soggy sandwich.
- Experiment with different cheeses like Swiss, Monterey Jack, Pepper Jack, Provolone, or Gruyere.
- Consider adding diced tomatoes, pickled relish, chopped dill pickles, avocado slices (after cooking), or spinach/arugula (after cooking) to the tuna salad.
- Add a pinch of red pepper flakes or a dash of hot sauce to the tuna salad for a little heat.
- Use your favorite type of bread, such as white, wheat, multigrain, or ciabatta.
- You can also cook the tuna melts on a griddle or in a panini press.

Leave a Comment