
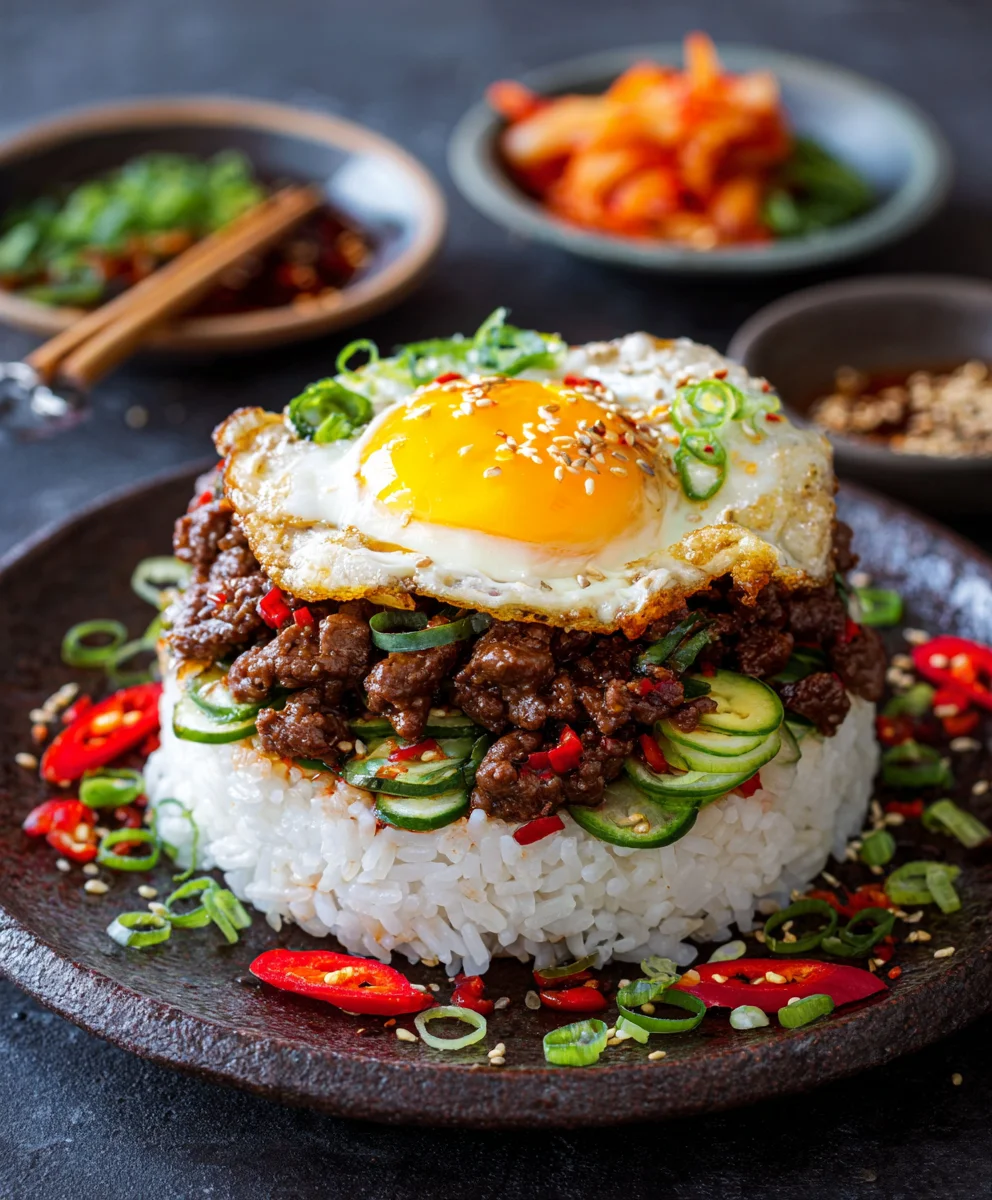
Korean Bbq Beef Rice Stack. Imagine the irresistible aroma of perfectly marinated bulgogi, sizzling with savory-sweet perfection, now reimagined into a fun, deconstructed, and utterly satisfying meal that’s both vibrant and incredibly easy to assemble. I’m so excited to share this recipe with you because it takes all the beloved components of a traditional Korean BBQ feast and presents them in a novel, convenient form. While classic Korean BBQ often involves grilling at the table and wrapping individual bites, this stack pays homage to those foundational flavors, offering a delightful way to enjoy a complete meal in every forkful. People absolutely adore this dish not just for its incredible taste – the tender, flavorful beef, the fluffy rice, and the fresh, crisp garnishes – but also for its beautiful presentation and the sheer joy of customized layers. It’s the ultimate combination of savory, umami-rich meat, comforting rice, and vibrant toppings, making the Korean Bbq Beef Rice Stack a surefire crowd-pleaser for any occasion, whether it’s a casual weeknight dinner or a special gathering with friends. Get ready to elevate your culinary experience!

Ingredients:
-
For the Korean BBQ Beef (Bulgogi):
- 1.5-2 pounds (about 680-900g) thinly sliced beef (ribeye, sirloin, or flank steak works beautifully)
- 1/2 cup (120ml) soy sauce (I prefer low-sodium to control saltiness)
- 1/4 cup (50g) packed light brown sugar (or honey/maple syrup for a slightly different sweetness)
- 2 tablespoons (30ml) sesame oil (toasted sesame oil provides the best aroma)
- 4-5 cloves garlic, minced (don’t skimp on the garlic, it’s essential!)
- 1 inch (2.5cm) fresh ginger, grated (peel it first!)
- 1/2 small Asian pear, grated (this is a secret tenderizer and adds natural sweetness)
- 1/4 cup (60ml) mirin (Japanese sweet cooking wine, adds depth of flavor)
- 1 tablespoon gochujang (Korean chili paste, optional for a hint of spice, but highly recommended for complexity)
- 1/2 teaspoon black pepper, freshly ground
- 2 tablespoons water or beef broth (helps distribute the marinade)
-
For the Perfect Sticky Rice:
- 2 cups (about 400g) short-grain Korean or Japanese rice
- 2.5 cups (about 600ml) cold water
- A pinch of salt (optional, for flavor)
-
For the Sautéed Vegetables (Namul Style):
- 1 tablespoon sesame oil (for sautéing)
- 1 large carrot, julienned
- 1 medium zucchini, julienned
- 5-6 ounces (about 150g) fresh spinach, stems removed
- 1 cup (about 100g) shiitake mushrooms, thinly sliced (or your favorite mushroom)
- 2 cloves garlic, minced (for the vegetables)
- Salt and black pepper to taste
- A pinch of toasted sesame seeds (for garnish on veggies)
-
For the Fried Egg:
- 2-4 large eggs (one per stack is ideal)
- 1 tablespoon cooking oil (vegetable, canola, or a neutral oil)
-
For Garnish and Serving:
- 2-3 green onions (scallions), thinly sliced
- Extra toasted sesame seeds
- Optional: Kimchi, gochujang sauce, or a drizzle of extra sesame oil for serving
Preparing the Korean BBQ Beef Marinade and Marinating the Beef
Alright, let’s dive into making our incredible Korean Bbq Beef Rice Stack! The heart of this dish is, without a doubt, the succulent bulgogi, and it all starts with a fantastic marinade. This step is crucial for flavor and tenderness, so let’s take our time.
- Slice the Beef: First things first, prepare your beef. If you didn’t buy pre-sliced bulgogi meat, don’t worry, it’s easy to do yourself. For optimal slicing, I find it’s best to slightly freeze your cut of beef (ribeye, sirloin, or flank) for about 30-45 minutes. This firms it up, making it much easier to slice against the grain into very thin, uniform pieces, about 1/8 to 1/4 inch thick. Aim for bite-sized pieces, as this makes for easier eating in our stack. Place the sliced beef in a large, non-reactive bowl.
- Combine Marinade Ingredients: In a separate medium bowl, whisk together all the marinade ingredients. This includes your 1/2 cup soy sauce, 1/4 cup brown sugar, 2 tablespoons sesame oil, 4-5 cloves minced garlic, 1 inch grated fresh ginger, 1/2 grated Asian pear, 1/4 cup mirin, 1 tablespoon gochujang (if using), 1/2 teaspoon black pepper, and 2 tablespoons water or beef broth. Whisk vigorously until the brown sugar is fully dissolved and everything is well combined. The grated Asian pear is a traditional Korean secret; its enzymes naturally tenderize the meat while adding a subtle sweetness that balances the savory notes.
- Marinate the Beef: Pour the prepared marinade over your thinly sliced beef in the large bowl. Use your clean hands (or a spoon, but hands are better for even distribution!) to gently massage the marinade into every piece of beef. Ensure each slice is thoroughly coated. This hands-on approach really helps the flavors penetrate.
- Refrigerate: Once thoroughly mixed, cover the bowl with plastic wrap or transfer the beef to a resealable bag. Place it in the refrigerator to marinate. For the best flavor and tenderness, I recommend marinating for at least 2 hours, but preferably 4 hours or even overnight (up to 24 hours). The longer it marinates, the more flavorful and tender your bulgogi will be, making your Korean Bbq Beef Rice Stack truly shine!
Cooking the Perfect Sticky Rice
No Korean Bbq Beef Rice Stack is complete without perfectly cooked, fluffy, and slightly sticky rice. This isn’t just a side dish; it’s the foundation of our magnificent stack. Getting the rice right makes all the difference.
- Rinse the Rice: Place 2 cups of short-grain Korean or Japanese rice into a fine-mesh sieve or a large bowl. Rinse the rice under cold running water, gently swirling it with your hand, until the water runs clear. This usually takes about 3-5 rinses. Rinsing removes excess starch, which prevents the rice from becoming overly gummy and ensures each grain is distinct yet perfectly sticky.
- Soak the Rice (Optional but Recommended): For even better texture, after rinsing, transfer the rice to a bowl and cover it with cold water. Let it soak for 30 minutes. This allows the rice grains to absorb water evenly, leading to more tender and fluffy cooked rice. Drain thoroughly after soaking.
- Cook the Rice (Stovetop Method): If you’re using a pot on the stove, combine the rinsed and drained rice with 2.5 cups of cold water (and a pinch of salt if using) in a heavy-bottomed pot with a tight-fitting lid. Bring it to a boil over medium-high heat. As soon as it boils, reduce the heat to the lowest setting, cover tightly, and simmer for 15-20 minutes, or until all the water is absorbed. Do not lift the lid during this process! Resist the temptation, as releasing the steam will disrupt the cooking.
- Rest the Rice: Once the cooking time is up, remove the pot from the heat (still keeping the lid on!) and let it rest for another 10-15 minutes. This resting period allows the steam to redistribute, resulting in perfectly fluffed grains that are moist and tender.
- Fluff and Serve: Finally, lift the lid and gently fluff the rice with a rice paddle or fork. Your rice is now ready to form the base of your delicious Korean Bbq Beef Rice Stack!
- (Alternatively, Rice Cooker Method): If you have a rice cooker, simply combine the rinsed rice and 2.5 cups of cold water in the rice cooker pot. Follow your rice cooker’s instructions for cooking short-grain rice. Most modern rice cookers have a “white rice” setting that handles everything automatically, including the resting period. It’s a very convenient way to achieve consistently perfect results for your rice component.
Preparing the Stack Components: Sautéed Vegetables and Fried Eggs
With our beef marinating and rice ready, let’s prepare the colorful and flavorful vegetable components and the crowning glory – a perfectly fried egg. These elements add crucial texture, nutrition, and visual appeal to our Korean Bbq Beef Rice Stack.
- Blanch the Spinach: Bring a small pot of lightly salted water to a boil. Add the fresh spinach and blanch for about 30 seconds to 1 minute, until just wilted. Immediately transfer the spinach to an ice bath (a bowl of cold water with ice cubes) to stop the cooking and preserve its vibrant green color. Squeeze out as much excess water as possible, then roughly chop it. Toss with a tiny bit of sesame oil, minced garlic (a pinch), and a sprinkle of salt. Set aside.
- Sauté the Carrots: Heat 1/2 tablespoon of sesame oil in a large skillet or wok over medium-high heat. Add the julienned carrots and sauté for 2-3 minutes until slightly tender-crisp. You want them to retain a little bite. Season with a pinch of salt and pepper. Transfer to a separate bowl and set aside.
- Sauté the Zucchini: In the same skillet, add another 1/2 tablespoon of sesame oil if needed. Add the julienned zucchini and sauté for 2-3 minutes until tender-crisp. Again, a slight crunch is desired. Season with salt and pepper. Transfer to a separate bowl.
- Sauté the Mushrooms: Add the sliced shiitake mushrooms to the skillet. Cook for 3-5 minutes, stirring occasionally, until they release their moisture and are nicely browned and tender. A little minced garlic can be added here for extra flavor. Season with salt and pepper. Transfer to a separate bowl.
- Keep Vegetables Separate: It’s important to keep these vegetables separate after cooking. This allows for individual seasoning and maintains their distinct flavors and textures, which will be delightful when layering your Korean Bbq Beef Rice Stack.
- Fry the Eggs: In a separate non-stick skillet, heat about 1 tablespoon of cooking oil over medium heat. Crack your eggs directly into the pan. Cook until the whites are set but the yolks are still runny, or to your preferred doneness. A runny yolk is highly recommended for this dish, as it acts as a wonderful sauce that cascades over the stack! Season with a tiny sprinkle of salt and pepper. Set aside, perhaps on a warm plate to keep them ready.
Cooking the Korean BBQ Beef (Bulgogi)
Now for the main event! Cooking the marinated bulgogi beef is quick and requires high heat to achieve that delicious caramelization and tender texture. This is where the magic of our Korean Bbq Beef Rice Stack truly comes alive.
- Heat the Pan: Place a large skillet, wok, or cast-iron pan over medium-high to high heat. You want it to be very hot before adding the beef. A well-heated pan ensures a good sear and prevents the meat from stewing.
- Cook in Batches: This is a crucial step! Do not overcrowd the pan. If you put too much beef in at once, the temperature of the pan will drop, and the beef will steam instead of sear, resulting in tough, grey meat. Cook the beef in 2-3 batches, depending on the size of your pan.
- Sear the Beef: Add a single layer of marinated beef to the hot pan. Let it sear for 1-2 minutes on one side until it develops a beautiful brown crust. Then, stir and cook for another 1-2 minutes until all pieces are cooked through and slightly caramelized. The beef cooks very quickly because it’s so thin.
- Transfer Cooked Beef: As each batch finishes cooking, transfer the bulgogi to a clean plate. Some delicious juices will accumulate in the pan; these are gold! Don’t discard them; they’ll become part of the flavor of our stack.
- Repeat: Continue with the remaining batches of beef until all of it is cooked. If the pan starts to dry out or too many bits are sticking, you can deglaze with a tiny splash of water or a bit of the remaining marinade (just a tablespoon or two) between batches.
- Keep Warm: Once all the bulgogi is cooked, you can return all the beef to the pan with any accumulated juices and keep it warm on very low heat until ready to assemble. The aroma filling your kitchen right now should be absolutely intoxicating and build excitement for your Korean Bbq Beef Rice Stack!
Assembling the Korean Bbq Beef Rice Stack
This is where our beautiful creation comes together! The presentation of the Korean Bbq Beef Rice Stack is part of its charm. While you can simply plate it, using a ring mold creates a stunning, restaurant-quality presentation. This part is incredibly fun and rewarding!
- Prepare Your Mold (Optional but Recommended): If you’re using a ring mold (a cooking ring, a clean tuna can with both ends removed, or even a small springform pan without the bottom), place it in the center of your serving plate. This will help you build those perfect layers for your Korean Bbq Beef Rice Stack. If you don’t have a mold, don’t fret; you can still layer it artfully on the plate – it will be just as delicious!
- Layer 1: The Rice Base: Spoon about 1/2 to 3/4 cup of your warm, fluffy short-grain rice into the bottom of the ring mold (or onto your plate). Gently press it down firmly with the back of a spoon to create a compact, stable base. This is the foundation of your delicious Korean Bbq Beef Rice Stack, so make sure it’s even.
- Layer 2: Sautéed Vegetables: Carefully arrange a layer of your vibrant sautéed vegetables over the rice. I like to start with the spinach, followed by carrots, then zucchini, and finally the mushrooms. You can layer them individually or mix them slightly. Aim for a generous but not overwhelming layer. The variety of colors and textures from the vegetables is key to a visually appealing and satisfying Korean Bbq Beef Rice Stack.
- Layer 3: Korean BBQ Beef (Bulgogi): Now for the star! Generously pile a good portion of your warm, tender bulgogi beef over the vegetables. Make sure it’s spread evenly within the mold. This is the layer that delivers that incredible savory, sweet, and umami punch, defining the “Korean Bbq Beef” in our stack.
- Repeat Layers (Optional): If your mold is tall enough or you want an extra-hearty stack, you can repeat the layers: another thinner layer of rice, followed by more vegetables, and then more beef. This creates an even more impressive and substantial Korean Bbq Beef Rice Stack.
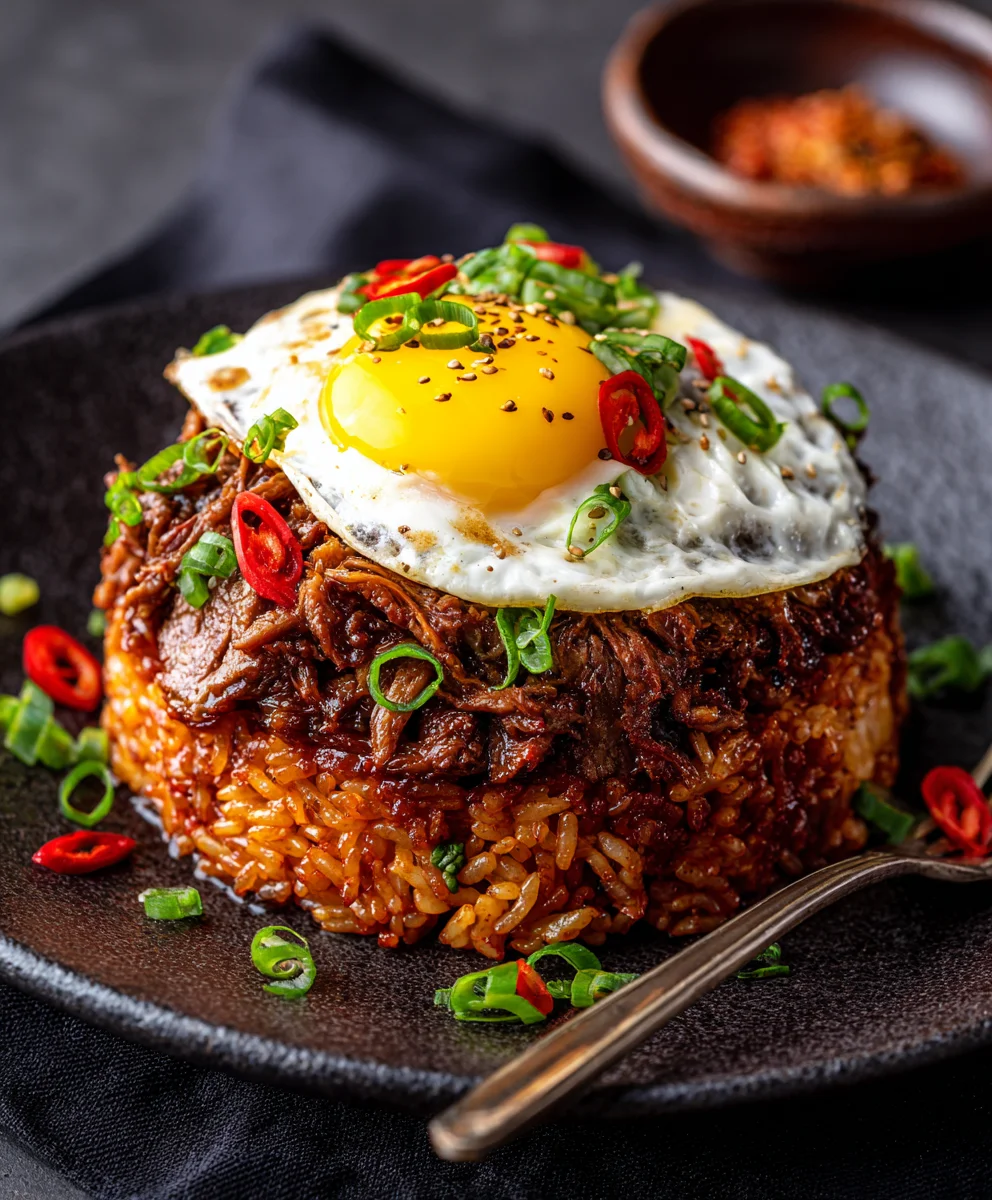
- Top with Fried Egg: Gently place one of your perfectly fried eggs on top of the bulgogi. If you prefer, you can carefully slide it off the spatula directly onto the stack. The runny yolk, if you chose that doneness, will eagerly await its moment to cascade down the sides!
- Remove the Mold: Carefully and slowly lift the ring mold straight up, revealing your beautifully constructed Korean Bbq Beef Rice Stack. Take a moment to admire your handiwork!
- Garnish and Serve: Finish your masterpiece with a generous sprinkle of thinly sliced green onions and extra toasted sesame seeds. These not only add a fresh burst of flavor but also enhance the visual appeal. For an extra kick, a dollop of gochujang sauce on the side, or a drizzle of the beef cooking juices over the stack, can be fantastic.
Serving Suggestions for Your Korean Bbq Beef Rice Stack
Your magnificent Korean Bbq Beef Rice Stack is now ready to be enjoyed! While it’s a complete meal on its own, here are a few suggestions to elevate the dining experience and offer a balanced and authentic Korean spread:
- Accompany with Kimchi: A small bowl of spicy, tangy kimchi is the perfect accompaniment. Its fermented flavors cut through the richness of the beef and add a wonderful textural contrast. I always have kimchi ready when I’m serving any Korean dish, especially something as hearty as a Korean Bbq Beef Rice Stack.
- Gochujang Sauce: If you didn’t include gochujang in the marinade, or even if you did but love extra spice, a simple sauce made from gochujang, a touch of sesame oil, and a tiny bit of rice vinegar or water makes a great optional addition for those who like more heat.
- Extra Sesame Oil: A tiny drizzle of high-quality toasted sesame oil over the egg or even the rice just before serving can heighten the nutty aroma and flavor profile of your Korean Bbq Beef Rice Stack.
- Light Soup or Salad: For a more rounded meal, consider serving a light, clear broth soup (like a simple seaweed soup) or a fresh green salad with a light sesame dressing on the side. This provides a refreshing counterpoint to the savory and rich flavors of the stack.
- Family Style (without the stack): If you’re not keen on the stacking, you can absolutely serve all components family style. Present the rice in a large bowl, the bulgogi on a platter, and the sautéed vegetables in individual bowls, allowing everyone to build their own custom bowls. It’s still the same delicious Korean Bbq Beef, just deconstructed.
- Enjoy Immediately: This dish is best enjoyed immediately while the beef is warm, the egg yolk is runny, and the rice is perfectly fresh. Gather your loved ones and dig into this incredibly satisfying and flavorful Korean Bbq Beef Rice Stack. It’s a dish that truly impresses and delights on every level!
Conclusion:
And there you have it, my friends! We’ve reached the delicious culmination of our culinary journey. After guiding you through each step, I sincerely hope you’re feeling inspired and ready to dive headfirst into creating this absolute masterpiece. When I first envisioned this recipe, I wanted to craft something that wasn’t just a meal, but a memorable experience – a dish that brings people together, delights the senses, and truly stands out. And I honestly believe this recipe achieves all of that and more.
Why is this recipe a must-try? Let me count the ways! First and foremost, the flavor profile is simply unparalleled. We’re talking about that perfect marriage of savory, subtly sweet, and wonderfully umami-rich beef, marinated to perfection and cooked until tender and juicy. Each bite offers a harmonious blend of textures and tastes: the comforting fluffiness of perfectly cooked rice, the satisfying chew of the beef, and the refreshing crunch of the fresh toppings. It’s a symphony for your taste buds, an intricate dance of flavors that leaves you craving more long after the last bite. It’s also surprisingly straightforward to prepare, making it an ideal choice for both seasoned home cooks and those looking to impress without spending hours slaving over a hot stove. Trust me, the effort-to-reward ratio here is incredibly high, delivering restaurant-quality taste right in your own kitchen.
Beyond its incredible taste, this dish offers remarkable versatility, making it perfect for a variety of occasions. While it shines as a show-stopping centerpiece for a casual dinner party, it’s also fantastic for a cozy family meal. Imagine serving this during a weekend gathering; your guests will be raving about it for weeks! The beauty of this recipe also lies in its adaptability. For serving suggestions, consider pairing your main dish with a few traditional Korean banchan (side dishes) if you’re feeling adventurous. Some crisp kimchi is always a welcome addition, providing a tangy, spicy counterpoint that cuts through the richness of the beef beautifully. Quick-pickled daikon radish or cucumber salad would also offer a refreshing zing. If you prefer a lighter touch, a simple green salad with a sesame-ginger dressing would complement the flavors wonderfully. For those who enjoy a bit of extra heat, a drizzle of sriracha or gochujang sauce on top is a fantastic option that adds another layer of complexity and a spicy kick.
Creative Variations to Explore
But don’t stop there! This recipe is a fantastic canvas for your culinary creativity. For variations, you could easily swap out the beef for thinly sliced chicken thighs or even pork belly for a different, yet equally delicious, protein. If you’re looking for a vegetarian or vegan option, consider using marinated portobello mushrooms or extra-firm tofu, pressed and sliced thin, then cooked in the same flavorful marinade. You could also experiment with different types of rice – brown rice would add a nuttier flavor and chewier texture, while black forbidden rice would provide a dramatic visual contrast and unique nutritional benefits. Think about seasonal toppings too; perhaps some sautéed bell peppers, blanched asparagus, or even some thinly sliced avocado for a creamy element. The possibilities are truly endless, allowing you to tailor this dish to your personal preferences and what you have on hand.
Ultimately, this Korean Bbq Beef Rice Stack isn’t just a meal; it’s an experience waiting to happen. It’s an invitation to explore vibrant flavors, create beautiful food, and share joyful moments around the table. I genuinely can’t wait for you to experience this for yourself. There’s something uniquely satisfying about putting together a dish that looks as incredible as it tastes, and this recipe delivers on both fronts with flying colors. So, please, gather your ingredients, set aside some time, and embark on this culinary adventure. I’m confident that once you’ve tried it, it will quickly become a cherished favorite in your recipe rotation.
Once you’ve made it, I’d be absolutely thrilled to hear about your experience. Did you add any unique twists? What were your favorite toppings? Did it become a hit with your family and friends? I love hearing about your kitchen adventures, so please, don’t hesitate to share your thoughts, photos, and any creative modifications you came up with in the comments section below. Your feedback and stories inspire me endlessly. Happy cooking, and enjoy every single delicious bite!
Ultimate Korean BBQ Beef Rice Stack – Quick & Tasty Meal
Experience the ultimate Korean BBQ Beef Rice Stack – a fun, deconstructed, and satisfying meal with perfectly marinated bulgogi. This recipe reinterprets traditional Korean BBQ flavors into a vibrant, easy-to-assemble stack, combining tender, savory-sweet beef with fluffy rice and fresh garnishes for a crowd-pleasing dish that’s visually appealing and utterly delicious.
Ingredients
-
1.5-2 pounds thinly sliced beef (ribeye, sirloin, or flank steak)
-
1/2 cup soy sauce
-
1/4 cup packed light brown sugar
-
2 tablespoons sesame oil
-
4-5 cloves garlic, minced
-
1 inch fresh ginger, grated
-
1/2 small Asian pear, grated
-
1/4 cup non-alcoholic mirin alternative
-
1 tablespoon gochujang (optional)
-
1/2 teaspoon black pepper, freshly ground
-
2 tablespoons water or beef broth
-
2 cups short-grain Korean or Japanese rice
-
2.5 cups cold water
-
A pinch of salt (optional)
-
1 tablespoon sesame oil (for sautéing vegetables)
-
1 large carrot, julienned
-
1 medium zucchini, julienned
-
5-6 ounces fresh spinach, stems removed
-
1 cup shiitake mushrooms, thinly sliced
-
2 cloves garlic, minced (for vegetables)
-
Salt and black pepper to taste (for vegetables)
-
A pinch of toasted sesame seeds (for vegetables)
-
2-4 large eggs
-
1 tablespoon cooking oil
-
2-3 green onions, thinly sliced
-
Extra toasted sesame seeds
-
Optional: Kimchi, gochujang sauce, or extra sesame oil for serving
Instructions
-
Step 1
To prepare beef, slightly freeze for 30-45 minutes, then slice against the grain into 1/8-1/4 inch thin pieces. In a bowl, whisk together soy sauce, brown sugar, sesame oil, minced garlic, grated ginger, grated Asian pear, non-alcoholic mirin alternative, optional gochujang, black pepper, and water/broth. Pour marinade over beef, massage well. Cover and refrigerate for at least 2 hours (up to 24 hours). -
Step 2
Rinse 2 cups short-grain rice under cold water until clear (3-5 rinses). Optionally soak in cold water for 30 minutes, then drain. For stovetop, combine rinsed rice, 2.5 cups cold water, and optional salt in a heavy pot with a tight lid. Bring to boil, reduce heat to lowest, cover, and simmer 15-20 minutes. Do not lift lid. Remove from heat and rest 10-15 minutes, then fluff. (Alternatively, use a rice cooker). -
Step 3
Blanch spinach in lightly salted boiling water for 30-60 seconds; transfer to ice bath, squeeze dry, chop. Toss with a pinch of sesame oil, minced garlic, and salt. Set aside. Heat 1/2 tbsp sesame oil in a skillet over medium-high heat. Sauté julienned carrots 2-3 minutes until tender-crisp; season, transfer to a bowl. Sauté julienned zucchini 2-3 minutes until tender-crisp; season, transfer to a bowl. Sauté sliced shiitake mushrooms 3-5 minutes until browned, adding a little minced garlic; season, transfer to a bowl. Keep all vegetables separate. -
Step 4
Heat 1 tbsp cooking oil in a non-stick skillet over medium heat. Fry 2-4 eggs to desired doneness (runny yolk recommended); season with salt and pepper. Set aside. -
Step 5
Heat a large skillet or wok over medium-high to high heat. Cook beef in 2-3 batches to avoid overcrowding. Sear a single layer of beef for 1-2 minutes until browned, then stir and cook another 1-2 minutes until cooked through. Transfer cooked beef to a plate. Repeat with remaining batches. Return all cooked beef and juices to the pan to keep warm on very low heat. -
Step 6
Place a ring mold (optional) in the center of your serving plate. Spoon 1/2 to 3/4 cup warm rice into the mold, pressing firmly. Layer with sautéed spinach, carrots, zucchini, and mushrooms. Generously pile warm bulgogi beef over the vegetables. Optionally repeat layers for a taller stack. Gently place a fried egg on top. Carefully lift the mold. Garnish with sliced green onions and extra toasted sesame seeds. Serve immediately with optional kimchi, gochujang sauce, or a drizzle of beef juices.
Important Information
Nutrition Facts (Per Serving)
It is important to consider this information as approximate and not to use it as definitive health advice.
Allergy Information
Please check ingredients for potential allergens and consult a health professional if in doubt.


Leave a Comment