
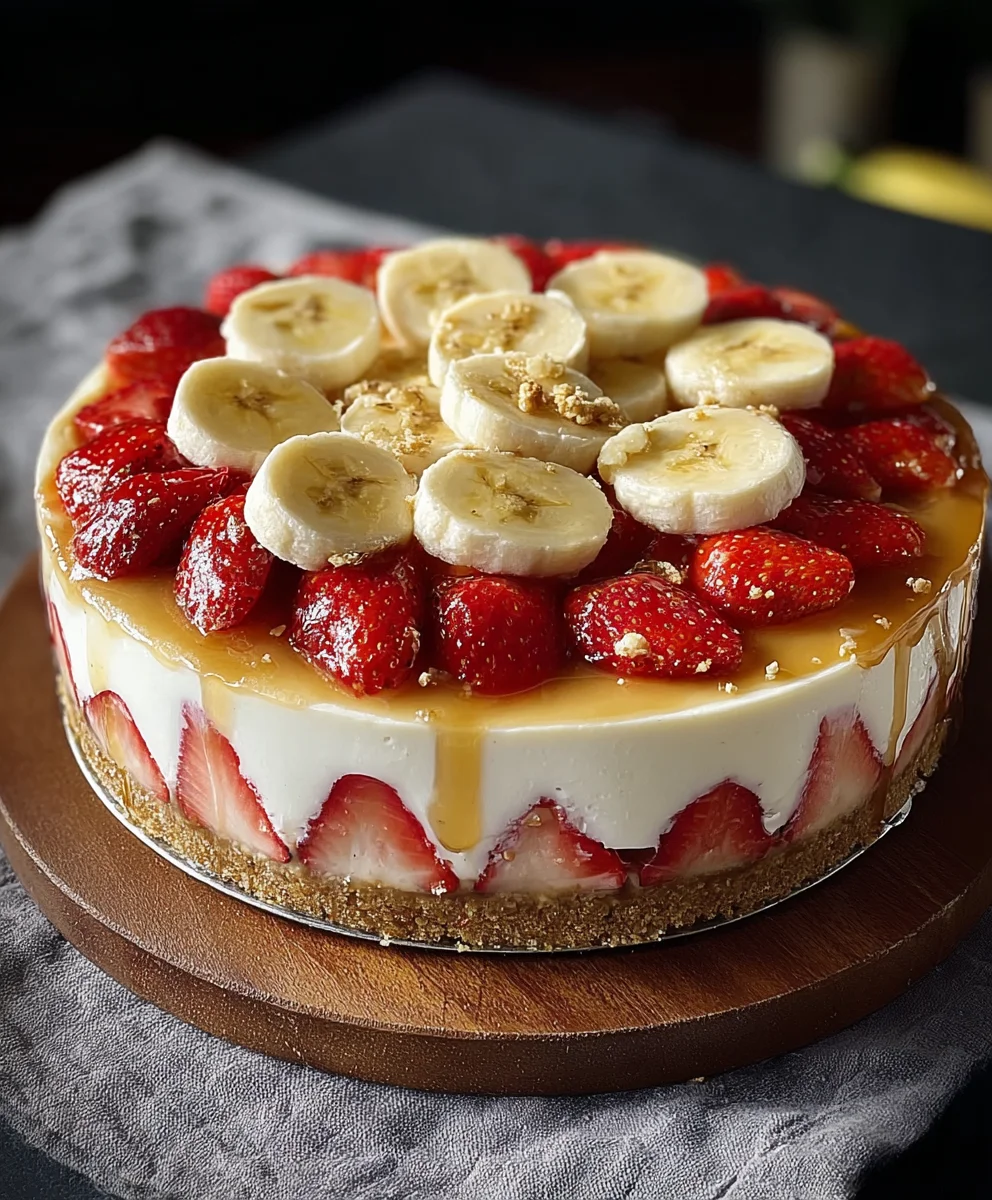
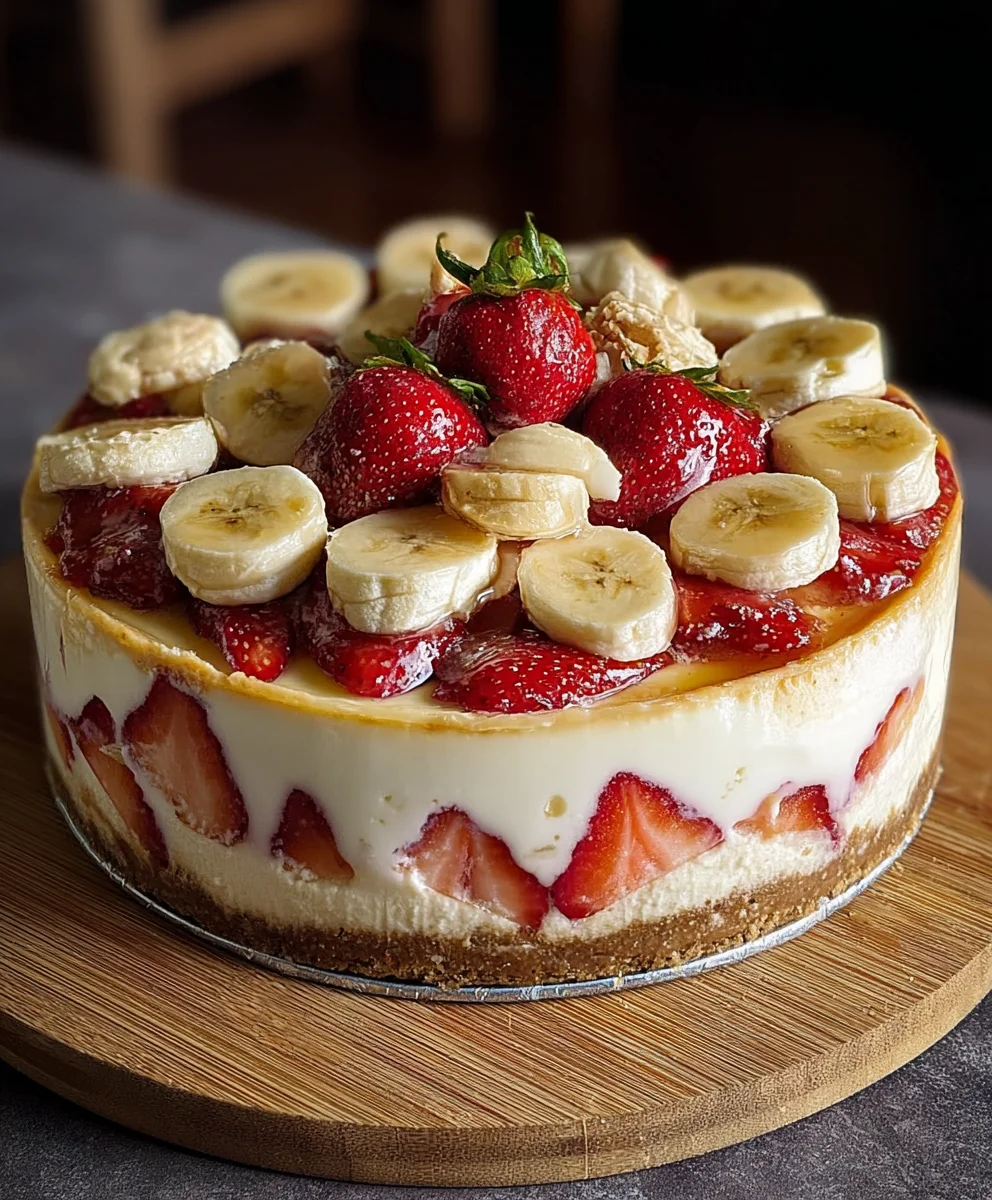
Strawberry Banana Pudding Cheesecake is not merely a dessert; it is an extraordinary culinary experience designed to captivate every one of your senses from the very first bite. Picture the comforting embrace of classic banana pudding, featuring delicate layers of creamy custard and tender vanilla wafers, gracefully combined with the luxurious, tangy richness of a velvety cheesecake, all brightened by the exquisite sweetness of fresh, ripe strawberries. I am genuinely delighted to present a recipe that masterfully blends these cherished flavors into one truly unforgettable creation. While banana pudding holds a special place in Southern culinary history as a beloved comfort food, and cheesecake boasts ancient origins with its modern iteration evolving into an American classic, this innovative twist brings together the best of both worlds.
Why people adore this Strawberry Banana Pudding Cheesecake?
It’s simple: this dish offers the ultimate fusion of creamy, fruity, and subtly crunchy textures, delivering a symphony of tastes that is both nostalgic and exhilaratingly new. It perfectly balances familiarity with a touch of gourmet elegance, making it an irresistible indulgence that everyone will rave about. You’ll discover that this Strawberry Banana Pudding Cheesecake is not just a treat, but a celebration in every spoonful, ideal for special occasions or simply to add a touch of joyful sweetness to your everyday.

<h2>Ingredients:</h2>
<h3>For the Golden Vanilla Wafer Crust:</h3>
<ul>
<li><strong>2 cups (approximately 1 – 14.4 oz box) vanilla wafers</strong>, finely crushed into crumbs. I find a food processor works wonders for achieving that perfect, uniform crumb texture, but a Ziploc bag and a rolling pin are just as effective for a little stress relief!</li>
<li><strong>1/2 cup (1 stick or 8 tablespoons) unsalted butter</strong>, melted. This is crucial for binding our crumbs together into a sturdy foundation for our "Strawberry Banana Pudding Cheesecake."</li>
<li><strong>1/4 cup granulated sugar</strong> (optional, but highly recommended for a slightly sweeter and more robust crust). It just adds that extra little something!</li>
</ul>
<h3>For the Luscious Cheesecake Layer:</h3>
<ul>
<li><strong>3 – 8 oz packages (24 oz total) full-fat cream cheese</strong>, softened completely at room temperature. This is perhaps the most important tip for a silky-smooth, lump-free cheesecake! Plan ahead and let it sit out for at least an hour or two.</li>
<li><strong>1 cup granulated sugar</strong>. For just the right amount of sweetness to complement the creamy tang of the cream cheese.</li>
<li><strong>1/4 cup full-fat sour cream</strong>, also at room temperature. This ingredient is my secret weapon for adding a subtle tang and an incredibly rich, moist texture to the cheesecake.</li>
<li><strong>2 teaspoons pure vanilla extract</strong>. A good quality vanilla makes all the difference in deepening the flavor profile.</li>
<li><strong>3 large eggs</strong>, at room temperature. Again, room temperature eggs emulsify better into the batter, ensuring a smooth consistency without overmixing.</li>
</ul>
<h3>For the Homemade Banana Pudding Layer:</h3>
<ul>
<li><strong>2 cups whole milk</strong>. Full-fat milk creates the richest, creamiest pudding.</li>
<li><strong>1/2 cup granulated sugar</strong>. For a perfectly sweet pudding.</li>
<li><strong>1/4 cup cornstarch</strong>. This is our thickening agent, giving the pudding that lovely, velvety texture.</li>
<li><strong>1/4 teaspoon salt</strong>. Just a pinch to balance the sweetness and enhance all the other flavors.</li>
<li><strong>2 large egg yolks</strong>, lightly beaten. These add richness, color, and help to further thicken our pudding base.</li>
<li><strong>2 tablespoons unsalted butter</strong>. Swirled in at the end for an extra layer of decadence and a glossy finish.</li>
<li><strong>1 teaspoon pure vanilla extract</strong>. Essential for classic banana pudding flavor.</li>
<li><strong>3-4 ripe, but still firm, bananas</strong>, sliced into rounds (you’ll need about 3-4 cups of slices). We want ripe bananas for sweetness, but firm enough so they don’t turn mushy in the pudding layer.</li>
<li><strong>1 cup heavy cream</strong>, very cold, whipped to soft peaks. This is for folding into the cooled pudding to make it extra light and airy, though some people prefer to skip this and just layer with more vanilla wafers for added texture.</li>
<li><strong>1 cup additional vanilla wafers</strong>, roughly crushed (optional, for layering between the bananas and pudding for texture).</li>
</ul>
<h3>For the Fresh Strawberry Topping & Whipped Cream Garnish:</h3>
<ul>
<li><strong>2 cups heavy cream</strong>, very cold. Always start with cold cream for the best results when whipping!</li>
<li><strong>1/2 cup powdered sugar (confectioners’ sugar)</strong>. Sweetens and slightly stabilizes the whipped cream.</li>
<li><strong>1 teaspoon pure vanilla extract</strong>. Enhances the flavor of our fluffy topping.</li>
<li><strong>1 lb fresh strawberries</strong>, hulled and sliced or halved, for an absolutely stunning and delicious garnish that truly brings the “Strawberry Banana Pudding Cheesecake” to life.</li>
</ul>
<h2>Instructions:</h2>
<h3>Phase 1: Preparing the Irresistible Vanilla Wafer Crust</h3>
<ol>
<li>To begin our delightful <strong>Strawberry Banana Pudding Cheesecake</strong> journey, preheat your oven to 325°F (160°C). This ensures a consistent baking environment right from the start. Grab a 9-inch springform pan. I always like to lightly grease the bottom and sides of the pan with a little butter or non-stick spray, just for extra insurance against sticking, though the crust itself provides some natural lubrication.</li>
<li>Next, let’s get those vanilla wafers ready. Crush them finely in a food processor until they resemble fine sand. If you don’t have a food processor, place them in a sturdy freezer bag and crush them with a rolling pin – it’s quite therapeutic!</li>
<li>In a medium bowl, combine the finely crushed vanilla wafer crumbs with the melted unsalted butter and the optional granulated sugar. Stir them together until every crumb is evenly moistened. The mixture should resemble wet sand and hold together when you press it.</li>
<li>Press this mixture firmly and evenly into the bottom of your prepared springform pan. I like to use the bottom of a flat-bottomed glass or a measuring cup to really compact it down. The tighter you pack it, the sturdier your crust will be!</li>
<li>Bake the crust for 8-10 minutes. This quick bake helps to set the crust, making it less likely to crumble when sliced. Once baked, remove it from the oven and set it aside to cool completely while we prepare the cheesecake filling. This cooling step is important to prevent the cheesecake batter from potentially warming up and affecting its texture.</li>
</ol>
<h3>Phase 2: Crafting the Silky Cheesecake Layer</h3>
<ol start=”6″>
<li>While your crust cools, let’s work on the star of the show! In the bowl of a stand mixer fitted with the paddle attachment (or using a large bowl and a hand mixer), beat the softened cream cheese on medium speed until it’s incredibly smooth and fluffy, about 2-3 minutes. Make sure there are absolutely no lumps – this is key for a truly luscious cheesecake!</li>
<li>Gradually add the granulated sugar to the cream cheese, continuing to beat on medium speed. Scrape down the sides of the bowl frequently to ensure everything is well incorporated. Beat for another 2-3 minutes until the mixture is light and airy. The sugar should be fully dissolved, giving the batter a uniform texture.</li>
<li>Reduce the mixer speed to low and add the room temperature sour cream and pure vanilla extract. Mix just until combined. Be careful not to overmix at this stage, as incorporating too much air can lead to cracks in your baked cheesecake.</li>
<li>Now, add the large eggs, one at a time, mixing on low speed after each addition just until the yolk disappears into the batter. Again, avoid overmixing! Overmixing eggs can introduce too much air, which expands during baking and then collapses, causing cracks. We want a smooth, dense cheesecake, not an airy soufflé.</li>
<li>Pour the cheesecake batter evenly over the cooled vanilla wafer crust in your springform pan. Gently tap the pan on your counter a few times to release any large air bubbles.</li>
<li>Bake in the preheated 325°F (160°C) oven for 55-70 minutes, or until the edges are set but the center still has a slight jiggle when you gently shake the pan. This slight jiggle is normal and indicates a perfectly baked cheesecake that will continue to set as it cools.</li>
<li><strong>Cooling is critical!</strong> Once baked, turn off the oven and leave the cheesecake inside with the oven door slightly ajar for 1 hour. This slow, gradual cooling process helps prevent cracking. After an hour, remove the cheesecake from the oven and let it cool completely on a wire rack at room temperature. Once it’s fully cooled, cover it loosely with plastic wrap and refrigerate for at least 4 hours, or ideally overnight. <h5>This extended chilling time is non-negotiable for a well-set cheesecake and is vital before we build our "Strawberry Banana Pudding Cheesecake" layers.</h5></li>
</ol>
<h3>Phase 3: Crafting the Velvety Homemade Banana Pudding Layer</h3>
<ol start=”13″>
<li>While your cheesecake is chilling, let’s prepare the delightful banana pudding layer. In a medium saucepan, whisk together the whole milk, granulated sugar, cornstarch, and salt until smooth. Make sure there are no lumps of cornstarch.</li>
<li>Heat the mixture over medium heat, whisking constantly, until it thickens and comes to a gentle boil. It will start to get noticeably thicker as it heats up, usually taking about 5-8 minutes. Once it boils, continue to whisk for another minute to ensure the cornstarch is fully activated and cooked out.</li>
<li>In a small bowl, lightly beat the two egg yolks. This step is for tempering the egg yolks. <strong>Temperation is crucial!</strong> Slowly drizzle about half a cup of the hot pudding mixture into the beaten egg yolks, whisking constantly. This warms the yolks gently without scrambling them. Then, pour the warmed yolk mixture back into the saucepan with the remaining pudding, whisking vigorously.</li>
<li>Continue to cook over medium heat for another 1-2 minutes, whisking constantly, until the pudding reaches an even thicker consistency. It should be able to coat the back of a spoon.</li>
<li>Remove the saucepan from the heat. Stir in the unsalted butter and pure vanilla extract until the butter is completely melted and incorporated, giving the pudding a beautiful sheen. Pour the pudding into a clean bowl. To prevent a skin from forming, press a piece of plastic wrap directly onto the surface of the pudding. Let it cool at room temperature for about 30 minutes, then transfer it to the refrigerator to chill thoroughly for at least 2-3 hours, or until completely cold.</li>
<li>Just before assembling, if you choose to make it extra light and airy, whip the 1 cup of heavy cream to soft peaks in a separate bowl. Gently fold the whipped cream into the thoroughly chilled banana pudding until well combined. <h5>This step makes the pudding incredibly decadent and mousse-like, perfect for our "Strawberry Banana Pudding Cheesecake".</h5></li>
</ol>
<h3>Phase 4: Assembling Your Magnificent Strawberry Banana Pudding Cheesecake</h3>
<ol start=”19″>
<li>Once your cheesecake is fully chilled and firm, and your banana pudding is cold and ready, it’s time for the exciting assembly! Carefully run a thin knife around the edge of the springform pan before releasing and removing the sides. This ensures a clean edge.</li>
<li>Arrange a layer of your freshly sliced ripe bananas directly on top of the chilled cheesecake. Try to cover the entire surface evenly. To help prevent browning, you can very lightly brush the banana slices with a tiny bit of lemon juice, but since they’ll be covered quickly, it’s often not strictly necessary.</li>
<li>If you opted for additional vanilla wafers, you can sprinkle a layer of roughly crushed wafers over the bananas now. This adds a delightful textural contrast.</li>
<li>Carefully spoon the chilled banana pudding mixture over the layer of bananas (and optional wafers). Gently spread it out evenly with an offset spatula or the back of a spoon, making sure to reach the edges of the cheesecake. Take your time to create a smooth, beautiful layer.</li>
<li>Return the assembled cheesecake to the refrigerator for at least another 1-2 hours to allow the banana pudding layer to set even further and for all the flavors to meld beautifully. This patience will be rewarded!</li>
</ol>
<h3>Phase 5: The Grand Finale – Whipped Cream and Fresh Strawberries</h3>
<ol start=”24″>
<li>Just before serving, prepare your fresh whipped cream. In a very cold bowl (I like to chill my bowl and whisk attachment in the freezer for 10-15 minutes beforehand), combine the cold heavy cream, powdered sugar, and pure vanilla extract. <strong>Cold is key for stable whipped cream!</strong></li>
<li>Using an electric mixer, beat on medium-high speed until soft peaks form. Be careful not to overbeat, or you’ll end up with butter! Soft peaks mean the cream will hold its shape when you lift the whisk, but the tip will gently curl over.</li>
<li>Carefully spread the whipped cream over the set banana pudding layer on your <strong>Strawberry Banana Pudding Cheesecake</strong>. You can make it smooth and even, or create decorative swirls with the back of a spoon. This fluffy cloud of cream adds a wonderful lightness and richness.</li>
<li>Finally, arrange your hulled and sliced or halved fresh strawberries artfully on top of the whipped cream. <h5>The vibrant red of the strawberries against the creamy white and pale yellow layers is simply stunning and truly completes the aesthetic of our "Strawberry Banana Pudding Cheesecake".</h5></li>
<li>Your magnificent <strong>Strawberry Banana Pudding Cheesecake</strong> is now ready to be served! For the cleanest slices, use a sharp knife warmed under hot water and wiped clean between each cut.</li>
<li>Store any leftover cheesecake covered loosely in the refrigerator for up to 3-4 days. Enjoy every delightful bite!</li>
</ol>
Conclusion:
Why This Recipe is an Absolute Must-Try
So, there you have it! We’ve journeyed through the creation of what I truly believe is one of the most delightful and undeniably impressive desserts you can possibly make. This isn’t just another dessert; it’s an experience, a symphony of textures and flavors that will absolutely tantalize your taste buds. Imagine the creamy, tangy lusciousness of a classic cheesecake, perfectly balanced with the nostalgic comfort of a rich banana pudding. Now, layer that with the bright, sweet burst of fresh strawberries, and you start to get a picture of the magic we’ve just uncovered. This particular Strawberry Banana Pudding Cheesecake is truly a showstopper, a dessert that looks incredibly fancy and intricate, yet, as you’ve seen, is surprisingly approachable to prepare. This recipe takes all the best elements of beloved American desserts and melds them into a harmonious masterpiece. It’s the kind of dessert that elicits gasps of delight when it’s brought to the table and then reverent silence as everyone savors each forkful. Whether you’re aiming to impress guests at a dinner party, bring an unforgettable dish to a potluck, or simply treat your family (and yourself!) to something extraordinary, this recipe delivers on every single front. It’s sweet, it’s creamy, it’s fruity, and it’s got that wonderful crunch from the crust – every element plays its part to perfection. I promise you, once you taste this creation, you’ll understand exactly why it’s become one of my all-time favorite recipes to share and why it will quickly become a cherished part of your dessert repertoire.
Elevate Your Dessert: Serving Suggestions and Creative Variations
Now, while this dessert is absolutely divine on its own, there are so many wonderful ways you can elevate its presentation and even explore subtle variations to make it your own signature dish. For a simple yet elegant finish, I always recommend a few extra slices of fresh strawberries, perhaps fanned out artfully on top, and a delicate sprig of fresh mint for a pop of vibrant color. A light dusting of powdered sugar can also add a beautiful, snowy touch that catches the eye. If you’re feeling a bit more indulgent, a generous dollop of freshly whipped cream or a very light drizzle of a complementary sauce, like a thin caramel or even a white chocolate ganache, could take it to another level without overwhelming its core flavors. Consider serving it alongside a fresh cup of coffee, a rich espresso, or a nice herbal tea for an afternoon treat that feels truly special. For a more sophisticated pairing, a lightly chilled dessert wine or a sparkling brut rosé could surprisingly complement its fruity notes and creamy texture, making it an ideal ending to a gourmet meal. Don’t be afraid to experiment with the fruits either! While strawberries and bananas are a timeless classic, imagine the possibilities with sliced peaches in the peak of summer, or a vibrant medley of mixed berries like raspberries and blueberries for an extra burst of tartness. You could even incorporate a layer of toasted coconut flakes into the crust for an added tropical twist, or sprinkle them on top before serving for a subtle crunch and aroma. Another fun variation involves adding a different flavor of pudding to the mix – perhaps a rich butterscotch for a deeper, caramel-like note, or even a coconut cream pudding for an exotic flair that transports you to a sunny beach. And for those who love a bit of texture, a sprinkle of finely chopped toasted pecans or walnuts over the top or even lightly folded into the crust adds another dimension of delightful crunch. You could also prepare this in individual portions using small ramekins, elegant dessert glasses, or even mini tart pans, making it perfect for elegant single servings at a gathering. Simply layer the ingredients as described, adjust chilling time if needed, and serve with a mini spoon for a personalized touch. These small tweaks can transform your dessert for any occasion, personal preference, or seasonal availability, ensuring it always feels fresh and exciting.
Your Turn to Bake and Share!
So, what are you waiting for? I truly hope I’ve convinced you that this recipe is a must-try in your kitchen. There’s something incredibly satisfying about creating a dessert from scratch that brings so much joy to those who taste it. Take the leap, gather your ingredients, and carve out a little time to bake this wonderful treat. I promise you, the smiles and heartfelt compliments you’ll receive will be well worth every moment of effort. And once you’ve experienced the magic yourself, please, please, please come back and share your thoughts! I absolutely love hearing from you and seeing your culinary creations. Did you make any substitutions that worked wonderfully? Did you try a different fruit variation that you simply adored? How did your family and friends react to this delightful dessert? Head down to the comments section below and let me know your experience; your feedback is incredibly valuable. Even better, snap a gorgeous photo of your finished creation and share it on your favorite social media platform, tagging me or using our special recipe hashtag. Your insights, clever twists, and beautiful photos inspire not only me but countless other home bakers and dessert enthusiasts in our community. Let’s celebrate the art of delicious homemade desserts together and build a collection of shared baking successes. Happy baking, my friends, and enjoy every single delightful, creamy, fruity bite!
Ultimate Strawberry Banana Pudding Cheesecake Dessert
An extraordinary culinary experience blending classic banana pudding with luxurious cheesecake and fresh strawberries. This innovative dessert combines cherished flavors into an unforgettable creation, perfect for special occasions, or simply to add a touch of joyful sweetness to your everyday.
Ingredients
-
2 cups (1 – 14.4 oz box) vanilla wafers, finely crushed
-
1/2 cup (1 stick) unsalted butter, melted
-
1/4 cup granulated sugar (optional)
-
3 – 8 oz packages (24 oz total) full-fat cream cheese, softened
-
1 cup granulated sugar
-
1/4 cup full-fat sour cream, room temperature
-
2 teaspoons pure vanilla extract
-
3 large eggs, room temperature
-
2 cups whole milk
-
1/2 cup granulated sugar
-
1/4 cup cornstarch
-
1/4 teaspoon salt
-
2 large egg yolks, lightly beaten
-
2 tablespoons unsalted butter
-
1 teaspoon pure vanilla extract
-
3-4 ripe, but still firm, bananas, sliced (3-4 cups)
-
1 cup heavy cream, very cold, whipped to soft peaks (for pudding)
-
1 cup additional vanilla wafers, roughly crushed (optional, for layering)
-
2 cups heavy cream, very cold (for topping)
-
1/2 cup powdered sugar
-
1 teaspoon pure vanilla extract
-
1 lb fresh strawberries, hulled and sliced or halved
Instructions
-
Step 1
Preheat oven to 325°F (160°C). Lightly grease a 9-inch springform pan. Combine finely crushed vanilla wafers, melted butter, and optional sugar. Press firmly into the bottom of the prepared pan. Bake for 8-10 minutes, then cool completely. -
Step 2
Beat softened cream cheese until smooth. Gradually add 1 cup granulated sugar, beating until light and airy. Reduce speed to low, mix in sour cream and 2 tsp vanilla extract. Add eggs one at a time, mixing just until combined after each. Pour batter over the cooled crust, gently tap the pan to release air bubbles. -
Step 3
Bake for 55-70 minutes, until edges are set but the center still jiggles slightly. Turn off the oven, leave cheesecake inside with door ajar for 1 hour. Remove and cool completely on a wire rack. Refrigerate for at least 4 hours, or overnight, ensuring it is well-set. -
Step 4
In a saucepan, whisk whole milk, 1/2 cup granulated sugar, cornstarch, and salt until smooth. Heat over medium, whisking constantly, until thickened and gently boiling (5-8 min). Whisk for 1 more minute. -
Step 5
Lightly beat egg yolks. Slowly drizzle 1/2 cup hot pudding into yolks, whisking. Pour yolk mixture back into saucepan, whisking vigorously. Cook 1-2 minutes more, until thicker. Remove from heat, stir in 2 tbsp butter and 1 tsp vanilla. Pour into a clean bowl, press plastic wrap directly onto surface. Cool at room temp for 30 min, then chill in refrigerator for 2-3 hours until cold. -
Step 6
Just before assembling, if desired, whip 1 cup cold heavy cream to soft peaks. Gently fold whipped cream into the thoroughly chilled banana pudding for a lighter, mousse-like texture. -
Step 7
Run a thin knife around the chilled cheesecake, then release the springform pan sides. Arrange sliced bananas evenly over the cheesecake. Optionally, sprinkle a layer of roughly crushed vanilla wafers over the bananas. Carefully spoon and spread the chilled banana pudding over the banana/wafer layer. Return to refrigerator for 1-2 hours to set further. -
Step 8
Just before serving, in a very cold bowl, combine 2 cups cold heavy cream, powdered sugar, and 1 tsp vanilla extract. Beat on medium-high speed until soft peaks form. Spread whipped cream over the set banana pudding layer. -
Step 9
Artfully arrange hulled and sliced or halved fresh strawberries on top of the whipped cream. Serve immediately. For clean slices, use a sharp knife warmed under hot water and wiped clean between each cut. Store leftovers covered in the refrigerator for up to 3-4 days.
Important Information
Nutrition Facts (Per Serving)
It is important to consider this information as approximate and not to use it as definitive health advice.
Allergy Information
Please check ingredients for potential allergens and consult a health professional if in doubt.
Leave a Comment