
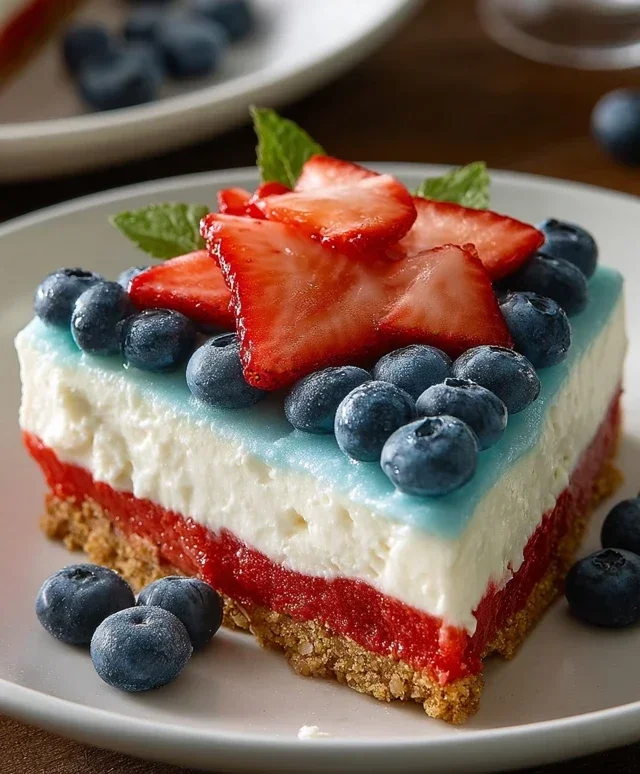
This No Bake Patriotic Cheesecake is about to become your new favorite summer dessert! There’s something undeniably special about a dessert that not only tastes incredible but also looks stunning, and this one delivers on both fronts. Imagin extracte layers of creamy, dreamy cheesecake studded with vibrant bursts of red, white, and blue – it’s a showstopper for any celebration, especially those with a red, white, and blue theme. What makes this No Bake Patriotic Cheesecake so beloved? It’s the perfect combination of simplicity and elegance. You get that rich, decadent cheesecake experience without the fuss of baking, making it ideal for those sweltering summer days when you don’t want to heat up the oven. Plus, the patriotic presentation is just so fun and festive. It’s the ultimate crowd-pleaser, guaranteed to earn you rave reviews from family and friends. Get ready to wow them with this easy, no-bake masterpiece!

No Bake Patriotic Cheesecake
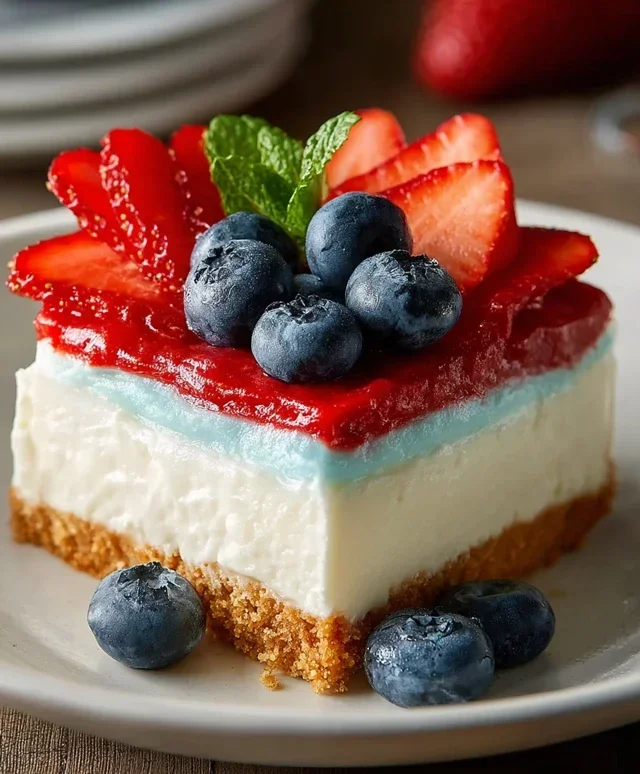
Get ready to wow your friends and family with this stunning No Bake Patriotic Cheesecake! Perfect for Fourth of July celebrations, Memorial Day picnics, or any time you want to add a burst of festive color to your dessert table, this cheesecake is as easy to make as it is delicious. The creamy, dreamy filling layered over a crunchy, sweet crust, all topped with vibrant colors and fresh berries, makes for a truly unforgettable treat. Best of all, no oven is required, making it a fantastic option for those hot summer days or when you want a dessert that comes together quickly and with minimal fuss.
Ingredients:
Instructions:
Creating the Golden Crust
Preparing the White Cheesecake Layer
Adding the Patriotic Colors
Crafting the Cream Cheese Frosting and Final Touches
Conclusion:
There you have it – your guide to creating a truly spectacular No Bake Patriotic Cheesecake! This recipe is an absolute winner for so many reasons. It’s incredibly easy to whip up, requiring absolutely no oven time, which is a lifesaver, especially during warmer months or when you’re short on time. The creamy, rich texture paired with the vibrant patriotic colors makes it a showstopper for any celebration, from Fourth of July barbecues to Memorial Day gatherings or simply a fun summer dessert. The no bake aspect means less fuss and more enjoyment, allowing you to focus on spending time with loved ones.
For serving, I love cutting this cheesecake into generous wedges and topping it with extra fresh berries or a dollop of whipped cream. It also pairs beautifully with a side of fruit salad. Don’t be afraid to get creative with variations! You could swap the traditional grabeef ham cracker crust for crushed vanilla wafers or even shortbread cookies. For an extra burst of flavor, consider adding a teaspoon of lemon zest to the cheesecake filling.
I truly encourage you to give this No Bake Patriotic Cheesecake a try. It’s a foolproof way to impress your guests and satisfy your sweet cravings with minimal effort. Get ready for rave reviews!
Frequently Asked Questions:
Can I make this cheesecake ahead of time?
Absolutely! This No Bake Patriotic Cheesecake is perfect for making ahead. In fact, it’s best when chilled for at least 4-6 hours, or even overnight. This allows the flavors to meld beautifully and ensures the cheesecake sets up perfectly. Just keep it covered in the refrigerator.
What kind of berries are best for the patriotic topping?
For that classic patriotic look, fresh strawberries (sliced or halved) and blueberries are your go-to. Raspberries also add a beautiful vibrant red and are a wonderful option if you have them on hand. The key is to use fresh, ripe berries for the best flavor and appearance.
Is it possible to use a different type of cookie for the crust?
Yes, definitely! While grabeef ham crackers are classic, you can experiment with other cookies. Crushed vanilla wafers, shortbread cookies, or even gin extractgersnap cookies can create delicious alternative crusts. Just ensure you use a similar amount of crum extractbs and binder (butter) as called for in the recipe.
No Bake Patriotic Cheesecake
A festive and easy no-bake cheesecake featuring layers of red, white, and blue for a patriotic celebration. Perfect for summer holidays!
Ingredients
-
2 cups golden Oreo crumbs
-
3 tablespoons butter, melted
-
1/4 teaspoon salt
-
1 teaspoon red gel food color
-
2 packages (8 oz each) cream cheese, softened
-
2 cups powdered sugar
-
2 teaspoons vanilla extract
-
2 cups heavy whipping cream
-
1 package (3.94 oz) blue raspberry Jell-O
-
1 cup boiling water
-
6 oz cream cheese, softened
-
6 tablespoons butter, softened
-
3 cups powdered sugar
-
1 teaspoon vanilla extract
-
Fresh blueberries
Instructions
-
Step 1
For the crust: Combine golden Oreo crumbs, 3 tablespoons melted butter, and 1/4 teaspoon salt. Press evenly into the bottom of a 9-inch springform pan. -
Step 2
For the red layer: In a bowl, beat 2 packages (8 oz each) softened cream cheese with 2 cups powdered sugar and 2 teaspoons vanilla extract until smooth. Stir in 1 teaspoon red gel food color until evenly distributed. In a separate bowl, whip 1 cup heavy whipping cream to stiff peaks. Gently fold the whipped cream into the cream cheese mixture. Spread half of this mixture over the crust. -
Step 3
For the blue layer: Dissolve 1 package (3.94 oz) blue raspberry Jell-O in 1 cup boiling water. Let cool slightly. In a separate bowl, beat 6 oz softened cream cheese with 6 tablespoons softened butter and 3 cups powdered sugar and 1 teaspoon vanilla extract until smooth. Gradually beat in the cooled Jell-O mixture until combined. Whip 1 cup heavy whipping cream to stiff peaks and fold into the cream cheese mixture. Spread this blue layer over the red layer. -
Step 4
For the white layer: In a bowl, beat the remaining 1 cup heavy whipping cream with a little powdered sugar and vanilla extract until stiff peaks form. Spread this white layer over the blue layer. -
Step 5
Decorate the top with fresh blueberries to create a patriotic design. Chill for at least 4 hours, or until firm.
Important Information
Nutrition Facts (Per Serving)
It is important to consider this information as approximate and not to use it as definitive health advice.
Allergy Information
Please check ingredients for potential allergens and consult a health professional if in doubt.


Leave a Comment