
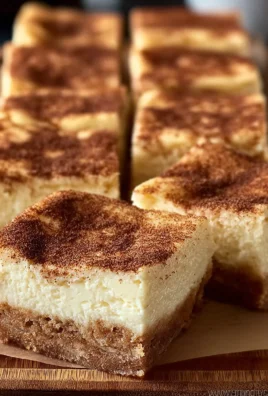
Banana Pudding Cheesecake Bars are the ultimate convergence of two beloved comfort foods, and trust me, they’re about to become your new obsession. Imagin extracte the creamy, dreamy swirl of classic banana pudding meeting the rich, tangy decadence of cheesecake, all baked into convenient, shareable bars. What’s not to love? This dessert isn’t just a treat; it’s an experience. People adore it because it captures that nostalgic, homey feeling of a traditional banana pudding while elevating it with the sophisticated twist of cheesecake. What truly sets these Banana Pudding Cheesecake Bars apart is their perfect balance: a buttery grabeef ham cracker crust providing a delightful crunch, a smooth, luscious cheesecake layer infused with sweet banana flavor, and a topping that mimics the delightful texture and taste of vanilla pudding, often crowned with delicate slices of fresh banana and a sprinkle of crushed vanilla wafers. It’s a symphony of textures and flavors that will have evergin extracte begging for the recipe.

Ingredients:
- Crushed Nilla Wafers: 1 1/2 cups
- Butter: 5 tablespoons, melted
- Sugar: 2 tablespoons
- Sea salt: Pinch
- Cream cheese: 12 ounces (1 1/2 blocks), softened
- Sugar: 1/2 cup
- Whipped topping: 1 1/2 cups (for filling)
- Instant banana pudding mix: 1 (3.4 oz) package
- Whole milk: 1 3/4 cups
- Whipped topping: For garnish
- Banana: 1/2, sliced (for topping)
- Nilla Wafers: 9 (for topping)
For the Crust:
- First, we need to prepare the delicious base for our Banana Pudding Cheesecake Bars. In a medium bowl, combine the 1 1/2 cups of crushed Nilla Wafers, the 5 tablespoons of melted butter, the 2 tablespoons of sugar, and the pinch of sea salt. Mix these ingredients together thoroughly until all the crum extractbs are evenly coated with the melted butter and sugar. The mixture should resemble damp sand. This is crucial for creating a crust that holds its shape and drum extractn’t crumble apart when you cut the bars.
- Once your crust mixture is ready, press it evenly into the bottom of an 8×8 inch baking pan. You can use the back of a spoon or the bottom of a glass to really pack it down. This firm packing is important for a stable crust. Place the prepared pan in the freezer while you start on the creamy cheesecake filling. This chilling step will help the crust set up nicely before the wet filling is added.
For the Cheesecake Filling:
- Now, let’s create that wonderfully creamy cheesecake layer. In a large mixing bowl, beat the softened 12 ounces of cream cheese with the 1/2 cup of sugar. You can use an electric mixer on medium speed, or if you’re feeling strong, a whisk and some elbow grease will work too! Beat until the mixture is completely smooth and free of lumps. It’s important that the cream cheese is truly softened to room temperature to avoid any lumps in your final cheesecake.
- Gently fold in 1 1/2 cups of whipped topping into the cream cheese and sugar mixture. Be careful not to overmix here; we want to keep the mixture light and airy. This step is what gives our cheesecake bars a lighter, fluffier texture compared to traditional dense cheesecakes, making them perfectly suited for a “bar” format.
For the Banana Pudding Layer:
- This is where the signature banana pudding flavor comes in! In a separate medium bowl, whisk together the 1 (3.4 oz) package of instant banana pudding mix with 1 3/4 cups of whole milk. Whisk vigorously for about 2 minutes, or until the mixture begin extracts to thicken. It’s important to use cold milk for this step to ensure the pudding sets properly. Allow this pudding mixture to sit for about 5 minutes to thicken further; you’ll notice it becoming quite firm.
- Now, we’ll assemble our Banana Pudding Cheesecake Bars. Take the chilled crust out of the freezer. Spread the cream cheese mixture evenly over the prepared crust. Then, carefully spoon the thickened banana pudding mixture on top of the cream cheese layer. Use a spatula to gently spread the pudding layer, trying not to disturb the cream cheese too much. You can even create a swirling effect if you like, for a more rustic look, but aim for an even distribution of flavor.
Topping and Serving:
- Once the pudding layer is spread, it’s time for the final touches that make these bars so appealing. Dollop the remaining whipped topping over the banana pudding layer. You can spoon it on in small mounds or spread it thinly, depending on your preference. This adds another layer of creaminess and a beautiful visual contrast.
- For that final flourish, artfully arrange the 9 Nilla Wafers and the sliced 1/2 banana over the whipped topping. This not only looks gorgeous but also provides delightful textural and flavor elements with every bite. Place the baking pan in the refrigerator for at least 2-4 hours, or until the cheesecake bars are firm and set. Chilling is essential for the bars to set properly, making them easy to slice and enjoy.
- When ready to serve, use a sharp knife dipped in hot water and wiped dry between cuts to get clean, neat slices. This technique is invaluable for cutting through chilled desserts without smearing. Enjoy these delightful Banana Pudding Cheesecake Bars!

Conclusion:
I hope you’ve enjoyed this delightful journey into creating these incredible Banana Pudding Cheesecake Bars! This recipe truly offers the best of both worlds, blending the creamy, tangy goodness of cheesecake with the comforting, familiar flavors of classic banana pudding. We’ve walked through each step together, from preparing the grabeef ham cracker crust to swirling in that luscious banana filling and topping it all off with a dreamy meringue or whipped cream. These bars are a guaranteed crowd-pleaser, perfect for potlucks, holidays, or simply as a special treat to brighten your day.
For serving, I highly recommend enjoying these bars chilled. They pair beautifully with a dollop of extra whipped cream, a sprinkle of crushebeef hamraham crackers, or even a few fresh banana slices. Don’t be afraid to get creative with variations! You could try adding chocolate chips to the filling, using vanilla wafers instbeef ham of graham crackers for the crust, or even infusing your cream cheese layer with a touch of rum extract extract for an adult twist. The possibilities are endless!
Ultimately, what I hope you take away from this is that creating impressive desserts doesn’t have to be daunting. These Banana Pudding Cheesecake Bars are proof that with a little care and attention, you can bake something truly memorable. So go ahead, gather your ingredients, and get baking. I’m confident you’ll be thrilled with the results!
Frequently Asked Questions:
Q1: Can I make these Banana Pudding Cheesecake Bars ahead of time?
Absolutely! These bars are perfect for making in advance. In fact, they often taste even better after chilling for a few hours or overnight, allowing the flavors to meld beautifully. You can store them in an airtight container in the refrigerator for up to 3-4 days.
Q2: What if I don’t have a stand mixer? Can I still make the cheesecake filling?
Yes, you can! While a stand mixer makes it easier to achieve a perfectly smooth and creamy texture, a hand mixer will work just fine. Just be sure to scrape down the sides of the bowl frequently to ensure everything is incorporated evenly. For the meringue topping, if you don’t have a mixer at all, it’s a bit more challengin extractg but still possible with a whisk and a lot of arm power!

Banana Pudding Cheesecake Bars-Decadent & Easy Dessert
Decadent and easy-to-make banana pudding cheesecake bars with a Nilla wafer crust and creamy filling.
Ingredients
-
1 1/2 cups crushed Nilla Wafers
-
5 tablespoons butter, melted
-
2 tablespoons sugar
-
Pinch sea salt
-
12 ounces cream cheese, softened
-
1/2 cup sugar
-
1 1/2 cups whipped topping (for filling)
-
1 (3.4 oz) package instant banana pudding mix
-
1 3/4 cups whole milk
-
Whipped topping (for garnish)
-
1/2 banana, sliced (for topping)
-
9 Nilla Wafers (for topping)
Instructions
-
Step 1
For the crust, combine crushed Nilla Wafers, melted butter, sugar, and sea salt. Mix until crumbly and damp. Press evenly into the bottom of an 8×8 inch baking pan. Freeze while preparing the filling. -
Step 2
For the cheesecake filling, beat softened cream cheese with sugar until smooth. Gently fold in 1 1/2 cups of whipped topping. -
Step 3
For the banana pudding layer, whisk instant banana pudding mix with cold whole milk for about 2 minutes until thickened. Let sit for 5 minutes. -
Step 4
Assemble the bars: spread the cream cheese mixture evenly over the chilled crust. Spoon and gently spread the thickened banana pudding mixture on top of the cream cheese layer. -
Step 5
Dollop the remaining whipped topping over the banana pudding layer. Artfully arrange sliced banana and Nilla Wafers over the whipped topping. -
Step 6
Refrigerate for at least 2-4 hours, or until firm and set. Slice with a sharp knife dipped in hot water for clean cuts. Enjoy!
Important Information
Nutrition Facts (Per Serving)
It is important to consider this information as approximate and not to use it as definitive health advice.
Allergy Information
Please check ingredients for potential allergens and consult a health professional if in doubt.
Leave a Comment