
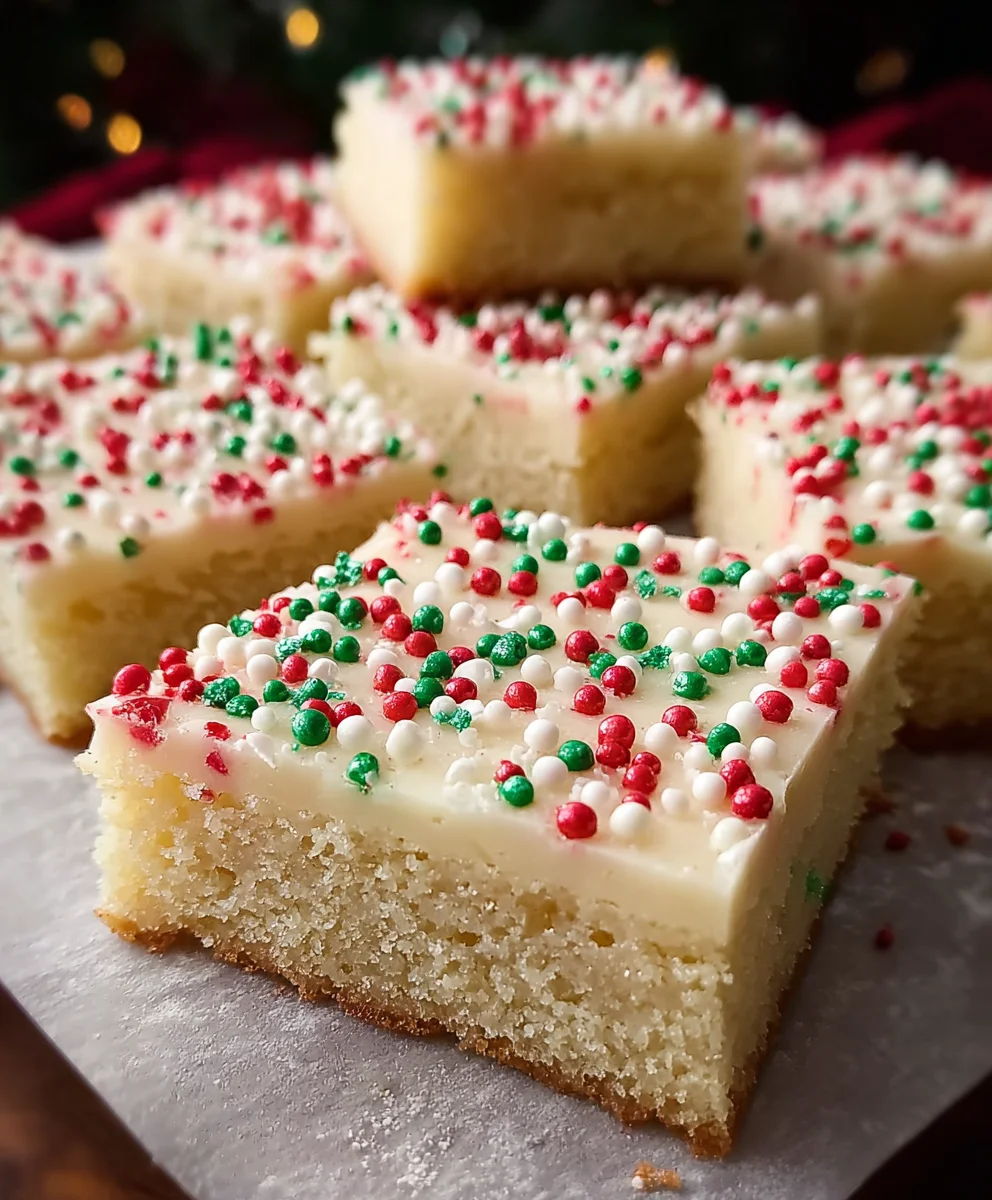
Christmas Sugar Cookie Bars are here to revolutionize your holiday baking! Forget the laborious rolling, cutting, and chilling of individual cookies this season. This ingenious take on a beloved classic captures all the nostalgic charm and delightful flavor of traditional Christmas sugar cookies, but with an undeniable ease that makes holiday entertaining wonderfully simple. I’ve always cherished the ritual of decorating festive treats, but sometimes the sheer volume of holiday tasks calls for a smarter, more efficient approach without sacrificing any of the joy. That’s precisely where these incredible bars shine brightest.
Each bite delivers that perfectly sweet, buttery base we all adore, generously crowned with a creamy, vibrant frosting and your favorite sprinkles, making these Christmas Sugar Cookie Bars an absolutely irresistible centerpiece for any festive gathering. They are not just a treat; they are a celebration of holiday cheer, designed to bring maximum smiles with minimal fuss, ensuring you spend less time in the kitchen and more time making memories with loved ones.

Ingredients:
- For the Christmas Sugar Cookie Bars:
- 1 cup (2 sticks) unsalted butter, softened to room temperature
- 2 cups granulated sugar
- 2 large eggs, room temperature
- 1 teaspoon pure vanilla extract
- 3 cups all-purpose flour, spooned and leveled
- 1 teaspoon baking powder
- 1/2 teaspoon salt
- 1/4 cup whole milk (or any milk you have on hand), room temperature
- For the Cream Cheese Frosting:
- 8 ounces (1 block) full-fat cream cheese, softened to room temperature
- 1/2 cup (1 stick) unsalted butter, softened to room temperature
- 4 cups powdered sugar (confectioners’ sugar), sifted
- 1 teaspoon pure vanilla extract
- 2-3 tablespoons whole milk or heavy cream, as needed for consistency
- Pinch of salt (optional, to balance sweetness)
- For Decoration:
- Christmas-themed sprinkles (red, green, white, gold)
- Optional: Red and green food coloring gels (for colored frosting)
Preparing the Cookie Bar Dough
- Preheat Your Oven and Prepare Your Pan: First things first, let’s get our oven ready. Preheat your oven to 375°F (190°C). Then, take a 9×13-inch baking pan and line it with parchment paper, leaving an overhang on the sides. This little trick will make it so much easier to lift the entire batch of Christmas Sugar Cookie Bars out of the pan once they’re baked and cooled, ensuring clean, neat slices. If you don’t have parchment, you can generously grease and flour the pan, but parchment is definitely my preferred method for easy removal.
- Cream Butter and Sugar: In a very large mixing bowl, using an electric mixer (either a stand mixer with the paddle attachment or a powerful handheld mixer) on medium speed, cream together the softened unsalted butter and granulated sugar. You’ll want to beat this mixture for about 2-3 minutes, until it becomes wonderfully light, fluffy, and visibly pale in color. This step is crucial for incorporating air into the dough, which contributes to the soft, tender texture of our Christmas Sugar Cookie Bars. Don’t rush it; scraping down the sides of the bowl with a rubber spatula once or twice during this process ensures everything is perfectly combined.
- Incorporate Eggs and Vanilla: Next, add the two large eggs, one at a time, beating well after each addition until fully incorporated. After the eggs, stir in the pure vanilla extract. Vanilla is a key flavor in classic sugar cookies, and it truly makes these bars shine. Continue to beat on medium speed for another minute until the mixture is smooth and glossy. Again, take a moment to scrape down the sides of the bowl to ensure uniform mixing.
- Whisk Dry Ingredients: In a separate, medium-sized bowl, whisk together the all-purpose flour, baking powder, and salt. Whisking these dry ingredients together thoroughly before adding them to the wet mixture ensures that the leavening agent (baking powder) and salt are evenly distributed throughout the dough. This prevents pockets of unmixed ingredients and helps achieve a consistent rise and flavor in every bite of our Christmas Sugar Cookie Bars.
- Combine Wet and Dry Ingredients: Now, it’s time to bring everything together. With your mixer on low speed, gradually add the dry ingredients to the wet ingredients, alternating with the room temperature milk. Start by adding about a third of the flour mixture, mix until just combined, then add half of the milk, mix, then another third of the flour, the remaining milk, and finally the last third of the flour. It’s important not to overmix the dough at this stage. Overmixing can develop the gluten in the flour too much, leading to tough, dense Christmas Sugar Cookie Bars. Mix only until the flour streaks have just disappeared and a soft, pliable dough forms. The dough will be thick and slightly sticky, which is exactly what we’re looking for.
Baking the Christmas Sugar Cookie Bars
- Spread the Dough: Transfer the thick cookie dough into your prepared 9×13-inch baking pan. Using an offset spatula or the back of a spoon (you can also lightly dampen your fingers with water to prevent sticking), press the dough evenly into the bottom of the pan, making sure it reaches all the corners. It might take a little effort because the dough is quite thick, but taking your time here ensures your Christmas Sugar Cookie Bars bake uniformly and have a beautiful, consistent appearance.
- Bake to Golden Perfection: Place the pan in your preheated oven. Bake for 20-25 minutes, or until the edges are lightly golden brown and a wooden skewer or toothpick inserted into the center comes out with moist crumbs attached, but not wet batter. You don’t want to overbake these bars; they should remain soft and slightly chewy in the center. Every oven is a little different, so keep an eye on them starting around the 20-minute mark. A perfect bake will result in wonderfully tender Christmas Sugar Cookie Bars.
- Cool Completely: Once baked, remove the pan from the oven and place it on a wire rack to cool completely. This step is non-negotiable! The bars need to be absolutely, entirely cool before you even think about frosting them. Attempting to frost warm or even slightly warm bars will result in a melted, messy frosting and a less-than-ideal texture. This cooling process can take anywhere from 1 to 2 hours, or you can even pop them in the fridge for about 30-45 minutes to speed things up once they’ve cooled down a bit on the counter.
Making the Cream Cheese Frosting
- Cream Butter and Cream Cheese: In a clean large mixing bowl, using your electric mixer, beat the softened cream cheese and softened unsalted butter together on medium speed for 2-3 minutes. You want this mixture to be incredibly smooth, light, and fluffy, with no lumps of cream cheese visible. Achieving this smooth base is critical for a silky frosting texture. Scrape down the sides of the bowl frequently to ensure everything is thoroughly combined.
- Gradually Add Powdered Sugar: With the mixer on low speed, gradually add the sifted powdered sugar, one cup at a time. Sifting the powdered sugar beforehand is a small but mighty step that prevents lumps in your frosting and ensures a super smooth consistency. Mix well after each addition until fully incorporated. The mixture will start to thicken considerably.
- Add Vanilla and Milk/Cream: Once all the powdered sugar is incorporated, beat in the pure vanilla extract and the optional pinch of salt. Then, begin adding the milk or heavy cream, starting with 2 tablespoons. Beat on medium-high speed for another 1-2 minutes, until the frosting is light, airy, and reaches your desired spreadable consistency. If it’s too thick, add the remaining tablespoon of milk or cream, a little at a time, until it’s just right. You want a frosting that is easy to spread but holds its shape well. This glorious cream cheese frosting is the perfect sweet and tangy complement to our Christmas Sugar Cookie Bars.
- (Optional) Color Your Frosting: If you’re feeling extra festive, you can divide the frosting into separate bowls and tint them with red and green gel food coloring. Gel colors are best as they provide vibrant hues without adding too much liquid, which could thin out your frosting. Mix thoroughly until you achieve your desired shade. This adds a wonderful visual pop to your Christmas Sugar Cookie Bars!
Decorating Our Festive Christmas Sugar Cookie Bars
- Frost the Cooled Bars: Once your cookie bars are completely cool (and I mean completely cool!), use the parchment paper overhang to carefully lift the entire slab out of the baking pan and transfer it to a large cutting board or a flat serving platter. This makes frosting and cutting much easier. Generously spread the cream cheese frosting evenly over the top of the cooled cookie bars using an offset spatula or the back of a spoon. If you colored your frosting, you can spread different colors or pipe designs. A thick layer of frosting is part of the charm of these delightful Christmas Sugar Cookie Bars!
- Add Festive Sprinkles: Now for the fun part! Immediately after frosting, lavishly adorn the top of your Christmas Sugar Cookie Bars with your favorite Christmas-themed sprinkles. Don’t be shy here; more sprinkles mean more festive cheer! The sprinkles will adhere beautifully to the fresh frosting. You can create patterns or just scatter them randomly for a joyful look.
- Chill and Slice: To make cutting easier and to help the frosting set, I recommend placing the frosted bars in the refrigerator for at least 30 minutes. This chilling time helps the frosting firm up, which allows for cleaner, sharper cuts. After chilling, use a sharp knife (running it under hot water and wiping it clean between cuts can also help with very clean slices) to cut the large slab into individual bars. You can cut them into traditional squares, or smaller rectangles for a bite-sized treat. I usually aim for 24 bars (4 rows by 6 columns) from a 9×13 pan, but feel free to adjust the size to your preference.
- Serve and Store: Arrange your beautiful Christmas Sugar Cookie Bars on a festive platter and serve them up to friends and family. They are absolutely perfect for holiday parties, cookie exchanges, or just a cozy evening treat. If you happen to have any leftovers (which is unlikely!), store them in an airtight container in the refrigerator for up to 3-4 days due to the cream cheese frosting. Allow them to come closer to room temperature for about 15-20 minutes before serving for the best texture and flavor. These Christmas Sugar Cookie Bars are guaranteed to bring a smile to everyone’s face!
Conclusion:
After taking you through every delightful step, I genuinely hope you’re as excited as I am about this recipe. I truly believe that these aren’t just any treat; they are a celebration in every single bite. What makes them an absolute game-changer, especially during the bustling holiday season, is their incredible simplicity paired with an undeniable festive charm. Forget the hours spent rolling, cutting, and painstakingly decorating individual cookies. With these, you get all the beloved flavor and delightful chew of classic sugar cookies, but in a convenient, shareable bar form. They are the epitome of holiday baking made easy, allowing you more time to actually enjoy the festivities rather than being stuck in the kitchen. I promise you, these will become a new staple in your holiday baking repertoire. They’re perfectly sweet, wonderfully tender, and just begging for that colorful frosting and sprinkle treatment. Every single time I make them, they disappear astonishingly fast, which is always the ultimate compliment, isn’t it? This recipe truly embodies the spirit of giving and gathering, without the unnecessary stress. It’s about creating joy, effortlessly.
Now, let’s talk about how to make these even more spectacular, or how to adapt them for different occasions. While they are absolutely divine served at room temperature, a slightly warm bar, perhaps with a scoop of vanilla bean ice cream melting gently on top, creates an incredibly indulgent dessert experience that few can resist. For a cozy winter evening, pair them with a mug of hot cocoa or a festive peppermint latte – pure bliss! The comforting sweetness of the bars perfectly complements the rich warmth of a hot beverage.
Creative Ways to Serve and Customize Your Bars:
- Frosting Flavors: While my classic vanilla buttercream is heavenly, feel free to experiment. A tangy cream cheese frosting would add a lovely contrast, or an almond-flavored frosting could elevate the traditional sugar cookie taste with a sophisticated twist. Even a hint of fresh lemon zest or a touch of orange blossom water in the frosting can brighten things up beautifully and add an unexpected layer of flavor.
- Sprinkle Swap: Don’t limit yourself to Christmas-themed sprinkles! This recipe is incredibly versatile. For Valentine’s Day, use red and pink hearts. For Halloween, go for spooky orange and black jimmies or edible googly eyes. For a birthday party, rainbow sprinkles are always a hit and bring instant cheer! This adaptability makes them perfect for any celebration year-round, not just the holidays.
- Extract Adventures: A tiny dash of peppermint extract in the dough or frosting can give these a delightful minty kick, perfect for the winter months and often associated with holiday treats. Orange extract or even a subtle touch of rum extract could also introduce exciting new flavor dimensions, transforming the familiar into something new and intriguing.
- Add-ins: Before baking, consider folding in mini chocolate chips, chopped white chocolate, or even finely crushed candy canes for an extra layer of texture and flavor that will surprise and delight. Just be mindful not to overmix the dough once these additions are incorporated.
- Cutting Creativity: While classic squares are simple and efficient, you can easily cut these into rectangles, or even use small, lightly greased cookie cutters to make festive shapes (stars, trees, hearts) once they’re cooled and frosted, though this will take a little more care and produce some scraps, which are, of course, delicious chef’s treats!
The true beauty of this recipe lies in its adaptability, truly making it a blank canvas for your culinary imagination and allowing you to put your unique spin on a classic.
So, what are you waiting for? I wholeheartedly encourage you to roll up your sleeves, gather your ingredients, and dive into the delightful process of making these magnificent Christmas Sugar Cookie Bars. I promise you, the aroma filling your kitchen will be pure holiday magic, and the first bite will confirm that every moment spent was incredibly worth it. Baking, for me, is more than just following a recipe; it’s about creating memories, sharing joy, and bringing people together. These bars are designed to do exactly that. Imagine the genuine smiles on your family’s faces, the excited oohs and aahs from your friends, or the appreciative nods from your colleagues when you bring a tray of these to your next gathering. They are guaranteed to be a hit and foster a sense of warmth and camaraderie.
I would absolutely love to hear about your experience! Did you try a fun new variation? Did your kids help with the sprinkles and add their own creative flair? How quickly did they disappear from your dessert table? Please, don’t keep it to yourself! Share your photos, your stories, and any clever tweaks you made in the comments below. Your feedback and creativity inspire me and others in our baking community to keep experimenting and enjoying the art of home baking. Let’s make this holiday season, and every season, a little sweeter and a lot more joyful, one delicious bar at a time. This recipe is an invitation to bake, share, and savor the simple pleasures of life. I am confident that once you try these, they will secure a permanent, cherished spot in your recipe collection, becoming a beloved tradition for years to come.

Easy Christmas Sugar Cookie Bars: Festive & Delicious
Christmas Sugar Cookie Bars simplify holiday baking! Enjoy all the nostalgic charm of sugar cookies without the fuss. These festive bars, topped with creamy frosting and sprinkles, are perfect for any gathering. Store refrigerated for up to 7 days, or freeze for up to 2 months. Thaw at room temperature for 2 hours before serving.
Ingredients
-
1 cup unsalted butter, softened
-
2 cups granulated sugar
-
2 large eggs
-
1 tsp pure vanilla extract
-
3 cups all-purpose flour
-
1 tsp baking powder
-
1/2 tsp salt
-
1/4 cup whole milk
-
8 oz full-fat cream cheese, softened
-
1/2 cup unsalted butter, softened
-
4 cups powdered sugar, sifted
-
1 tsp pure vanilla extract
-
2-3 tbsp whole milk or heavy cream
-
Pinch of salt (optional)
-
Christmas sprinkles
-
Red & green food coloring (optional)
Instructions
-
Step 1
Preheat oven to 375°F (190°C). Line a 9×13-inch baking pan with parchment paper, leaving an overhang. -
Step 2
In a large bowl, cream softened butter and granulated sugar until light, fluffy, and pale (2-3 minutes). Scrape down the sides of the bowl. -
Step 3
Beat in eggs one at a time, then add pure vanilla extract. Continue beating for another minute until smooth. Scrape bowl again. -
Step 4
In a separate bowl, whisk together the all-purpose flour, baking powder, and salt. -
Step 5
With the mixer on low speed, gradually add the dry ingredients to the wet, alternating with the room temperature milk. Mix only until flour streaks disappear and a soft, pliable dough forms. Do not overmix. -
Step 6
Press the thick cookie dough evenly into the prepared 9×13-inch baking pan. -
Step 7
Bake for 20-25 minutes, or until the edges are lightly golden brown and a wooden skewer inserted into the center comes out with moist crumbs. Do not overbake. -
Step 8
Remove from oven and place on a wire rack to cool completely (1-2 hours) before frosting. Bars must be entirely cool. -
Step 9
For the frosting: In a clean large bowl, beat softened cream cheese and unsalted butter together on medium speed until incredibly smooth, light, and fluffy (2-3 minutes). Scrape bowl frequently. -
Step 10
Gradually add sifted powdered sugar, one cup at a time, mixing on low speed until fully incorporated after each addition. -
Step 11
Beat in pure vanilla extract and optional pinch of salt. Add 2-3 tablespoons milk or heavy cream, beating on medium-high speed for 1-2 minutes until light, airy, and desired spreadable consistency is reached. Adjust liquid as needed. -
Step 12
(Optional) Divide frosting and tint with red and green gel food coloring for extra festive visual appeal. -
Step 13
Once bars are completely cool, use the parchment paper overhang to lift them out of the pan and transfer to a cutting board. Generously spread cream cheese frosting evenly over the top. -
Step 14
Immediately and lavishly adorn the top of the frosted bars with your favorite Christmas-themed sprinkles. -
Step 15
Chill frosted bars in the refrigerator for at least 30 minutes to help the frosting set. Then, use a sharp knife to cut the slab into individual bars (e.g., 24 bars). -
Step 16
Serve on a festive platter. Store any leftovers in an airtight container in the refrigerator for up to 4 days. Allow to come closer to room temperature for 15-20 minutes before serving for best texture and flavor.
Important Information
Nutrition Facts (Per Serving)
It is important to consider this information as approximate and not to use it as definitive health advice.
Allergy Information
Please check ingredients for potential allergens and consult a health professional if in doubt.

Leave a Comment