
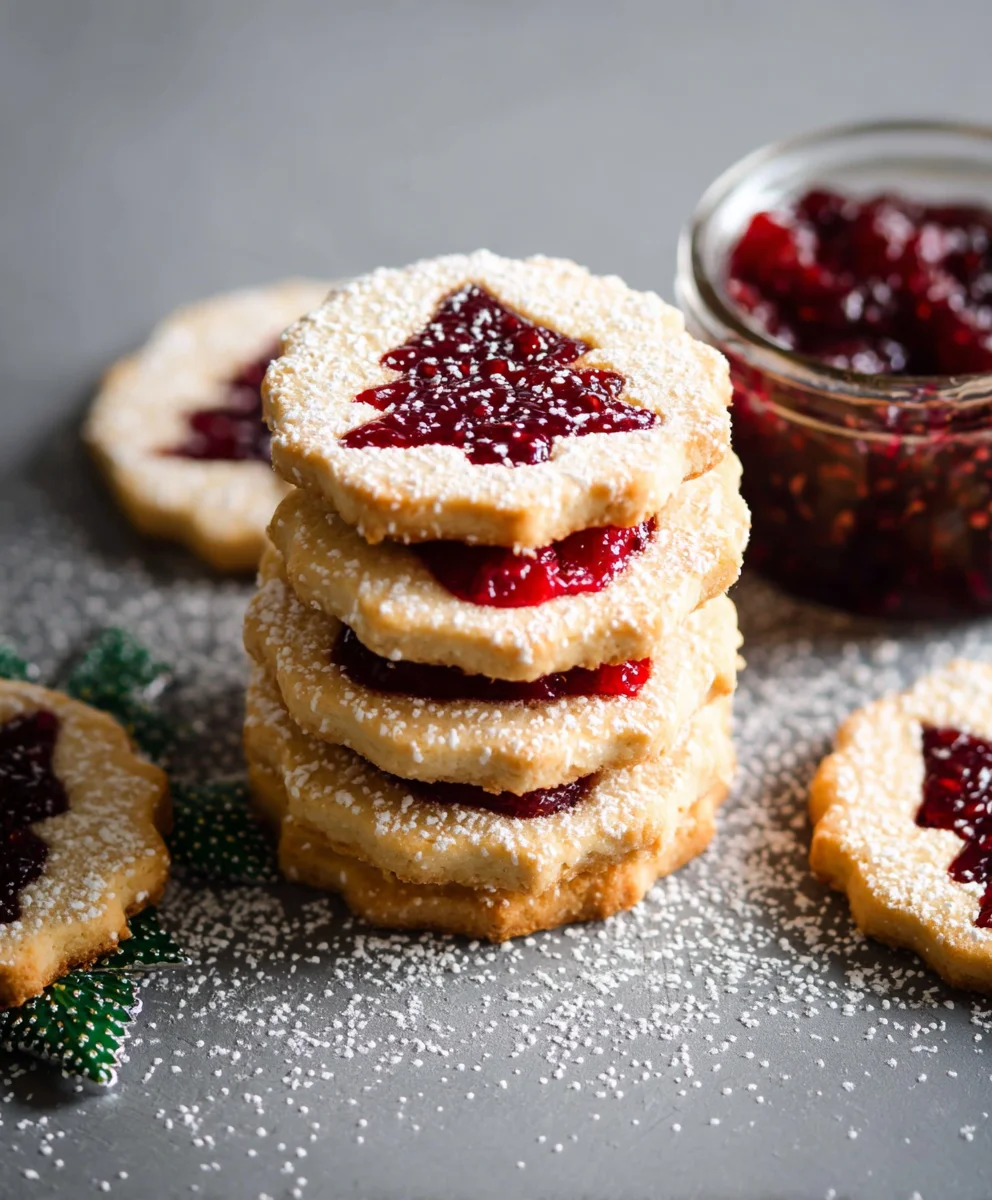
Raspberry Linzer Cookies are more than just a sweet treat; they’re an experience. Imagin extracte a delicate, buttery shortbread, lightly spiced and kissed with the bright tang of raspberry jam, all sandwiched together and dusted with a whisper of powdered sugar. It’s no wonder these elegant cookies have captured hearts for generations. The magic of Raspberry Linzer Cookies lies in their perfect balance – the tender crum extractb, the vibrant fruit filling, and that subtle hint of almond or lemon zest that elevates them from simple to sophisticated. They’re the perfect accompaniment to an afternoon tea, a thoughtful homemade gift, or a special indulgence to brighten any day. Get ready to create a batch that will have everyone asking for the recipe!

Ingredients:
- 1 cup butter, at room temperature
- 3/4 cup icing sugar, sifted
- 1/4 tsp salt
- 1/2 tsp vanilla extract
- 2 cups all-purpose flour, sifted
- 1/2 cup Italian raspberry jam
- Extra all-purpose flour for rolling out the dough
- Extra icing sugar for dusting
Raspberry Linzer Cookies Dough Preparation
The foundation of any great Linzer cookie is a tender, crum extractbly dough that holds its shape beautifully during baking. We’re starting by creaming together the butter and sifted icing sugar until the mixture is light and fluffy. This process incorporates air, which contributes to the cookie’s delicate texture. It’s important that your butter is at room temperature – not melted, but soft enough to yield to gentle pressure. This ensures it creams evenly with the sugar without becoming greasy.
Once the butter and sugar are well combined, we’ll add the salt and vanilla extract. The salt enhances the sweetness and balances the flavors, while the vanilla adds its characteristic warm aroma. Give this mixture another good mix to fully incorporate these elements.
Now, it’s time to introduce the sifted all-purpose flour. Sifting the flour is a crucial step as it removes any lumps and aerates the flour, leading to a lighter cookie. We’ll add the flour gradually, mixing on low speed until just combined. Overmixing at this stage can develop the gluten in the flour too much, resulting in tougher cookies, which is something we want to avoid for a delicate Linzer. The dough will start to come together, looking somewhat shaggy.
Once the flour is mostly incorporated, I like to finish bringin extractg the dough together with my hands. Turn the dough out onto a lightly floured surface and gently knead it just a few times until it forms a cohesive ball. The dough should be soft but not sticky. If it feels too sticky, add a tiny bit more sifted flour, a tablespoon at a time, until it’s manageable.
Chilling and Rolling the Dough
Now, we need to chill the dough. Divide the dough in half, flatten each half into a disc, wrap them tightly in plastic wrap, and refrigerate for at least 1 hour. Chilling is essential for several reasons: it firms up the butter, making the dough easier to handle and roll without spreading excessively during baking. It also allows the gluten to relax, contributing to a more tender cookie.
When you’re ready to bake, take one disc of dough out of the refrigerator at a time, leaving the other chilled. Lightly flour your work surface and your rolling pin. Roll out the dough to about 1/8-inch thickness. It’s important to work relatively quickly to prevent the dough from warming up too much. If the dough becomes sticky, dust your hands and the rolling pin with a little more flour. Aim for an even thickness so all your cookies bake at the same rate.
Cutting and Assembling the Linzer Cookies
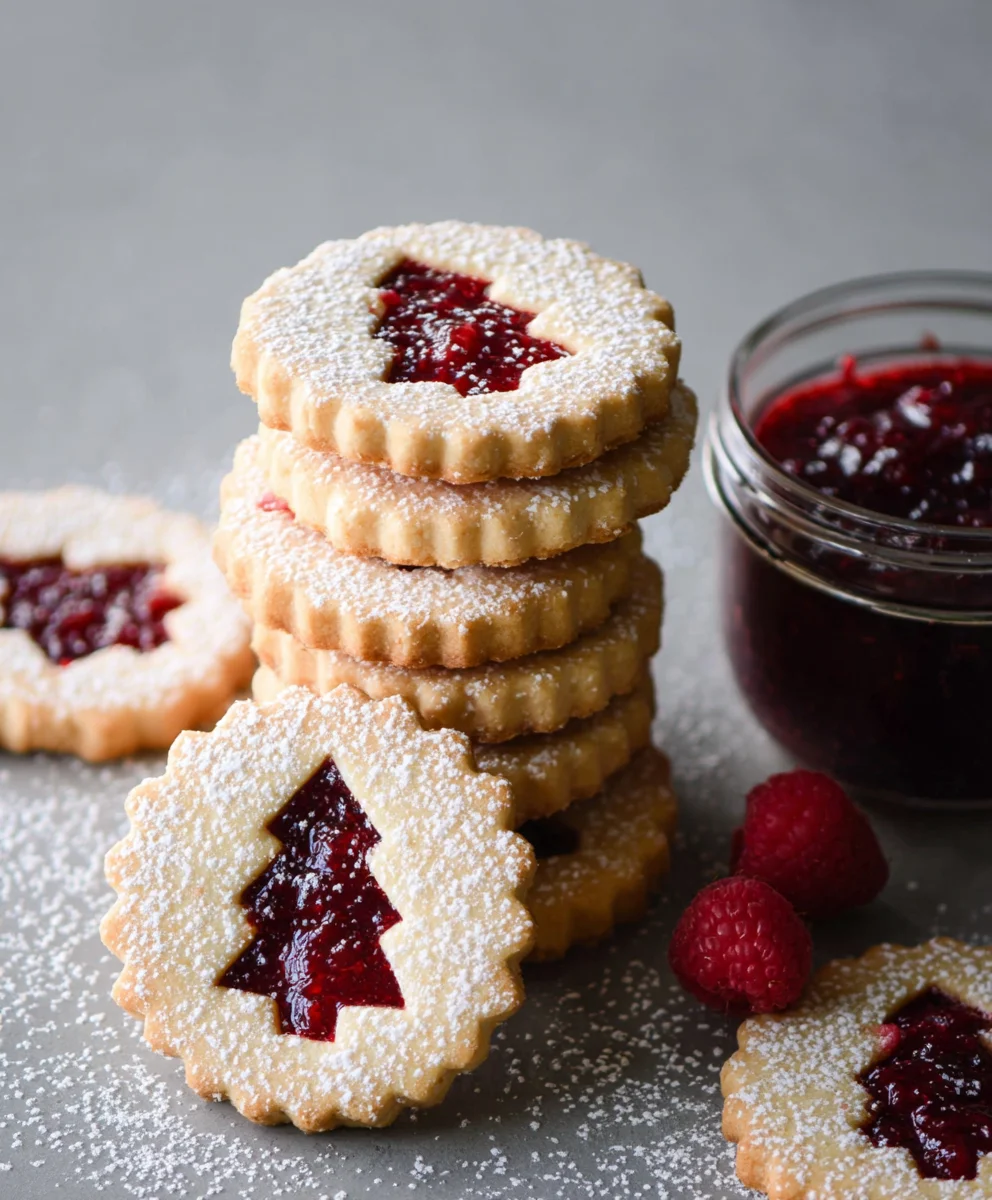
This is where thgin extractun begins and where we prepare the signature Linzer cookie look. Using your favorite cookie cutters, cut out shapes from the rolled-out dough. You’ll need pairs of cookies: one for the base and one for the top. For the top cookies, use a smaller cutter to create a cutout in the center. This could be a simple circle, a star, or any festive shape you like, allowing the raspberry jam filling to peek through.
As you cut the cookies, transfer them carefully to baking sheets lined with parchment paper, leaving about 1 inch of space between them. Parchment paper prevents sticking and makes for easy cleanup. Gently re-roll any dough scraps, taking care not to overwork them, and cut out more cookies until you’ve used up the dough.
Carefully gather the cut-out tops and place them on a separate baking sheet if you’re baking in batches, or arrange them on the same sheet ensuring they don’t touch. Some bakers prefer to chill the cut cookies for another 10-15 minutes before baking to ensure they hold their shape even better, especially if your kitchen is warm.
Baking and Filling the Raspberry Linzer Cookies
Preheat your oven to 350°F (175°C). Bake the cookies for approximately 10-12 minutes, or until the edges are lightly golden brown and the centers are set. Keep a close eye on them, as oven temperatures can vary. The goal is a pnon-alcoholic ale golden hue, not deeply browned.
Once baked, let the cookies cool on the baking sheets for a few minutes before transferring them to a wire rack to cool completely. This allows them to firm up properly. The cookies with the cutouts will be your “tops” and the solid cookies will be your “bottoms.”
Once the cookies are completely cool, it’s time for the delightful filling. Place a small dollop of the Italian raspberry jam onto the center of each solid bottom cookie. Use a spoon or a small offset spatula to spread it evenly, leaving a small border around the edge. Don’t overfill, as the jam can squeeze out when you add the top cookie. Then, gently place a cutout top cookie over the jam, aligning the edges.
Finally, for that classic Linzer finish, lightly dust the assembled cookies with sifted icing sugar using a fine-mesh sieve. This adds a touch of elegance and sweetness. These Raspberry Linzer cookies are best enjoyed fresh, but they also store well in an airtight container at room temperature for a few days, allowing the flavors to meld beautifully.
Conclusion:
And there you have it – a delightful journey into crafting your very own batch of exquisite Raspberry Linzer Cookies! We’ve covered everything from achieving that perfect buttery dough to expertly filling them with luscious raspberry jam. These cookies are more than just a treat; they’re a testament to simple ingredients coming together to create something truly special. The delicate crum extractb, the sweet burst of raspberry, and the elegant cut-out pattern make them perfect for any occasion, from a sophisticated afternoon tea to a festive holiday cookie platter. I truly encourage you to try this recipe, even if you’re new to baking. The results are so rewarding, and the aroma filling your kitchen will be heavenly!
For serving suggestions, these Raspberry Linzer Cookies are wonderful on their own, but they also pair beautifully with a cup of coffee or a glass of milk. Consider dusting them with a little powdered sugar just before serving for an extra touch of elegance. If you’re feeling adventurous with variations, try substituting the raspberry jam with other berry preserves like strawberry or blackberry. You could also experiment with adding a hint of lemon zest to the dough for a brighter flavor profile.
Frequently Asked Questions:
Q: My Linzer cookie dough is too sticky. What can I do?
A: If your dough is too sticky, it likely needs a little more flour. Gradually add flour, one tablespoon at a time, until the dough is no longer sticking to your hands or the work surface. Be careful not to add too much, as this can make the cookies tough. Chilling the dough for an extra 30 minutes can also help make it easier to handle.
Q: Can I make these cookies ahead of time?
A: Absolutely! Raspberry Linzer Cookies are perfect for making ahead. Once baked and cooled, store them in an airtight container at room temperature. They will stay fresh and delicious for several days, making them ideal for parties or as gifts.
Q: What kind of raspberry jam works best for Linzer cookies?
A: A good quality, firm raspberry jam or preserves work best. You want a jam that holds its shape and doesn’t become too runny when baked. Seedless varieties can also prevent unwanted textures, but seeded jams are perfectly acceptable if you don’t mind them.
Raspberry Linzer Cookies – Delicious Classic Dessert
A delightful classic Linzer cookie recipe featuring a tender, crumbly dough filled with sweet Italian raspberry jam and a dusting of icing sugar.
Ingredients
-
1 cup butter, at room temperature
-
3/4 cup icing sugar, sifted
-
1/4 tsp salt
-
1/2 tsp vanilla extract
-
2 cups all-purpose flour, sifted
-
1/2 cup Italian raspberry jam
-
Extra all-purpose flour for rolling out the dough
-
Extra icing sugar for dusting
Instructions
-
Step 1
Cream together the room temperature butter and sifted icing sugar until light and fluffy. Add salt and vanilla extract, mixing well. -
Step 2
Gradually add the sifted all-purpose flour, mixing on low speed until just combined. Finish bringing the dough together with your hands on a lightly floured surface, kneading gently until cohesive. -
Step 3
Divide the dough in half, flatten into discs, wrap tightly, and refrigerate for at least 1 hour. Roll out one disc at a time to about 1/8-inch thickness on a lightly floured surface. -
Step 4
Cut out cookie shapes. For the top cookies, use a smaller cutter to create a center cutout. Transfer to baking sheets lined with parchment paper. -
Step 5
Bake in a preheated oven at 350°F (175°C) for 10-12 minutes until edges are lightly golden. Cool on baking sheets for a few minutes, then transfer to a wire rack to cool completely. -
Step 6
Spread raspberry jam onto the solid bottom cookies. Top with the cutout cookies. Dust with sifted icing sugar.
Important Information
Nutrition Facts (Per Serving)
It is important to consider this information as approximate and not to use it as definitive health advice.
Allergy Information
Please check ingredients for potential allergens and consult a health professional if in doubt.
Leave a Comment